How to clean a laptop from dust at home?
You checked the operating system for viruses, installed the most up-to-date components in your laptop, demolished Windows several times, but cannot get rid of the “brakes” and freezes when working? Most likely, the problem lies precisely where you did not look. Dust can accumulate inside the laptop, the presence of which in large quantities causes the overheating of the cooling system, which leads to “lags”. In this article, we describe popular methods of dealing with such a problem. So, we begin: how to clean the laptop from dust at home.
to contents ↑Self-cleaning - how realistic is it?
Is it possible to clean the laptop from dust at home with my own hands, so as not to break it? Can! It is enough just to have a few tools and access to the Internet.
There are two different ways to clean your laptop: superficial and deep. These words already speak for themselves. The first method does not imply the assembly and disassembly of the device, and the second - exactly the opposite.
to contents ↑How often do dusting work?
Part of this is not worth it. The frequency depends on various factors: the situation, configuration, and stability.
Consider the theoretical possible schedule:
- If dust often accumulates around, “cleaning” the laptop should be done every 6 months.
- Fan blades will attach dust particles even in the cleanest room, therefore it is recommended to clean the cooler at least once every 3 months.
- General cleaning is recommended to be done at least once every 3 years.

to contents ↑Important! When to start? If your laptop began to work unnaturally slowly and heats up even when you do not overload it, then you can wear rubber gloves and get ready for cleaning.
Training
First you need to get a set of tools for carrying out this procedure:
- different screwdrivers;
- cotton swabs;
- thermal paste (if you know how to apply it), and our separate article will help you choose the best option “Thermal grease for a laptop - which is better?”;
- pliers;
- machine oil;
- some flat object made of plastic.
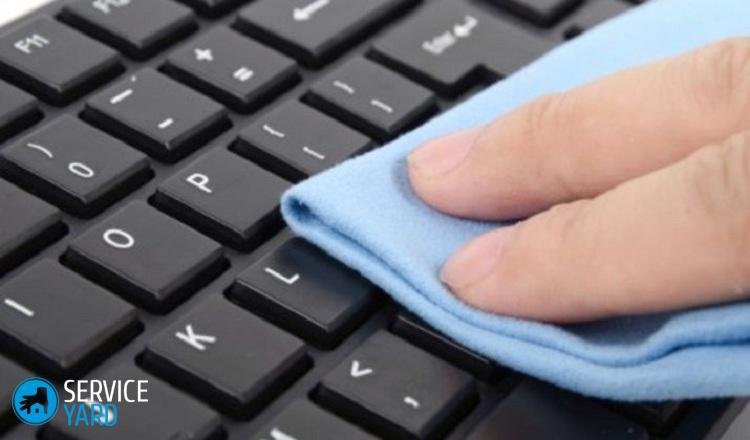
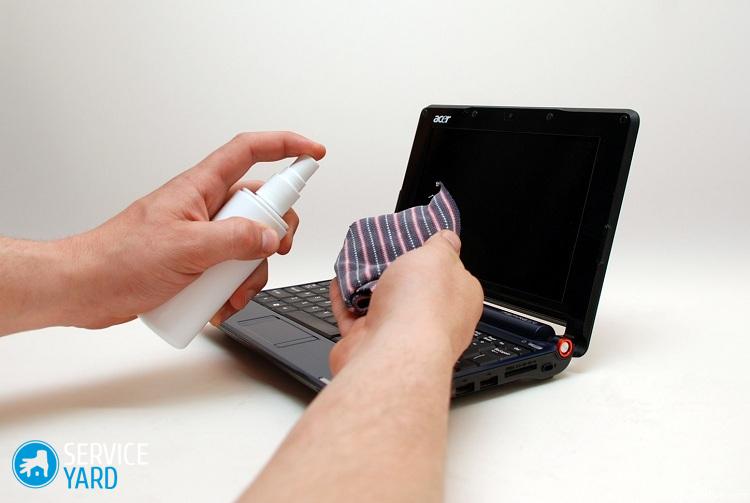
Surface method
How to clean a laptop from dust without taking it apart? We arm ourselves with cotton buds and begin to look for places of dust accumulation. Most often, dust accumulates between the openings in the ventilation system. Using sticks, remove all dust from there and blow it with a vacuum cleaner (at medium power).
Important! This method is very simple and does not require much experience.
Deep cleaning
We plunge “headlong” into the purge, in the literal sense of the word. This method requires a minimum knowledge base about the components of the laptop and their approximate location inside the case.
Important! If you are disassembling a laptop for the first time, we recommend photographing the location of laptop components at each stage of this procedure. This will allow you to facilitate the assembly process of the laptop.

Ready? Getting started:
- We remove the keyboard. In different models, this is done differently. Show patience and accuracy in this matter.
- Remove the battery and remove the back cover. Usually it is held by several screws, which can be unscrewed with a small Phillips screwdriver.
- Before you climb inside, remove the static from yourself by touching an iron object. But it is best to carry out work with gloves on.
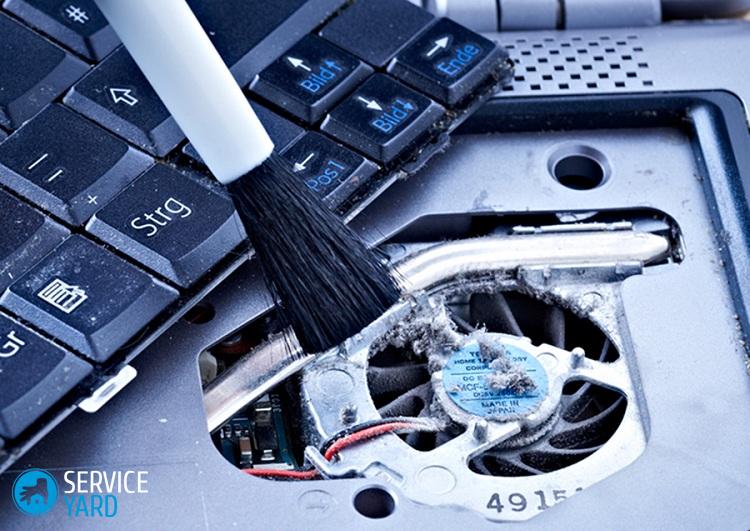
- Hard-to-reach spots are effectively cleaned with cotton buds. Greater efficiency will give alcohol, which you can wet the sticks.
- Most dirt accumulates in the cooling system. Disconnecting the fans is as easy as removing the cover. You can clean the fan blades with a cloth that has previously been moistened with alcohol. Experienced users recommend lubricating the cooler rotor with engine oil.
- The radiator will need to devote more time, since it is this part that provides heat dissipation.
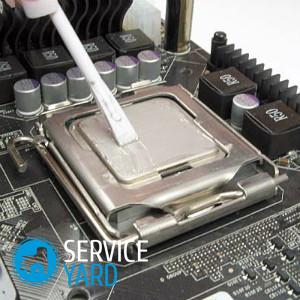
- With careful movements, disconnect the radiator and remove the old thermal grease with dry wipes. We thoroughly clean everything from dust.
- Remember to securely install all components in their place.
Important! Be careful and careful when cleaning electronic components. Excessive efforts can lead to the formation of defects, which entails the failure.
Well. Deep cleaning was also done. True, after the last stage it is advisable to apply a new thermal paste, but for beginners it is not recommended to do this on their own.
to contents ↑Important! Noticed that the computer began to work slower? Has its performance decreased? Perhaps the reason for this is the presence of viruses. If you don’t have time to wait for the master, use our step-by-step instructions toclean your laptop from viruses yourself.
Preventive actions
General cleaning can be postponed for a long time, if you adhere to the following tips:
Important! Careful attitude to technology will extend its service life, as well as maintain its appearance. But the appearance of scratches on a laptop is a common problem. In our separate review we have collected the best scratch removal methods.
- Place the laptop on a clean surface only. Do not use pillows or blankets, because most models have coolers at the bottom, and the inlet will be easily clogged.
- If the pace of life does not allow you to avoid having a meal at the computer, try to be careful with the device: do not spill liquid or sprinkle crumbs on the keyboard.
- Always turn off the device or put it into sleep mode.
- It’s nice to have a can of compressed air that can blow out the laptop’s ventilation holes from time to time.
to contents ↑Important! There are special devices sold in many appliance stores. They can help maintain cleanliness: small USB cable powered vacuum cleaners, external cooling systems, and more. It will be very easy for you to choose the best laptop stand if you look through the information from the article“A good laptop stand”.
Stock footage
Now you know how to clean your laptop from dust at home. Operating tips will help you avoid regular interference with the inside of the device. Keep the room in which you use the laptop clean, ventilate it more often. Be attentive to your device. Such an attitude will help to avoid problems in the future. Good luck
 (No ratings yet)