How to clean the printer?
A printer is such a miracle of technology, which in the modern world saves a huge number of students, school students, office workers. Like everything in the world, in order for it to constantly maintain its good functionality, it simply needs to be cleaned. But how to clean the printer on your own so that you do not have to contact the service department every time and pay specialists money for the services? We will give you the answer to this question in this article.
to contents ↑Cleaning the printer using software
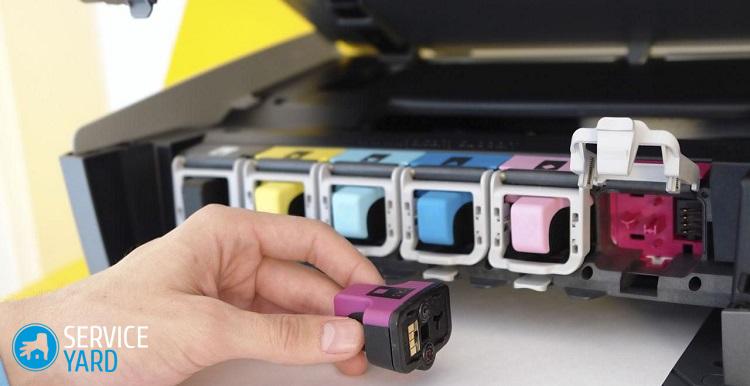
As a rule, at the time of purchase, the printer must be accompanied by a disk with programs, useful help information, and drivers. The program that is offered for installing the disk, the solution center, will help you while cleaning the printer. It is quite simple: you just need to run the program, and after that find the “Toolbar” of the printer in the program menu, and then “Clean Cartridges”.
to contents ↑Cleaning the printer with a special fluid
Entrusting the cleaning of the print head is usually the safest way for highly qualified specialists. But this does not always mean that you can’t try to do this procedure yourself, in order to save both money and time.
Tools for work
So, in order for the HP printer to be cleaned correctly, you will need the following items:
- A plastic container with a relatively flat bottom, which will not be a pity to throw away, for example disposable plates.
- A dense, thoroughly absorbent rag or gauze.
A specialized kit designed to clean the printer, which can be purchased both on the Internet and in electronics stores. These sets come in varying degrees of action:
- Designed for old pollution - an aggressive set.
- Designed for cleaner heads - an ordinary set.
Important! The cleaning procedure itself does not depend on the degree of contamination of the print head.
Technology:
- Start by pouring service fluid into a pre-prepared plastic bowl.
- Then set this container aside.
- Take a piece of rag or gauze, soak it with water, and then wipe the bottom area of the print head with this piece.
- Wet one more piece with a special liquid, then wipe the entire print head with it along the DYUZ contour.
- In the event that this is required, you can change a piece of rag, just soaking a new piece in a liquid.
Important! Be extremely careful and try not to touch the DOZ themselves with a rag. The contact of DYUZ with contaminated liquid is fraught with clogging.
Head cleaning can take just as long as it takes.
In any case, after completing head cleaning:
- With gauze, remove the ink rubber bands from it.
- Just rinse under warm running water.
- Then return it to its place.
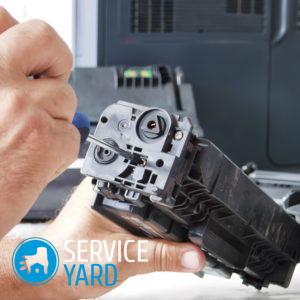
- After all this, the most complex and also the most important action begins: cleaning the print head, but now from the inside.
Cleaning the printer head and nozzle:
- To do this, place gauze or a rag under the head, and warm the service fluid to approximately 55 C.
- Then drip the heated liquid with a special syringe onto the intake fittings until ink marks remain on the gauze under the head.
- Replace the gauze if necessary, and when the rag is already clean, you can assume that the HP printer has been cleaned.
Daily printer cleaning
We have already described what to do with cartridges as well as the print head. But in no case do not forget that the printer cannot be started in everyday life. I.e:
- Wipe it at least once a week with a slightly damp cloth if there is a lot of dust in the room or with a dry cloth in order to prevent excessive spraying.
In addition, for the purposes of prevention, sometimes we recommend carrying out a cartridge cleaning procedure using software. This can help keep the printer in good condition for a long time.
to contents ↑Important! If all of the above methods did not help, we recommend that you use the useful information from our review "How to restore an inkjet cartridge?".
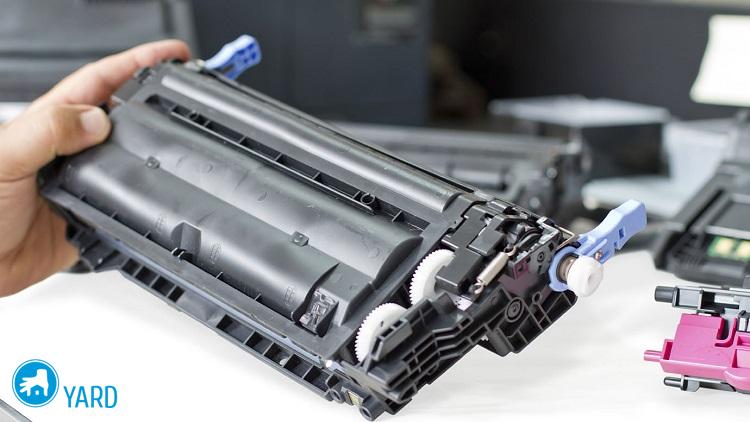
Cleaning the interior of a laser type printer
The laser printer can also be cleaned at home. The main thing is to strictly adhere to all the rules.
You will need:
- Lint-free cotton swabs or special swabs that are designed for the printer. These swabs have slightly longer sticks to reach the gaps.
- Sheets of paper or large newspapers.
Precautionary measures:
- Start by reducing the amount of indoor air movement. This is likely to lead to a spread of loose toner particles that may be in the air, and you inhale it. Turn off air conditioners, fans, etc. to keep indoor air as stationary as possible.
- Put on a fine mask or a respirator to prevent inhalation of any toner particles.
- Use latex gloves to protect your hands.
- Cover the work area with a large sheet of paper.

Cleaning process:
- Turn off the printer, and then place it on top of the paper.
Important! Be sure to ensure that enough time has passed before it can cool. The fuser roller gets hot enough during the printing process, which is why it is important that you let it cool completely. Otherwise, burns cannot be avoided. We recommend that you turn off the printer at least 1 hour before opening it for cleaning.
- Open your printer and carefully remove the toner cartridge from it.
- Activate your fabric, which is designed for toner, gradually stretching it to the sides.
Important! These wipes are specially designed to invoke toner particles and subsequently catch them. Otherwise, they can disperse in the air.
- Use a rag, wipe the surface of the cartridge, and then lay the cartridge on top of a clean cloth.
- Use a vacuum cleaner to remove any toner that is loose on all internal compartments.
Important! To remove toner, you need a powerful vacuum cleaner, and you need to keep it away from all internal surfaces. Place the nozzle of the vacuum cleaner close to the surface, but not touching them. At a time when household vacuum cleaners can be powerful enough to eliminate toner particles, they do not have the proper filtration system to remove particles from re-discharge into the air. For this reason, use a vacuum toner that can be found on the Internet or at a local stationery store.
- Use a small soft brush to gently clean all loose particles from corners and crevices while using a vacuum cleaner.
- The printer contains thin wires, which quite often break in the cleaning process.All these thin wiring can be quite easily damaged and at the same time are expensive to repair.
Important! Take extra precautions so as not to damage the wiring with a brush or vacuum cleaner. Instead, use a cotton swab with isopropyl alcohol, carefully and carefully passing along the length of the wires. Do not apply any pressure to remove fine particles.
- After cleaning the printer, insert the toner cartridge, and then close the cover and reconnect the printer.
- Run test page printing to ensure the printer is working properly, and then print normally.
How to clean a Canon printer or any other printer from dust?
- Before cleaning the printer, turn off the power and then remove the cover.
- After that, wipe the paper roller from dust and dirt. The main thing - try not to damage the mechanism itself.
- Thoroughly and gently clean the assembly, as well as the guides of the transport roller. This is done in order to prevent the appearance of spots on the surface of the paper.
- After that, remove the cartridge from the printer and also wipe it. Be extremely careful not to expose the cartridge to light for a long time. During cleaning, do not use aerosols or any other cleaning agents under any circumstances.
- Wipe with a soft swab all the dustproof windows of the unit, also without using liquids. This item should not be missed, because it is one of the most important in the above question, how to clean laser printers.
- After cleaning, close all covers of your printer and check its print quality.
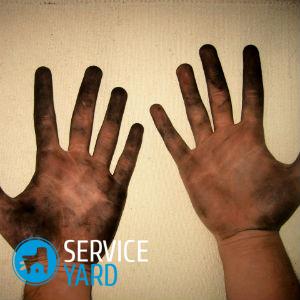
to contents ↑Important! Surely, when cleaning the printer you will come across the fact that your hands will be very dirty with paint. Follow the link and find out how to wash ink from the printer with your hands.
Stock footage
-
After you read this article, you become aware of the issue of cleaning printers at home. We hope you managed to complete the first procedure accurately and correctly, which means that in the future it will be much easier and simpler, because the movements will already be worked out, and you will no longer be confused in the sequence of actions of the technology.
 (No ratings yet)