

How to connect the projector to a laptop?
The question of how to connect the projector to a laptop often worries not only students, because the projector can be used for presentations at work and for home celebrations. No complicated actions are required - any person can perform the connection by fulfilling certain conditions.
to contents ↑Projector cable
Some video projectors can use a wireless connection. In this case, you can even connect it to the phone. But nevertheless, cable connection is most popular and in demand.
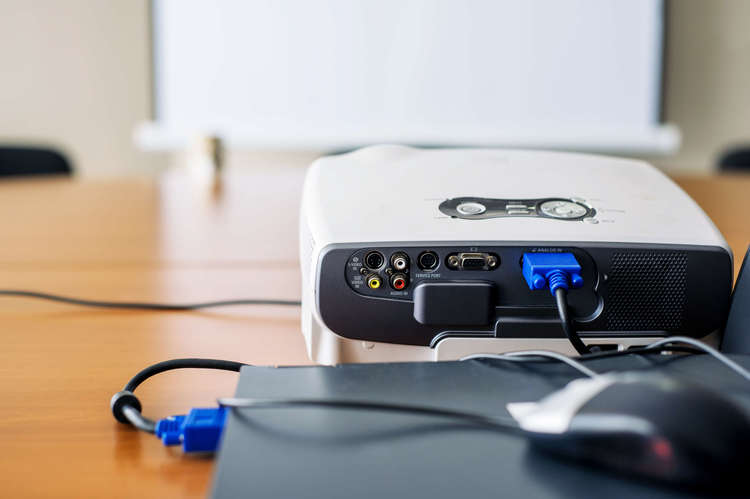
The first step is to study the connectors on the devices; they can be of the type VGA or HDMI. Both are fairly reliable, but HDMI has advantages:
- This connection has a higher speed., so there will be no delays even when playing Blue-Ray video.
- This connection allows audio transmissionwithout using an additional audio cable.
to contents ↑Important! If the cables do not fit the devices, you can use special adapters.
Connecting the projector to a laptop
First of all, you need to make sure that both the laptop and the projector are disconnected from the power supply. Then we proceed as follows:
- We connect the projector and laptop with a cable.
- Turn on the video projector.
- Turn on the laptop.
After these steps, if necessary, you will need to adjust the image. Most often it appears automatically, but sometimes problems can occur. In this case, you should wait until the operating system is fully loaded, and then press the Fn key and the transition key between screens.

Important! For different models of laptops, keyboard shortcuts may vary.
To connect two projectors to a laptop or PC, you should use a splitter - a special splitter.
to contents ↑Correcting problems connecting the projector
If the video projector is connected and “no signal” is visible on the screen, you need to check a few points:
- Connection order. The first step is to connect the device, and then turn on the computer or laptop. The connectors must match. Some devices use WIFI. In this case, you should study the instructions and make sure that the sequence of actions is correct.
- Correct settings. When connected to a computer unit when the screen is the only monitor, the set screen resolution may become a problem. You will need to preset the values that the projector supports. You can find them in the instructions or on the packaging.
Important! When the device does not see the connection to the projector, a system reboot can help. It is possible that automatic recognition of a new device did not work.
In the event that the laptop does not recognize the video projector and the signal does not appear, proceed as follows:
- Go to the Control Panel in “Screen Settings” or right-click on the desktop and select the “Screen Resolution” section.
- We select the necessary parameters, using the “Find” item, we search for the second monitor.
- In the “Screen” item of the Control Panel, select “Connect to Monitor”.
- Choose one of the display options:
- Computer only - Images are visible exclusively on a computer or laptop monitor.
- Expand - part of the data is visible on the laptop, part - on the monitor and projector.
- Duplicate - The same data will be on the screen and on the projector.
- Projector only - Data will be visible only on the video projector.
Operating system issues
In some cases, the system works fine, and then the image suddenly disappears. Sometimes this happens after reinstalling the operating system. In this case, the fault is problems with the drivers. To solve them, go to the “Device Manager” and find the connected projector in the list. If there is a problem with the equipment, a yellow exclamation mark will be displayed next to it.
If the system was not reinstalled, it must be checked using an anti-virus program. The cause of driver damage can be virus programs. After removing the viruses, the necessary drivers are downloaded from the official websites of the developers. In most cases, they are installed automatically, but you can do this in manual mode, using the “Device Manager”:
- Right-click on equipment that was not recognized.
- Select the item “Update driver”.
- We select the “Manual” method and indicate the place where the files for installation are downloaded.
Important! To install new drivers in some cases, you need to remove the old ones.
Connecting a projector is a simple task. It is enough to connect the devices using a cable or Wi-Fi antenna, connect them to the network and adjust the image. If all the steps are performed correctly, there will be no problems with image transmission. And to make sure everything is done correctly, use the proposed video with a step-by-step master class.
- How to choose a vacuum cleaner taking into account the characteristics of the house and coatings?
- What to look for when choosing a water delivery
- How to quickly create comfort at home - tips for housewives
- How to choose the perfect TV - useful tips
- What to look for when choosing blinds
- What should be running shoes?
- What useful things can you buy in a hardware store
- Iphone 11 pro max review
- Than iPhone is better than Android smartphones
 (No ratings yet)