How to assemble a computer yourself from the components?
Any equipment becomes obsolete over time and it has to look for a replacement. Personal computers are no exception. Everything would be fine, but price increases hit the budget very much. Ready powerful desktop computer will cost somewhere in the 1500 dollars. The cost looks cosmic and discourages all desire to look for a new gadget, but there is also a way out of this situation - to assemble the device yourself. How to assemble a computer yourself from the components, and how to choose them correctly - you will learn in this article.
to contents ↑Remember to impose services
Selecting parts individually will not only satisfy all needs, but also significantly reduce the total cost for a complete system unit. Plus, if you assemble the computer yourself from the components, all the characteristics will exactly meet your expectations.
Important! Sales consultants specifically intimidate inexperienced users that self-assembly makes warranty replacement impossible. There is not a drop of truth in this, since each part will have a warranty card, and if it suddenly fails, you can always replace it or take it to repair under warranty.
Let's take a closer look at all the information about the components and the main nuances of their choice.
to contents ↑CPU, motherboard and RAM
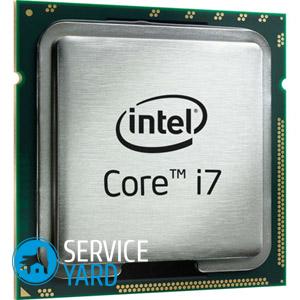
How to build a computer yourself? First you should do the stuffing for your system unit. We proceed to the choice of the processor, which is the "heart" of the computer.
Power
First you need to determine the purpose of using a stationary personal computer. If you are used to working in demanding software or playing computer games, then you should pay attention to powerful processors. The higher its speed, the faster the device works.
There are two main indicators that you need to know about in order to assemble the computer yourself from the components:
- Clock frequency. You should not choose components with values below 2 GHz.
- RAM. Do not even look towards slats with values below 2 GB.
The best option when these indicators are 2 times greater than the specified minimum. In a separate article, which you can follow the link, we have prepared for you a lot of useful information and processor rating.
Important! If you choose a processor, then take the time to familiarize yourself with its cache memory. Relevant are those models for which the indicator is not lower than 3 MB.
Motherboard
Let's move on to the motherboard, on which the entire device is literally based:
- We recommend that you familiarize yourself with such eminent manufacturers as: ASUS, Gigabyte, Foxconn, Msi.
- To make your machine powerful, you need to give preference to ATX-format boards, because it has the largest number of pins that contribute to a future upgrade. Yes, and such a motherboard is very easy to install in the system unit.
Important! First of all, you need to make sure the selected processor is compatible with the motherboard. If the devices are incompatible, then you will have huge problems during installation.
If you have difficulty choosing, since you are poorly versed in all the intricacies, be sure to check out our detailed motherboard selection guide.
RAM
Well, and RAM (RAM). Now the most current models work on the principle of DDR3 or DDR4. These are the options we will consider. But choosing the type of RAM is not the most important thing. The most important parameter is the amount of memory. It is advisable to equip your computer with two 8 GB strips, then you will have more opportunities to assemble the most powerful computer from the components.
Important! Also do not forget that you will need:
Video card
Hello to gamers! The quality of everything that you can observe on your monitor directly depends on this component. The importance of choosing this part is not inferior to the previous ones, especially if you plan to assemble a computer yourself from components, and want it to fully meet your requirements.
The criteria here are similar to RAM:
- More volume characterizes the quality of the models.
- If we are talking about manufacturers, then you need to put an eye on Nvidia and AMD, which have long been comfortable in the technology market.
Important! If you get vidyuha from one of the above manufacturers, then the chances of stumbling on a “scorched” technique are reduced to zero.
How to assemble a gaming computer? We have already talked about the most important details for the players, now you need to find them the right food.
to contents ↑A bit about the power supply
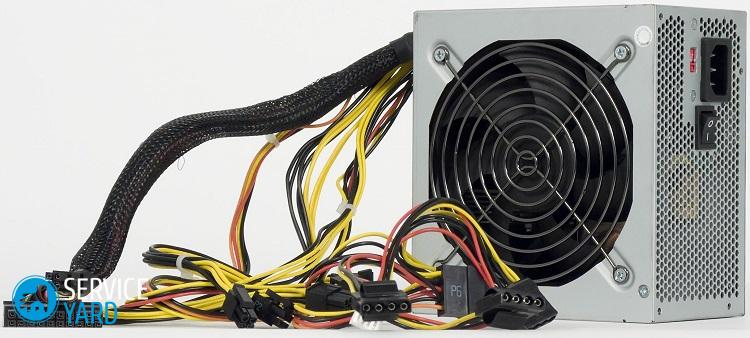
If you are aiming to build a powerful PC, then the power of the power supply should be at least 700 watts. If you give preference to models with less power, you are very at risk of burning this device in less than a month. You can insure yourself and purchase a UPS (uninterruptible power supply). An uninterrupted power saves from sudden blackouts and power-ups.
to contents ↑Important! The total output power of the PSU should be more than 40-50% more than the power consumed. And it is advisable to immediately get another useful spare part, which will eliminate the combustion of the system due to power surges. Read about UPS for computer.
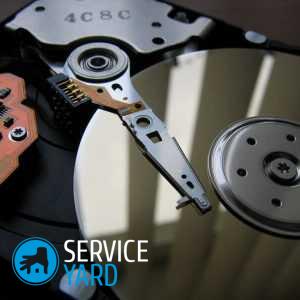
Data store
Well, our computer is almost drawn, it remains to choose a few more details and everything will be ready. Now we will talk about the hard drive (hard drive):
- The best option is to install two parts at once.
- It is advisable to give preference to those models whose rotation speed is from 7200 rpm, and the capacity of such a device should be at least 1 Tb.
to contents ↑Important! If you have a good budget, then it is better to purchase an SSD drive instead of HDD. SSDs are many times faster, but their cost is several times higher than that of hard drives with previous technology.
Drive
Well here everything tastes and color. Some users do not bother to buy, because today no one is buying disks. But if you are the owner of a collection of games, films and software, then check out such manufacturers as: Sony and Pioneer.
Important! It’s better not to take older models like a CD-ROM. Most likely, you will not have the opportunity to even stumble upon such devices in the modern technology market.
Do-it-yourself computer device assembly
How to start assembling a computer? If you have brought all the purchases home, then you can proceed with the installation.
Important! Every part is protected against incorrect assembly. If the component does not want to be installed, then just try to install it differently.
Let's move on to the step-by-step instructions for assembling a stationary personal computer:
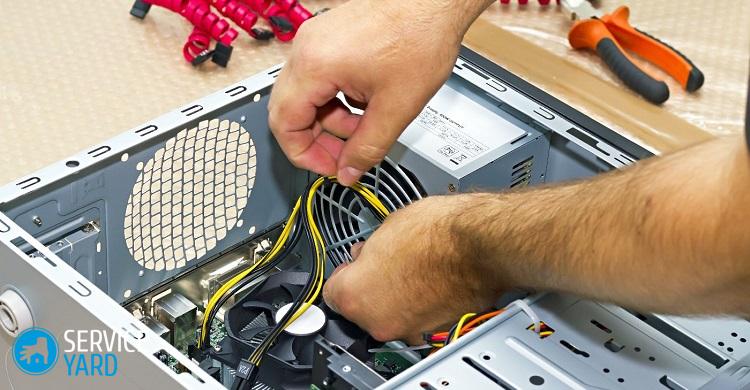
- You need to open the system unit. Remove the side cover with a screwdriver and install the PSU (power supply) in its rightful place. The mounting holes will tell you exactly how to install it.
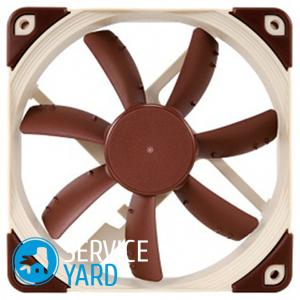
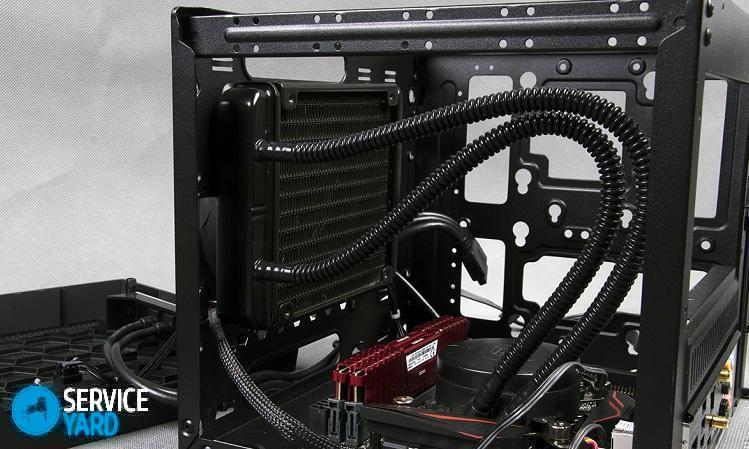
- Now it’s worth doing the cooling system. The minimum number of coolers in the system must not be less than two. One of the fans provides air flow and is located in the front of the system unit.The second one "pumps out" hot air, and is located in the back of the system unit. For fasteners, self-tapping screws or special rubber clips are usually used.
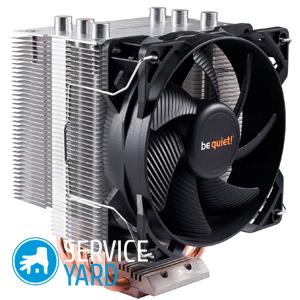
- With extreme caution, we install on the motherboard all purchased components. The CPU (central processor) must be fixed so that the connector on the motherboard matches the processor pins. The fan is mounted above the processor using the fasteners that come with it.
Important! Remember to apply a small layer of thermal paste to the surface area of the CPU, in order to avoid the effects of high temperatures in the future.
- We connect the cooler to the motherboard using the CPU FAN socket.
- We install racks under the motherboard in the “box”. Do not forget about the plug, which prevents dust and other debris from getting inside.
- We insert levels of random access memory. To install, you need to pull off the latches and slightly press on the RAM until a characteristic click is heard.
- Again we take up the main board, put it on a ready place in the case of the future device. Carefully check that all the connectors on the back of the PC are in place. We fix the main board with screws.
- We are looking for a drive bay. It is necessary to remove the plug and insert the optical drive from the outside, securing it with screws.
- The turn came to the hard drive. Usually underneath it is allocated a place at the very bottom. It is best to carry out the installation from the inside. Do not forget about connecting the power and signal cables. Tighten the screws for fixation.
- Open the plug in the place where the video card will be installed. Usually it is fixed on the back of the unit. We insert the card into the connector of the board and screw it.
- Now you need to take up the connection of wires. Connect all components with power and secure with latches, if any.
- Now you need to connect the “mother” and the panel of the case. It is necessary that all indicators of the system unit are connected to the corresponding connectors.
- We connect the remaining connectors: USB and audio.
- Well, at the end of the procedure, you need to clean up the inside of the iron box, because there should be a chaotic web of wires.
Put the cover in place. We cling to the computer all the accessories and check the newly made device for performance.
to contents ↑Stock footage
As you can see, not everything is so complicated and quite realistic to assemble a computer yourself from the components. Moreover, if you have an idea of what you are dealing with, how it looks and is up to date with the principle of the system.
- How to choose a SSD drive for a laptop?
- How to choose a motherboard for a computer?
- How to choose a processor for the computer?
- Computer cooler 🥝 how to install it correctly on the processor, case and in the system unit
- Is a matte or glossy laptop screen better?
- How to choose a UPS for your computer?
- Speakers for the computer
 (No ratings yet)