

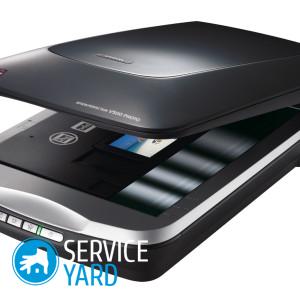
How to install a scanner on a computer?
A scanner is not as much a part of a home computer desk as a printer. But if you still decide to install it at home or at work, then you should know how to install the scanner on your computer. It would seem that it should be installed there - but no, there are also subtleties here. So, let's begin to figure out what to do for the correct connection and what settings to set so that all the work of these two devices is smooth and without lags.
to contents ↑Scanner Installation Process
After you turn on the scanner, you should install the driver of this device so that it is feasible to transfer data between it and the computer. Start by connecting the device to the USB port of your computer.
Important! Carefully read the operating instructions for your equipment, find out how to connect it to a laptop or computer.
Procedure:
- Turn on the equipment. Most scanners use technology such as Plug and Play, through which Windows can recognize and install hardware.
- If the model you purchased supports this technology, Windows will display a “Found new hardware” notification, which is displayed in the notification area, in the lower right corner of the taskbar.
Important! Plug and Play devices are installed primarily on their own, so nothing is needed from the person who uses it.
- If the automatic driver installation did not occur, then this means that your scanner does not have Plug and Play technology or your Windows OS could not find the driver for this device. In such a case, click on the SMS “Found new hardware”, and then continue the installation of the driver.
- A tab will appear in the search box for new equipment, but only if it is not forbidden to independently connect Windows to the update server. First click on “Yes”, only this time, and then on the “Next” button.
- If you have a CD with the drivers, place it inside the CD drive, then click the “Next” button. After that, your Windows will find the drivers and install them.
- Click on the “Start” - “Control Panel” on the taskbar. In the search bar, enter the word Scanner. A couple of links are displayed. Click on the “View cameras and scanners” link. In the “Scanners and Cameras” tab, click “Add Device”.
- In the window of the camera and scanner installation wizard that opened, click on the “Next” button. In the next tab of the wizard, click on the list of manufacturers of equipment that is displayed in the left edge of the window, select a model from the list that is displayed on the right.
- Follow the prompts provided by the scanner setup wizard if the equipment is supplied with a DVD or a CD with programs and drivers. If there is no such disk, Windows will help you download the necessary programs from Internet resources.
- When absolutely all necessary installation operations are completed, click “Finish" to complete the installation.
Change settings
After installing the instrument, you probably want to view the settings or change the default settings. In order to do this, execute the “Start” - “Control Panel” command. In the search bar in the control panel tab, write the word “Scanner”, and then press the Enter key:
- In the control panel window, click on the “View scanners and cameras” link that appears.
- In the tab that opens, you will see a list of models that are installed. First click on any of them in the window, and then click on “Scan Profiles”.
- In the “Scan profiles” section, click on your device and click on the “Change” button.
Important! In the “Change default profile” tab, pay attention to the settings, which may include (depending, of course, on the device model) color gamut control for more correct reproduction of tones and setting the expansion ability. The higher the resolution, the clearer and sharper the electronic document will be, but because of this, it may take much longer for the copy process.
- Click “Save Profile”, then you will return to the “Properties” dialog box, double-click the “Close” button to close “Scanning Profiles”, as well as “Scanners and Cameras”.
to contents ↑Important! When you are ready to turn on the equipment, put in it the document that you want to copy. Look in the instructions of your model how to start the procedure, for example, click on the “Scan” button or “Start”. The computer will independently determine the start of the procedure and display a dialog box that shows the progress of the process, as well as offer to save and view the scanned object.
Stock footage
Buying the right device is half the battle; you need to correctly configure it so that its mode of operation meets your expectations. But, as a rule, modern models are not very difficult to configure and connect, so you will probably cope with this task yourself, taking into account the recommendations from this article and from the instructions from the manufacturer of your equipment.
- How to choose a vacuum cleaner taking into account the characteristics of the house and coatings?
- What to look for when choosing a water delivery
- How to quickly create comfort at home - tips for housewives
- How to choose the perfect TV - useful tips
- What to look for when choosing blinds
- What should be running shoes?
- What useful things can you buy in a hardware store
- Iphone 11 pro max review
- Than iPhone is better than Android smartphones
 (No ratings yet)