How to fill up a sewing machine?
A sewing machine is a useful acquisition, if you can use it correctly. The very first and simplest thing you need to get started is to figure out how to properly thread a sewing machine. Inexperienced users can find it difficult to learn how to handle spools and tensioners the first time, but if you take into account the advice of more advanced housewives, then everything will work out.
to contents ↑How to fill up a sewing machine?
When refueling any sewing machine, work according to the instructions and observe safety precautions.
General recommendations:
- Be sure to disconnect the device from electricity. Otherwise, you can accidentally press the pedal and injure your fingers.
- Read the instructions for using the device. Usually manufacturers indicate how to refill the sewing machine of your particular model, as well as all the technical nuances of not only this process.
- If there are stickers with patterns on the typewriter - study them too, they are designed to help beginners figure out how to insert the thread into the sewing machine on their own.
Important! The main part of sewing machines is tucked in two steps: winding threads and threading the machine.
To start work you will need:
- the sewing device itself;
- spool of thread;
- bobbin.
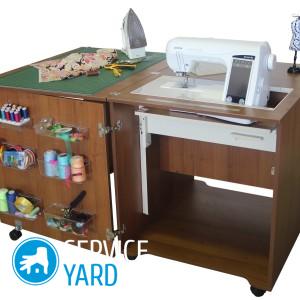
Important! If you still have not organized your workplace with the maximum convenience and comfort, check out the master class, how to make a table for a sewing machine.
Let's take a step-by-step look at how to make a refueling sewing machine yourself.
to contents ↑Winding bobbin
The bobbin is a small spool that feeds the thread from below. This option involves a few simple steps.
Steps:
- Release the needle. To do this, fully turn the side screw. This is a necessary measure so that when installing the thread, you do not accidentally touch the needle with your hand.
- We take out the bobbin. To do this, open the plate, which is located directly under the needle, and remove the spool from the mechanism. Please note that the thread must not be wound on the spool.
- Install the coil. Pins are located on the top of the machine. On the longest, you need to put a coil. Installation takes place so that the thread spins counterclockwise.
- We pull the thread. For this step, you need to stretch it through the tension disk. If the machine has a circuit, then you can act according to its instructions.
- We wind it up. Next, a thread is wrapped around the bobbin for two or three circles.
- Installing the spool. On a short pin on top of the machine install a bobbin and fix it.
- Start winding. This step involves connecting the device to the network. Then the thread adheres for a few seconds and is released for winding. Depending on the configuration of the machine, the option of pressing the pedal or a special button is possible. If the inner end of the thread sticks out, it must be carefully cut.
- The end of the winding. Next, the pedal is pressed again before the thread is fully wound. Most often, the machines themselves stop winding, but it is better to track additionally: there should be enough thread so that the spool can fit comfortably and crank in the mechanism.
- Take off. At the end of the winding, the retainer pin is pushed back, the bobbin is removed and the thread connecting it to the spool is cut.
- Next, the spool must be placed in a special metal container for it, and thread the thread under the spring.
Important! Remember that the thread in the cap must be tensioned. The tension can be adjusted using the special screw on the hood. But be careful: if you unscrew the screw strongly, then it can accidentally slip out and get lost.
Next, thread the upper thread into the needle of the sewing device.
Threading
If you have learned to wind a bobbin, the next thing to do is to find out how to thread the sewing machine with the upper thread. The procedure is simple, if you treat it with attention. Work also involves a series of actions.
Steps:
- We put the needle in place, while the spool remains at the top, and the bobbin must be removed and opened.
- Unwind the thread from the bobbin.
- We put the bobbin in place so that when rotating the thread goes counterclockwise. The thread should stretch easily.
- We fill the thread from the spool. To do this, the thread, which is located above, is pulled through the upper thread guide. On new cars, arrows should indicate where and in which direction it is necessary to pass it. If the arrows are erased or missing, you can refer to the instructions or find a small metal part on top of the needle.
- Pull the thread. Next, the thread is pulled through the bottom in the direction of the arrows, and returned upward to the second part of the thread guide. In this case, the thread pattern should make a path in the form of the letter U.
- We thread the tension lever. It is threaded into the tension mechanism and sent down again, this time to the needle.
- Insert the upper thread into the eye of the needle and thread through the foot located under the needle. The tail of the thread should be directed in the opposite direction from itself.
- Pull the bottom thread. To do this, hold the tail of the top, and slightly turn the wheel in its direction, until the tail from the thread at the bottom appears at the top. As soon as it can be picked up, we pull out a little up manually.
Important! For rotary type sewing machines, threading will be different. There should not be a problem with refueling new cars, as manufacturers supplement the devices with diagrams and instructions.
With old appliances, difficulties are possible. Consider the example of refueling the sewing machine “Podolsk”.
Threading at Podolsk
This sewing machine belongs to the class 2M, and it happens with both manual and foot drive. Rarely, even electric models are found.
Important! The machine is almost a rarity, and the price for its repair is much higher than the purchase of a new one. But the build quality and the ability to flash dense fabrics are not inferior to modern models. Many housewives have kept these devices in excellent working condition, and are still using them.
The design of Podolsk may differ in details, but the basic principle of their operation is the same.
How to keep:
- To avoid breakdowns, configure the device correctly.
- Check how the needle is installed.
- Periodically check how fasteners hold securely.
- Be sure to lubricate the machine parts.
Also an important factor for the long use of the machine is its correct refueling.
Thread the upper thread:
- Raise the needle with the side wheel.
- Install the coil on the rod from above.
- Pull the thread through the first thread guide.
- We lower the thread under the tension regulator and turn it into the spring loop.
- We pull the thread up, we thread into the eye of the thread guide.
- We start for the second, and then for the third thread guide.
- Insert the thread into the needle.
- We put the thread guide lever up.
Important! Depending on your sewing skills and preferences in the manufacture of certain clothes, our ideas and workshops on tailoring different things may be useful to you:
Fill the lower thread:
- We wind the thread on the spool and insert it into a metal case.
- We thread the thread under the tension spring.
- Put the bobbin in the shuttle.
- Pull the thread up.
- We start both threads under the foot.
If you still have questions about how to fill the sewing machine, you can always refer to the instructions for your sewing machine.
Important! Remember that periodically you need to take care of such devices. Tips from our separate publication will help you cope with this task. “How to lubricate a sewing machine?”.
Overlock
Even experienced hostesses often have difficulty refilling the overlock. The difficulty here is that if it is incorrect to refuel and skip at least one link, the overlock will skip the thread, and accordingly, form unnecessary loops.
Important! For threading in an overlock, the best option is to refer to the scheme specifically for your model. You can easily find such schemes on the Internet.
From the general recommendations should be considered:
- The thread should go through all the loopers, be sure to lie between the plates of its tensioner. There are times when it pops up and remains lying on top - then it needs to be refueled.
- If the thread is threaded correctly, and the overlock sews with loops, it is possible that dirt has clogged between the plates. In this case, it is necessary to clean the clogged space.
- It is more convenient to use tweezers to refuel the overlock, since it is not always possible to get to the right place manually.
to contents ↑Important! When refueling a 4-thread overlock, remember that two left tensioners are used for needles. The remaining two use looper threads. At the same time, the leftmost tensioner is intended for the left needle, the next one for the right.
Read also our recommendations for choosing good threads for overlock.
Stock footage
If you correctly thread the thread into the machine or overlock - this is half the battle, then you should learn the basics of working with the device, do not forget about the good mood, and you can start crafting the most incredible things!
 (No ratings yet)