DIY headphone repair
Surely each of you has encountered a situation where your favorite headphones are out of order. What did you do in this case - throw it away? But this was superfluous, because the headphones are incredibly easy to repair. Do-it-yourself headphone repair takes place within an hour, provided that you do everything incredibly accurately, thoroughly and for the first time. So let's get started.
to contents ↑The most frequent breakdowns:
- Breakage of the plug at the end of the wires is the most common cause of headphones failure.
- From frequent strong jerking, kinks and other mechanical influences, thin wires break and break. In this case, usually one speaker or both speakers stops working.
- Sometimes there is a break in the common wire, and in this case, the sound signal is distorted beyond recognition: the mids and highs disappear almost completely. This is due to the fact that the left and right amplifiers of the phone or player turn on in antiphase, and their output signals almost completely cancel each other out.
- It also happens that the stereo effect simply disappears.
- As a rule, there is no sound in the ears, but the microphone works. However, in the event that a microphone wire breaks, the control panel on the cord stops working with the microphone.
to contents ↑Important! If you need to use headphones, we suggest using the information from our review “Which headphones are best for the phone?”.
Wire break repair
A wire break is the most common cause of headphones failure. To fix the problem you will need:
- soldering iron;
- scalpel or nippers;
- solder;
- heat-shrink tubing;
- rosin;
- hot glue;
- thread.
The DIY repair process for headphones in this case looks like this:
- First you need to determine the place where the cliff occurred, because the outer braid may not have visible deformations.
- You can find the place of wire break by connecting the headphones to your phone or your PC. Next, you need to bend the wire from the plug to the speakers, when the wire is bent, sound appears in the speakers.
- Having determined the location of the cliff, cut a section of the wire, stepping back a few centimeters from the cliff.
- After that, strip the wire from the external rubber insulation and tin the wires.
- Having tinned all the wires, put a suitable thin heat-shrink tube on each wire, solder the wires, observing the color frames, and use a lighter or a soldering iron to seat the heat-shrink tube.
Important! Shrinkage acts as an insulator, thereby preventing the wires from closing together.
- Now you need to ensure the reliability of our connection. To do this, fold the wires with the letter Z and use the thread to bandage your connection.
- The last stage of headset repair is of practical aesthetic value. Use a soldering iron to carefully apply hot melt adhesive to your bandage.
Important! Hot-melt adhesive will not let the thread unwind on the other hand, will give a normal appearance at the junction of the wires. If you could not find the black hot melt adhesive, you can put on a heat shrink over the bandage of the appropriate diameter.
If you like tinkering, trydo-it-yourself headphones.
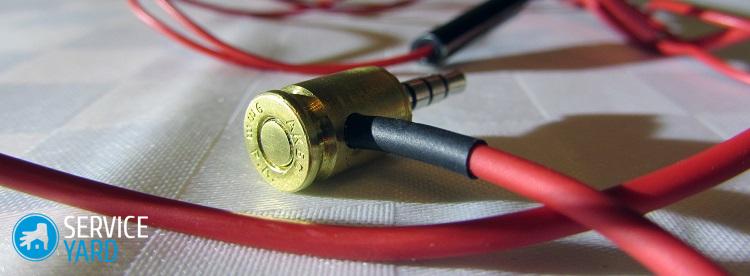
Headphone plug failure
Before you start repairing your headphones with your own hands, namely a plug, carefully disassemble it. To do this, carefully cut the body along with a scalpel. Damage to the plug can be divided into problems that are associated with mechanical deformation:
- Fracture of the last link. Usually this link remains in the reciprocal part of the mechanism and it can be obtained exclusively with tweezers and an awl for smd mounting. Such a breakdown can only be eliminated by replacing the plug.
Important! The rotation of the common link around its own axis is characterized by a change in sound perception to “metallic under water”, as well as a decrease in sound volume. In this case, the repair consists in soldering the contact to the link and the contact petals.
- Failures not related to mechanical deformations of the plug - wire break at the very base. It is “treated” by simply shortening the wire a few centimeters above the gap and soldering all the elements in their places in accordance with the color policy.
Headset speaker repair
If the input power is exceeded, the speaker can very likely go out of operation, as it causes the winding wire to burn out. The integrity of the speaker winding is checked with a multimeter. For a fully working speaker, the resistance of the winding should be equal to the resistance of the winding of the second speaker + \ - 10%. Usually this value is about 16-100 ohms.
Important! In the case when sound is present in the dynamics itself, but with wheezing, this means that the winding is in perfect order, but it either peeled off from the membrane itself, or clings to a magnet. This can happen due to impact, or due to excess power, boiling varnish inside the winding and “hook” on the magnet. Also part of the coil is peeled off from the membrane.
Such repairs require extreme care. You can glue the coil to the membrane using superglue - apply it with a toothpick or a sharpened match. You can speed up the drying by simply placing the speaker under the beams of a desk lamp.
Important! In order to avoid jamming of the diffuser, in no case connect the speaker housing together with the membrane itself until the superglue completely dries.
In the event that you still have not been able to repair the headphones, and the purchase of a new accessory is inevitable, follow the link and find out about top earphone manufacturers.
to contents ↑Stock footage
As you can see, there are several possible headset defects that can appear for a variety of reasons. In this article, we examined the main ones, so we hope that repairing your headphones with your own hands has become an easy and quite doable job for you.
 (No ratings yet)