

DIY thermal repair
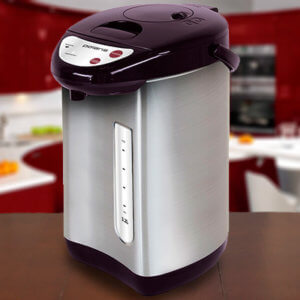
Relatively recently, scientists have created such a useful device as a thermal sweat. It simultaneously performs two important functions - a thermos and an electric kettle. This development, like all equipment, is prone to breakdowns. Today we will analyze the following issues: the principle of operation of the thermal sweat, possible breakdowns and repair of the thermal sweat with your own hands.
to contents ↑Principle of operation
Thermopot is an electric kettle that performs the function of a samovar. In a matter of minutes, it boils water and retains heat for a long time. For self-repair of the device, you need to know its structure and principle of operation.
Manufacturers of thermal sweat should indicate all these points in the attached technical instructions for the kettle.
There are times when the instructions did not have enough information for the user. For this reason, many simply do not know how to fix a thermal sweat. Next, we will analyze all these issues together.
The difference between a thermo kettle and a regular kettle is as follows:
- In addition to the water compartment, the housing has an electric pump.
- There is a “smart” device control headset.
- A flask that maintains a predetermined temperature for a long time serves as a thermos.
That is, an ordinary thermos keeps heat only for a certain time, and a thermo sweat - the entire period of connection to the outlet.
Important! Almost all of his models are equipped with two powerful heating elements - heating elements. One of them boils water, and the second, in turn, maintains temperature. Only economy-class samples have only one function - boiling.
Some models are equipped with various temperature controllers, which are responsible for the temperature of the heated fluid. Now we will list some of them:
- Stepless temperature controller, gradually increasing the heating of water from 60 to 100 ° C.
- Step thermostat - only executes pre-programmed programs.
Thermopot scheme
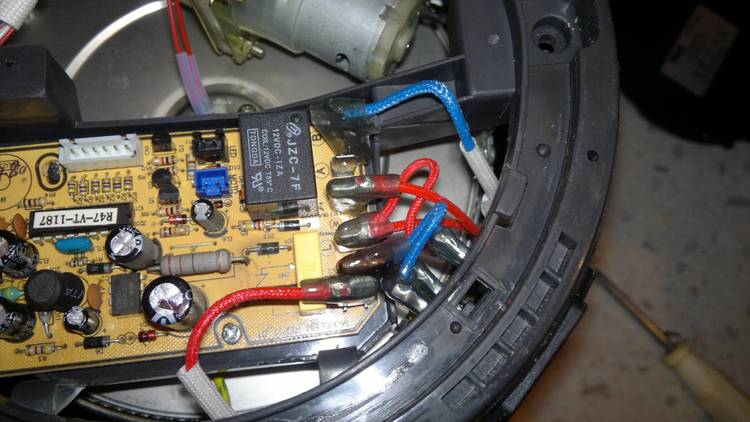
So, if you do not have the knowledge and experience in the repair of electrical appliances, then in this case we advise you to seek help from specialists. But in any case, you will not interfere with knowledge about the structure and scheme of the thermal sweat as a whole. This would help in the repair of minor problems on their own. For example, repair a network cable, solder and replace a defective condensate, or replace a burned-out pump or heater. Now we will help you deal with the scheme of the important components of this device.
The pump performs the function of supplying boiled water from the flask to the bowl. We list the main modes of its operation:
- Automatic spill.
- Manual spill.
- Pouring liquid with a lever on the spout of the device.
Some of the nuances of the operation of the constituent elements of the thermal sweat:
- Control system - mounted under the lid of the kettle.
- Pay - Responsible for re-heating the water with a time switch.
- Device thermal switch - controlled by a special fuse. This part is needed to prevent the device from malfunctioning due to the difference in electricity in the network.
- Power Supplyconsisting of a diode bridge and a transformer. Inside this block, we do not recommend interfering. Even experienced specialists do not risk repairing this system, but advise to replace everything.
to contents ↑Important! The components of the electrical circuit, which is the connecting bridge for all parts, includes such parts: diodes, capacitors, transistors, resistances, and others. All this contains an electric board.
How to disassemble a thermal sweat?
Before disassembling the device, you need to properly disassemble it. This is necessary to find the malfunction and for the correct assembly of all components in its original place. Otherwise, the repaired unit will not work.
Many models are similar to each other. Therefore, according to the general principle, it is easy to deal with the device itself. In order not to miss or confuse anything, we offer step-by-step instructions for dismantling the thermal sweat. It looks like this:
- Before directly disassembling the unit, disconnect the kettle from the network. We pour out all the liquid from it. Now we turn it over to the cover, unscrew all the available screws.
- Remove the plastic circle with a fastener with fasteners. Next, we unscrew the screws that are under this same circle.
- Now remove the pan. We recommend that every step be fixed in the photo so as not to get confused later when assembling the device.
- The pump has become freely available. We remove the fixing collars from hoses from the pump. Trim their ends a little with scissors.
- Remove the cables from the branches.
- Now remove the top cover, being careful not to press on the base of the thermal sweat.
- We put the device on a stable surface upside down, and then deal with the printed circuit board. Unscrew it and remove it to the side.
- We remove the entire gasket and unscrew two more screws.
- The metal bottom of the unit is free and ready for removal. Next, we get the pallet along with the bottom.
- It remains to unscrew another 8 screws that hold the protective bottom. Carefully remove the cover with a screwdriver. Now we have access to the most important heating part.
- It's time to disconnect and get the heater.
- We check the operability of the removed element. We call a special tester all the available electronics. We check the case for cracks that can leak fluid.

The list of malfunctions of a thermal sweat and ways to solve them
Let's figure out what can stop working, how to identify the causes and repair a particular part.
The list of the most common faults and solutions:
- Indicator is off or the device does not respond well to the specified functions, or it does not work completely. In this case, you need to check the power cords and the entire electrical system, thermostat and fuse. It is these elements that most often break.
- Only the function of reheating water works - the main boiling does not occur. The reason for this may be a breakdown of the bottom thermal switch or the combustion of the main heater.
Important! When checking the thermal switch, the tester should show 0 Ohm at room temperature. But if you put the switch in boiling water - infinity. Even with minor deviations from the tester, this part must be replaced urgently.Not forgetthose also check thermal grease. For perfect contact with the liquid, it should not dry.
- The main heating works, and re-boiling - refuses to fulfill its function. Here you need to check all the elements of the main board of the device.
- Water is not supplied by the thermal stream. The cause of this may be a malfunction or breakdown of the sediment power circuit. Very often an additional boiling heater burns out, through which an electrical impulse is supplied to the pump. According to experienced specialists, when a heating coil fails, repairing an electric thermos is unprofitable. It is better to buy a new device at the same price than you would have repaired the old one.
Important! After completing all work, be sure to check all electrical wiring. No wires should protrude onto the body of the unit, except for grounding.
In the article, we examined the most frequent failures, the causes of their occurrence, and solutions without the intervention of a specialist. This should be done when you understand the problem, you are aware of self-repair and are confident in a positive end result. The most important thing is not to overestimate your capabilities. A more detailed understanding of some of the nuances of the repair will help you the video below.
- How to choose a vacuum cleaner taking into account the characteristics of the house and coatings?
- What to look for when choosing a water delivery
- How to quickly create comfort at home - tips for housewives
- How to choose the perfect TV - useful tips
- What to look for when choosing blinds
- What should be running shoes?
- What useful things can you buy in a hardware store
- Iphone 11 pro max review
- Than iPhone is better than Android smartphones
 (No ratings yet)