

Computer table old remake in a new
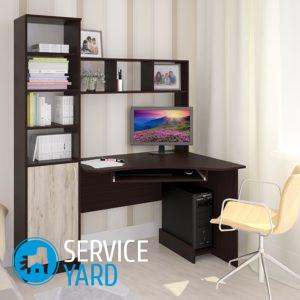
Probably everyone in the house has old furniture that has lost its aesthetic appearance. It’s a pity to throw it away, since it can last a rather long time, but I don’t really want to use it somehow. Therefore, we suggest that you learn about what the old computer table can change - it is not difficult to remake it, like kitchen or other pieces of furniture and give them a new “breath”. In addition to the fact that this will significantly save your budget, this process is still very interesting and exciting.
to contents ↑Stage 1. Preparatory work
Restoration of old furniture, albeit a creative process, nevertheless requires special care. It consists of several stages, which we will discuss in more detail below.
There are a huge number of ways to remake an old table, with a minimum amount of financial and time costs.
Important! If you connect your imagination, you can do a truly original and unique thing.
Before embarking on the restoration process, you need to prepare the product so that the subsequent layers of decorative finish lay flat and hold for a long time. To begin with, objectively assess the state of the table, as it will be very disappointing if you spend your time, and it will simply fall apart in a month. Check the wood itself, as well as the fittings. If you find any defects, it is advisable to eliminate them at this stage.
Important! If there are drawers in the table, you need to make sure that their work is working.
Next, remove all decorative accessories (if any), as well as other protruding elements. If the table was previously opened with paint, it must be erased with a solvent and sandpaper.
to contents ↑Important! Removing the old layer of paint with sandpaper, first you need to use coarse-grained, and then - softer. This is necessary so that the surface is smooth.
Stage 2. Eliminate defects
If you find various defects on the surface of the countertop or legs, they must be eliminated, since with further work they can become a serious obstacle. Most often found on old furniture chips and cracks. In order to eliminate them, you can use the following methods:
- Fill with putty, which can be purchased at a hardware store. To do this, you simply need to apply it on an uneven area with a spatula, and after complete drying - well sand.
Important! To date, the choice of putty mixtures is so great that you can choose a color similar to wood, so that no further treated areas stand out.
- Using a wood primer or special mortar.
Important! To prepare the solution, you need to mix small particles of wood with varnish.
- Turpentine can be poured into the damaged area, after which, after covering it with a metal plate, apply a hot iron.
After you have prepared the table, you can proceed directly to its alteration.
Stage 3. Decorate
At this stage, you need to include all your imagination and go to work with the creative. We offer you the main options for what can be done from the old table.
Wood paneling
This is one of the rather interesting and uncomplicated options for the restoration of old furniture.
Important! Wood paneling will look great on small square tables, such as balcony or street.
In order to decorate the table in this way, you will need the following tools and materials:
- Brushes;
- Hacksaw;
- Jigsaw;
- Glue for wood;
- Sandpaper;
- Planks;
- Paint;
- Varnish for wood.
Important! Pay attention to the fact that wooden planks need to be selected according to the color of the table. You can also “play” with shades, which in the end will give you a rather original result.
The course of work consists of the following actions:
- Check the trims for knots and defects.
- Adjust the planks to the size of the table, if necessary, align their edges with a hacksaw.
- Paint all the details of the table in the desired color, wait until the paint has completely dried.
Important! To paint the table, try to choose calm colors that are close to natural. Bright and juicy is best avoided.
- Stick the planks to the surface of the table. To do this, apply wood glue to the board and press it firmly to the countertop. Do the same with other panels.
Important! The panels need to be glued tightly without leaving any gaps.
- Trim the edges of the countertop with a jigsaw.
- Sand the table surface and remove any dust and debris that has formed.
- Open the finished table with varnish.
Painting an old table with your own hands through the tulle
This is one of the easiest and most basic ways. Nevertheless, even with its help, a simple table can be turned into an original element of interior decor. For this you will need:
- Sander or sandpaper;
- Masking tape;
- Roller;
- Necessary tools for disassembling the table, such as pliers, a hammer and a screwdriver;
- Background paint;
- Spray paint can;
- Tulle;
- Newspapers
- Acrylic lacquer.
The sequence of actions consists of the following:
- Dismantle the table into parts and sand them with sandpaper or a grinder.
- Remove all dust, open the details of the table with background paint.
- Assemble the product again in one piece.
- Use newspapers to close those items that you don’t want paint in a contrasting color when spraying from a spray can.
- Lay out the tulle on the countertop. It should lie flat, not forming folds.
- Color the material. You need to do this carefully, without sparing paint, because it will already be quite difficult to finish any details manually.
- After the paint has dried, remove the tulle and newspapers from the table.
- Apply acrylic varnish. He will give the product a finished look and protect the surface from premature abrasion.
Decoupage technique
In order to remake the table, you can use the decoupage technique.
Important! Decoupage is the decoration of an object by attaching a picture to it. Most often, for this technique use pieces of newspaper, napkins and shreds of fabric.
For this you need the following materials:
- Adhesive for decoupage or regular PVA;
- Scuba diving;
- Decoupage card;
- Base acrylic paint;
- Clear varnish on an acrylic basis;
- Primer;
- Coarse and fine sandpaper;
- Roller;
- Fan brush.
The course of work consists of the following actions:
- Prepare the table and ground the surface.
- Open the product with paint, leave it to dry completely.
Important! It is very important to wait until the paint has completely dried, since under a layer of varnish not dried up places will differ in color, and your work will simply go to smark.
- Apply aqualak to a dry surface and sand it well.
- From the decoupage paper, cut out the pictures you need, arrange them in the order in which they will be on the finished product.
- Make notes of the future location of the pictures. This is to ensure that you are not confused.
Important! According to the decoupage technique, you can decorate the entire product completely, and if desired, lay out in parts or according to the mosaic principle.
- Soak the pictures in water for a few minutes.
- Using special glue for decoupage or PVA, glue the pictures to the surface of the table.To avoid wrinkles, iron them with a fan brush.
- After complete drying, sand the countertop with fine-grained paper, and remove small debris and dust.
- Open the product with two layers of varnish with a break to completely dry the first.
to contents ↑Important! By the same principle, you can decorate a table with geographical maps, photographs or paintings.
Stock footage
As you can see, the restoration of a table and other outdated furniture is a very entertaining and creative process that brings pleasure and power to absolutely everyone. Putting our recommendations into practice, you can make rather original and exclusive interior objects from old and unsightly pieces of furniture that will not leave anyone indifferent.
- How to choose a vacuum cleaner taking into account the characteristics of the house and coatings?
- What to look for when choosing a water delivery
- How to quickly create comfort at home - tips for housewives
- How to choose the perfect TV - useful tips
- What to look for when choosing blinds
- What should be running shoes?
- What useful things can you buy in a hardware store
- Iphone 11 pro max review
- Than iPhone is better than Android smartphones
 (No ratings yet)