

Installing the cartridge in the printer

It is simply impossible to imagine at least one office in which a printer would not be installed. This information output device has been serving humanity for decades, greatly facilitating the workflow. It is difficult to imagine a person who could completely replace this useful equipment. All this is very cool, but, unfortunately, not every office worker knows how to install the cartridge in the printer. In addition, sometimes it is required to carry out a similar operation on a home device. Is it easy to handle this on my own? Of course, since it’s enough to know only a few simple instructions.
to contents ↑Change the cartridge in the printer
Suppose you have the very moment when the printer refuses to work - the cartridge has run out. This means only one thing - it's time to replace it. Everything would be very simple if this is not your first time doing it. Otherwise, you should get together a little and start your first practice, in which the basic recommendations for the replacement will help you. After reading the necessary information, you will stop asking questions like how to install a cartridge in a printer?
Today we look at the general rules. To begin with, it is worth understanding what fundamentals lie in this procedure, and only then consider the individual nuances of different models. Key points look something like this:
- First, pay attention to the type of device. It can be one-component or two-component. The bottom line is that for each case, different actions are required.
- Learn how your equipment works, as monochrome and color laser devices also have some differences.
Important! Before carrying out the necessary procedures, prepare the workplace: lay the unnecessary fabric or paper on the surface of the table. These precautions will help you avoid unnecessary contamination of your workspace. You should also carefully wrap the old component in cellophane and close it. If the powder gets on your skin or clothing, get rid of the substance immediately with cold water.
How to install a cartridge in an HP printer? To do this, pay attention to the information below.
to contents ↑Work with models: HP, Canon, Samsung
Designs of one-component type are a one-piece monoblock in which all parts and sections are located together (in one sealed enclosure).
In order to carry out the replacement, you must perform the following steps:
- Apply power to the appliance.
- Open the appliance door. Sometimes this requires a reset key.
- Pull the cover towards you. These steps should free the cartridge.
- Pull the element at an angle towards you.
Not so complicated, right? Difficulties can arise only in those models in which there is a blocking function. You need to act with them like this:
- Press the latch, sending it into the case.
- Open the stop mechanism.
- Hold the reset key, which is usually located on the side of the carriage.
Important! The housing itself needs to be opened right before installation. Do not attempt to remove the packaging from the plastic yourself.
Tips from the masters:
- The powder inside the appliance may be caked due to the long storage time. For this reason, it is recommended to shake the tank slightly about five times. At the same time, it must be positioned in a horizontal plane.
- As you know, the print head is located below and is protected by a film with a color tag. The tag should be removed before installation, avoiding contact with components.
- Install the new component into the chassis until it clicks into place. If there is a thrust mechanism or lock, excessive force and sudden movements should be avoided. Please note that a correctly installed unit moves quietly along the guide components.
Important! Be sure to insert the new cartridge in the same position as the old one. In no case should you turn the installed component upside down.
- After all the steps you need to close the door and start the equipment diagnostics. This process takes some time. After checking, you need to make a test print in order to make sure that the actions performed are correct.

Brother Models
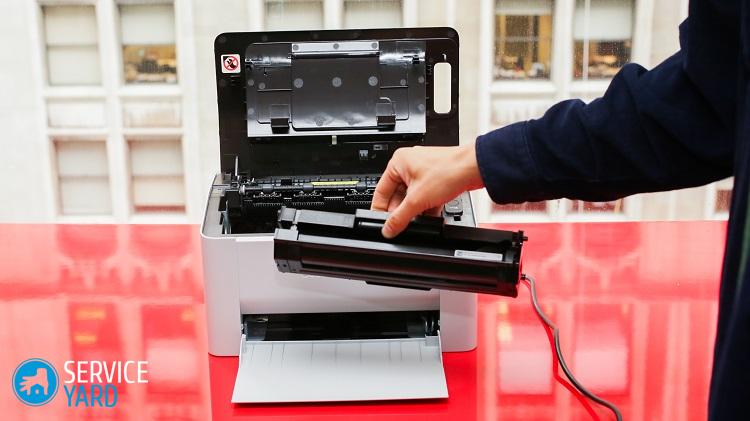
Installing a new cartridge in a Japanese laser printer will look a little different. This feature is due to the fact that a two-component principle is applied in the design. The mechanism includes a drum unit (drum) and a toner reservoir.
It is necessary to determine which resource ends. This can be tracked on the panel, which will be the inscription Toner or Drum.
To replace the toner, you need to dismantle the entire unit:
- Open the front panel and pull the cover towards you, slightly lifting it.
- Press on the blue latch that holds the powder tank. These steps should help remove the container.
- Unpack the new block. To do this, get rid of the protective film.
- Install a new element inside the drum unit, avoiding contact with the print head at the bottom.
- Make sure that the lever locking system is lifted automatically.
- Stir the blue slider on the drum unit in different directions to clean the special corona wire.
- Reinstall the unit by returning the aforementioned slider to its original position.
- Close the lid and test print.
If the indicator with the name Drum blinks, you need to replace the drum itself. Consider component replacement for the HL, MFC, and DCP series:
- Verify that the equipment is receiving power.
- Open the hardware compartment and remove the old drum in the same way as for the Toner.
- Remove the paint container.
- Unpack the new item and put it in the new drum.
- Replace the one-piece unit in the chassis, but do not close the printer door.
For further actions, it is worth deciding on a series:
- In the case of MFC and DCP, the algorithm is as follows: press “Back”, select “Yes” and press “Enter”. After that the cover of the device can be closed.
- In cases with HL, you will need to press the “Go” key. Hold the button until the “Drum Cleaning” message appears. If all indicators light up, you can close the lid.
Color printers
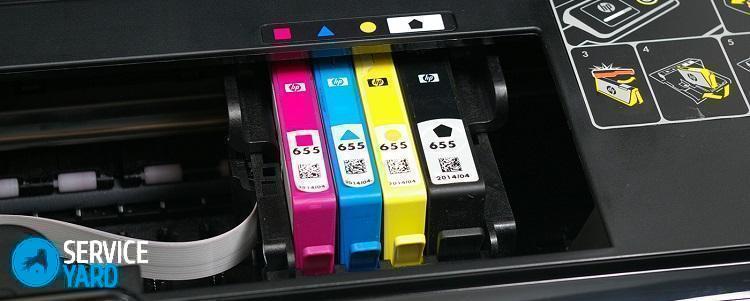
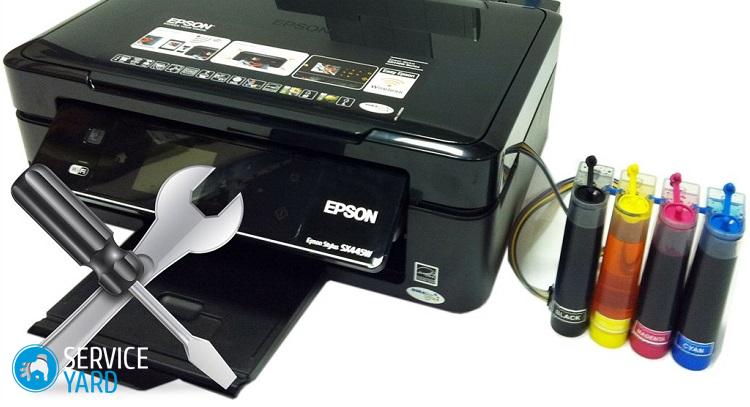
For color devices, four toners are required at once: yellow, cyan, black and magenta. Each of them is an independent sealed tank. The bottom line is that the shape and arrangement depend on the individual characteristics of specific models. You should always inspect the indicators that are located on the cartridge itself and in the installation slot. These measures are required for the correct installation of colored powder tanks.
Important! Each color is replaced independently, depending on the notification of the corresponding indicator.
If you open the lid, you will see the first case in front of you. To access others, you need to use the special service button. The dismantling and installation algorithm itself is no different from the above cases. You need to remember only one thing - for one algorithm, only one capacity changes.
to contents ↑Stock footage
Installing a cartridge in a printer is not the most difficult procedure, if you have the appropriate instructions at hand and put aside all fears of working with equipment. Experience comes with practice, and for practice you need to be confident.
- How to choose a vacuum cleaner taking into account the characteristics of the house and coatings?
- What to look for when choosing a water delivery
- How to quickly create comfort at home - tips for housewives
- How to choose the perfect TV - useful tips
- What to look for when choosing blinds
- What should be running shoes?
- What useful things can you buy in a hardware store
- Iphone 11 pro max review
- Than iPhone is better than Android smartphones
 (No ratings yet)