

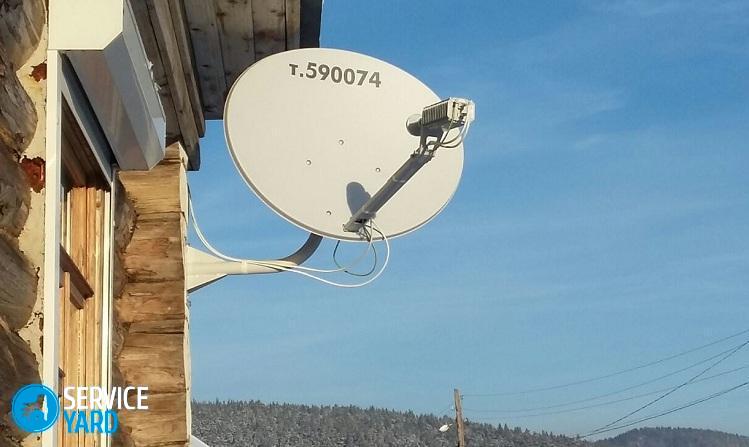
Installing a satellite dish
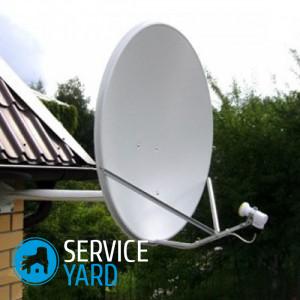
Every owner of a country cottage or apartment sooner or later faces the problem of connecting a television. Wanting to watch a large number of scientific, educational, sports, film channels and programs in good quality, the choice falls in favor of installing a satellite dish. Installation of a satellite dish can be carried out without the use of additional equipment, and anyone can connect and properly configure the receiver. In this article, we suggest you to understand all the intricacies of connecting such equipment.
to contents ↑Installing a satellite dish
To date, standard satellites - Hotbird, Amos, Sirius, broadcast 72 channels. Of the advantages of satellite television, the following can be especially noted:
- Cost - there is no monthly fee, which is inherent in all modern cable TV channels. The only cost that will pay off over time is the cost of the satellite dish itself and its installation.
- Large selection of various TV channels.
- High image quality.
The standard bundle for three satellites is Hotbird 13.0E, Sirius 5.0E. Amos 4.0W - it presents a choice of channels for absolutely every taste. Satellite television technology is developing rapidly, so every year there are more and more satellites for TV channels.
to contents ↑The principle of operation of the antenna
A satellite dish works according to the following principle:
- The satellite signal hits the surface of the dish.
- Further - being reflected, it is transferred to the converter.
- After that, the converter sends it to the receiver.
- Through the receiver, the signal goes directly to the TV.
Types of Satellite Dishes
All satellite dishes are divided into:
- Offset. The plate is installed in the direction not strictly to the satellite, but below it, because the signal reflected from the surface of the plate enters the converter at an angle.
Important! Similar models are fixed vertically so that less precipitation is collected on them.
- Direct focus. On these models, the converter partially covers the surface of the mirror.
to contents ↑Important! The most frequently used plate and receiver is Sves - the practicality and reliability of the goods of this manufacturer have been confirmed for many years on the market.
Satellite tv set
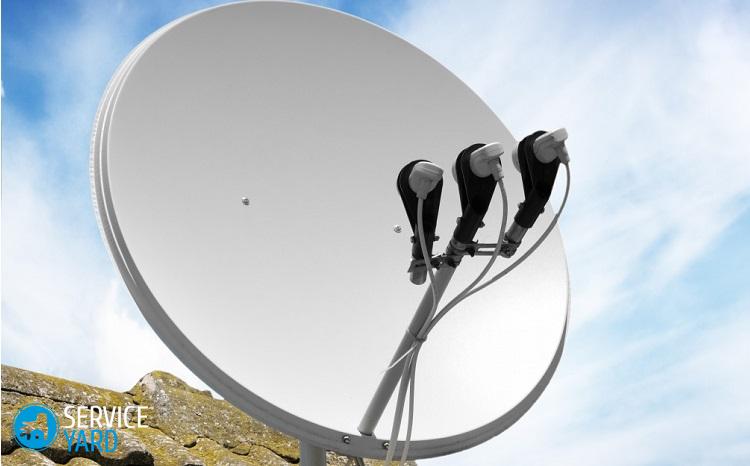
The satellite dish kit includes the following:
- Mirror (plate) the received signal. Its diagonal should be at least 60 cm (some models have a diagonal of 1.2 m).
Important! The choice of diagonal depends on the relief of the surrounding area and the obstacles that stand in the way of receiving a satellite signal.
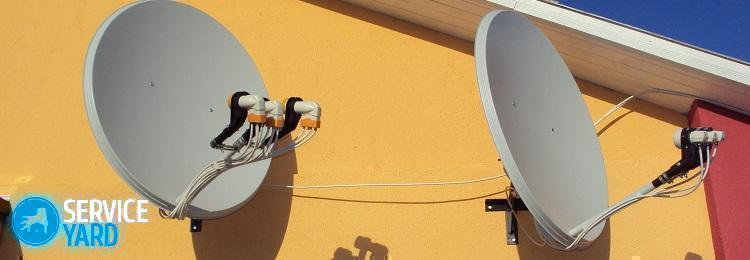
- Converter for converting the signal reflected from the plate and sent to the receiver. There are converters with a different number of outputs, thereby making it possible to connect several receivers at the same time.
- DiSEq for connecting multiple converters.
- Bracket.
- Cable.
- A DVD receiver is the most expensive part of a kit.
Important! To receive a signal from free TV channels, a Globo-type receiver is enough, but for receiving paid content, it is necessary to use models with card readers.
- F-connectors for connecting the cable to the receiver, converters, DiSEq and other system components.The standard installation scheme provides for the use of 8 pieces.
Important! To insulate the connection of cables and F-connectors, heat shrink is additionally required, as well as anchors to fix the bracket to the wall.
Choosing a location for installing a satellite dish
In order to install a satellite dish, you must correctly select its location.
Important! If a tree is located in the path of signal reception, it can significantly degrade the quality of signal reception. The three-satellite antenna should be tuned southwest.
Here are some tips on this:
- The ideal option, eliminating the possibility of interference, is the installation of satellite equipment on the roof of the house. In this case, it is undesirable to mount the plate to the pipes of gas flues or the hose of collective antennas. Mounting to the wall of the elevator shaft is allowed.
- A satellite dish cannot be installed under the roof visor, when the windows of the apartment face south or south-west - the visor will simply block the signal. In addition, precipitation can change its position. It is most optimal to fix the plate on the south-west or south side, on the outside of the balcony.
- In the case of installing a satellite dish on the facade of the building, you need to get permission from the architectural control, as well as a typical installation project.
Important! There are frequent cases when satellite dishes steal from the roofs of apartment buildings. If in your case there is an option of mounting the plate on the wall of the building, then it is better to opt for it.
The installation order of the antenna relative to elevation
In order to assemble the satellite dish yourself, you will need the following:
- 10-ring spanners (used when assembling the antenna and for fixing it in elevation).
- Spanner 10 (used during assembly).
- Key 13, L-shaped end (used when mounting the antenna in azimuth).
- Adjustable wrench (used if the satellite equipment is attached to the anchors).
- Phillips screwdriver.
- Pliers (used for trimming coaxial cable and plastic clamps).
- SDS-plus punch (used for drilling mounting holes in the wall).
- Drills for a punch, length 120-180 mm, d = 12 mm.
- Building magnetic level.
- Extension.
- A small TV with a low-frequency input (needed if there are no Openbox SF-10, SF-30, SF-20 satellite finders at hand).
- Insulating tape.
- Satellite receiver.
- Plastic clamps (for fixing the cable).
- Plastic corrugated pipe - 40 cm, d = 10 mm (used to protect the cable from rubbing at the descent from the roof).
- Wide and thick washers d = 30/50 mm - approximately 4-8 pcs (used for leveling).
- Screws with a turnkey head 13 with plastic dowels, length 60-80 mm - 6 pcs.
Assembly
Assembling a satellite dish yourself is as follows:
- Fasten the bracket. The choice of fasteners (nuts, anchor bolts, screws) should be based on the expected wind load, as well as the material of the wall on which the installation will be made.
- Install the converters in the holder so that the connector “looks” down. After installation, precipitation should not fall into the converters.
- Connect the cable to the converters using the F-connectors.
Installing F-connectors:
- Remove the top cable insulation by approximately 15 mm. It is important not to damage the shielding braid.
- Position the shielding braid along the cable.
- Position the foil along the shielding braid. Remove the inner insulation layer by approximately 10 mm.
- Screw the connector all the way. The center conductor must not protrude beyond the connector by more than 2 mm. If its length is more than 2 mm, bite off the excess.
- Seal the F-connector. Be sure to seal the electrical tape in two layers along the entire length. Apply a layer of sealant over the tape (it is better to use silicone).
- Attach the cable to the arc of the antenna converter holder using plastic clips or electrical tape.
- Mount the antenna on the bracket. Then tighten the adjusting nuts so that after installation it is possible to move it with little effort horizontally and vertically.
- If the calibration of the dish relative to the position of the satellite was not part of your plans, then install antennas with a motor suspension that adjusts to the position of the satellite in automatic mode.
- Attach the cable to the bracket using plastic clips or electrical tape.
Satellite dish tuning
To install a satellite dish, and then configure it, you must adhere to the following sequence:
- Set approximately the azimuth and elevation angles of the antenna (the azimuth is set using a compass).
- Connect the cable to the satellite receiver (this step should be clearly explained in the operating instructions) - the cable should come from the converter or DiseC. Process the F-connector according to the methodology that we talked about above.
- Connect the digital receiver to the TV.
Important! When buying a digital satellite receiver should be programmed to satellite channels (Hotbird, Amos, Sirius - for ordinary plates, on Yamal 201 - for models with a motor suspension). Select from the list of channels any “open” channel with a satellite signal.
- With translational, not too strong shocks, move the antenna mirror horizontally / vertically around the approximate location point selected for the satellite application. As a result, a column and a television picture should appear.
Important! When turning a degree, wait up to 5 seconds - during this time the signal should reach the antenna from the satellite.
- In the receiver's menu, find the item called “Received signal strength”, and then activate it. The highest signal level value can be achieved by smoothly moving the plate horizontally / vertically.
Important! The signal level will depend directly on weather conditions.
- Tighten the adjusting nuts, monitoring the signal level that is being received by the system.
Stock footage
As you can see, installing a satellite dish - This is a serious and responsible matter. Therefore, when starting work, you must carefully read the instructions that came with satellite equipment, as well as adhere to all the tips and recommendations. If you are not too confident in your abilities, then it is better to entrust this work to specialists.
- How to choose a vacuum cleaner taking into account the characteristics of the house and coatings?
- What to look for when choosing a water delivery
- How to quickly create comfort at home - tips for housewives
- How to choose the perfect TV - useful tips
- What to look for when choosing blinds
- What should be running shoes?
- What useful things can you buy in a hardware store
- Iphone 11 pro max review
- Than iPhone is better than Android smartphones
 (No ratings yet)