

DIY sandals
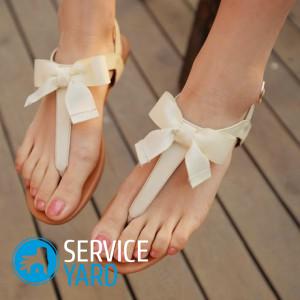
What craftsmen do not do today with their own hands: jewelry, furniture, home decoration and much more. All this allows you not to feel part of the merged mass, but to feel your individuality. But why not try yourself as a master and create something exclusive? For example, designer clothes or shoes. Today we will consider how to make stylish sandals with your own hands. And for starters, try to remake shoes.
to contents ↑Remaking flip flops
When the summer is near, I want the most breathable and comfortable shoes. Sandals in the form of slaps with frequent wear lose their attractive appearance. At the same time, most often they deteriorate from above, but retain a whole and durable sole. So why not use old shoes and create a new thing out of it that will definitely be unique. We will analyze the progress of the work step by step, but first we will prepare for work.
Step One: Prepare
First you need to clean our shoes, rinse and dry. And also prepare tools and materials.
You will need:
- Actually spanking, which we will remake.
- Dense, stretching material.
- Thick cardboard.
- Oilcloth.
- Glue for shoes and instant.
- Scissors.
- Other materials for decor.
After preparation, you should carefully cut out all the elements of our future product, and you can begin to create new sandals.
Step One: Track
In order to make a trail, we need solid cardboard. For example, like in a shoe box. By the way, you can use a cut box.
Getting started:
- On the cardboard with a pencil we circle the old track and carefully cut out the right and left parts.
- Next, we take any material that is convenient for you, which will cover the sole on top, and cut the same two parts out of it.
Important! As a material, leather, leatherette or dense jeans are well suited.
- The next step is to connect cardboard and fabric parts together with glue. Accordingly, we get two tracks: right and left.
Important! Remember that even with very accurate operation, errors are possible. Therefore, it is necessary to wait for the parts to dry and attach them to the sole.
- If all of a sudden the deals are a bit larger, you need to cut them to size.
- Further, our parts must be swept. This can be done with yarn. You can choose the right color based on the color of the topcoat.
Important! It is better to use yarn matching the tone of the material.
- After trimming, the track is glued to the base - the sole and allowed to dry well.
- After drying, the sole must be stitched with a trace.
Important! If you do not have enough experience, this stage is best entrusted to shoe masters. Of course, you will have to spend a little on the service, but you will get high-quality firmware.
The sole is ready, now it can be left alone for a short time, and proceed to the manufacture of the upper part of the shoe.
Step Three: Making the Top
First you need to take measurements from your feet. You can use a dense oilcloth, which should be wrapped around the leg with the old track, choose a comfortable tension, make marks on the material and trim the excess. Thus we get an almost finished foundation.
Important! For a precise fit, gently sweep the base to the old track and check how comfortable you are. If necessary, adjust the result.
Further, the upper part can be sheathed with a soft but strong fabric and proceed to the final stage.
Step Four: Connect the Parts
Before we get flip flops, you need to sew the top to the sole. Work carefully, and it’s better to double-check several times where the right is and where the left is. In this case, you do not have to expend effort to redo the work. In principle, do-it-yourself sandals are ready. If desired, you can add a heel back and various decorative elements to them.
to contents ↑Important! In order to make beautiful shoes yourself, it is not necessary to spend huge sums on designer products, and you may not be a shoe foreman. If you have a sole from old shoes, you can create other options for stylish and comfortable sandals.
Another version of the alteration
If the first version of the instruction on how to make sandals with your own hands from slaps does not suit you, there is another way.
You will need:
- Sole. Any from old slap, slippers, flip flops will do.
- Material for the upper part - trim from an old leather coat, dense elastic fabric.
- Needle, thread and scissors. Threads are better to choose durable. Well suited for kapron shoe flashing.
- Awl.
- Super glue or glue for shoes.
- Decor Elements. Ribbons, buttons, beads, rhinestones, rivets
Having prepared all the necessary tools and materials, you can begin to work.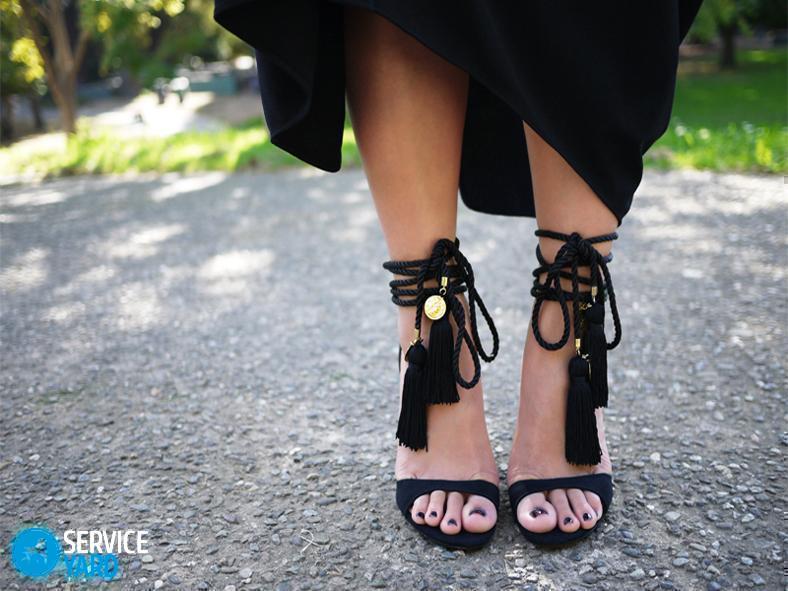
Steps:
- First you need to remove all dirt from old shoes, as well as cut worn parts.
- Next, measure out a narrow long strip of material of such a size that it can be wrapped around the leg several times.
- In the holes from the removed parts on the sole, we stretch the cord from the fabric and tie it with knots on the sole.
- The lateral part of the sole is incised and tissue is inserted into the holes, which will hold the foot at the toes.
Important! Do not make the incision large; otherwise, the footboard will quickly erase.
- Next cut the strips of the finger holders. They should be wider - about 8 to 20 cm, but everything fits on the foot - the width should not allow the toes to hang out, and about 1.5 cm from each edge will be needed to fix the footrest.
- After - the fabric is inserted into the slots on the sole, pressed and glued.
- To ensure that the bonding quality is the best, you can pinch the place in a vice.
- Next, you need to wait until the product has completely dried and proceed to create the front part.
to contents ↑Important! From the front, fabric can be laid crosswise or with one straight piece. You can tie two strips of fabric with a knot in the middle. You can also decorate the model in different ways: use appliqués, buttons, rhinestones, rivets, embroidery, beads and beads, belt buckles, the belts themselves, cords, ribbons and other elements.
What to make the top of?
In order to save on creating shoes, you need to not only make it yourself, but also take care of inexpensive materials.
Advice:
- The old sole is perfect as a blank for almost any model, insoles can be made independently.
- For the upper parts, you can use trimmings of leather, jeans and other dense fabrics.
- You can still knit the top with knitting needles or crochet, or use old belts.
- For the strength of the firmware, use kapron threads, and also think about their color. Contrast threads can serve as an additional element of decor.
- The painted sole looks interesting. Acrylic dyes and a transparent varnish for fixing the picture are well suited for painting.
- A very bright idea for decorating sandals with your own hands is felt flowers, or covering shoes with shiny varnish.
- DIY knitted items are also suitable for the top.
But these are not all options. It all depends on the design of your chosen model.
If you have mastered the alteration of shoes for yourself, then cope with the creation of children's sandals.
to contents ↑Children's shoes
Breathable shoes in summer are especially important for children. If the little man has not yet learned to walk, he can knit comfortable sandals with his own hands. The master class is designed for a leg of 10.5 cm, but you can choose your sizes by adding or removing width and length.
Master Class:
- To create children's sandals, we need a hook number 2.5 natural cotton yarn.
- First, the sole is knitted: twenty air loops with three lifting loops to start the next row.
- In the fourth loop of the row, three crochet columns are knitted. In the remaining columns, they are knitted with crochet columns, without knitting the last loop.
- In the last loop, seven double crochet columns are crocheted for a turn.
- The next row is knitted with columns, adding three double crochets and a blind loop to the last loop. This is the end of the second row.
- Following this instruction, two more rows are knitted. We get the insole. We need four such details.
Important! To give the sandals brightness, you can knit 2 details of the same color, and two - of the other, more contrasting. Next, the elements are ironed and the work continues.
- On the last double crochet column, a hook is passed through and four air loops are knitted.
- Next, the first wall fits. To do this, knit six columns with two crochets.
- After that, you need to make a chain of twelve air loops and knit in the fifth column of a U-turn. This is the column that we made with two double crochets. It is in the middle. So we get the straps for our sandals.
- For the second side we make eleven air loops and knit in six columns with two crochets.
- For the strap on the heel, 21 air loops 16 are knitted for the strap, and 5 for the buttonhole.
Important! On the second leg, all work is carried out in mirror image. The two details that remain are the soles. They need to be sewn to knitted sandals.
Of course, such products are not suitable for kids who can already walk, but for very young children - this is a very convenient and beautiful option for shoes.
You can make the same sandals with the help of knitting needles.
to contents ↑Stock footage
If you do not have original summer shoes - this is not a reason to be upset. With a sole, you can easily make yourself real designer clothes or tie cute sandals to your child. For the evening version, choose bright decor elements: chains, ribbons, brooches, laces. If you make shoes with wedges, then the platform can be covered with patterns. The main thing is to work carefully, and if difficulties arise in the process, seek the advice of experienced craftsmen. Inspiration and creative success!
- How to choose a vacuum cleaner taking into account the characteristics of the house and coatings?
- What to look for when choosing a water delivery
- How to quickly create comfort at home - tips for housewives
- How to choose the perfect TV - useful tips
- What to look for when choosing blinds
- What should be running shoes?
- What useful things can you buy in a hardware store
- Iphone 11 pro max review
- Than iPhone is better than Android smartphones
 (No ratings yet)