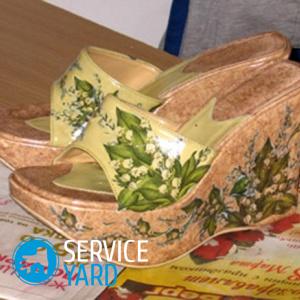
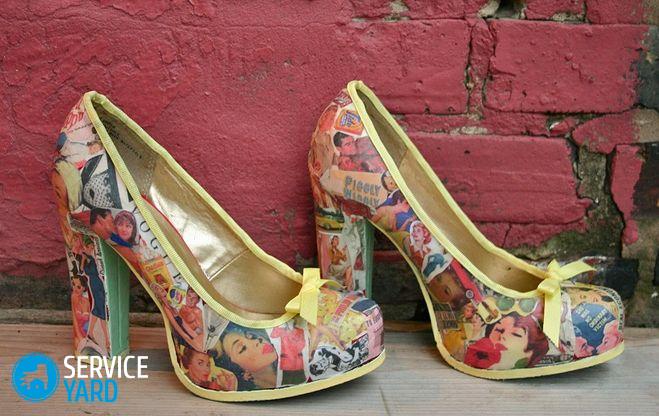
DIY decoupage shoes

Each person seeks to give his appearance a certain individuality and difference from others in accordance with his style preferences, body features, attitude to practicality and convenience of clothing. Despite the use of special tools, shoes, while wearing, lose their appearance. Refreshing it will help creativity and a little perseverance. For example, decoupage of shoes with your own hands will help you to attract other people's attention, look unusual and original. We prepared a master class on this topic in this article.
to contents ↑What is needed for decoupage?
One of the original ways to return the shoe to its attractiveness is decoupage, which will help not only hide the damage, but also give the shoes an original, unusual look.
Important! Before starting work, the product must be thoroughly washed, remove all dirt and dry thoroughly.
To decoupage the leather model, you need to purchase the following materials:
- sharp knife or scalpel;
- masking tape;
- scissors;
- brushes;
- sponge;
- pictures to be applied to the shoe surface;
- primer;
- acrylic paints, which if necessary can be replaced with nail polish;
- waterproof acrylic varnish with which the material will be coated at the very end of the work.
DIY shoe decoupage workshop
In order to learn the decoupage of shoes, you need to try to start by applying small decorative elements to shoe products. For this, it is best to use children's shoes, which are characterized by small sizes, and therefore it will be more convenient for you to try your hand at it.
To work with children's shoes, you will need leather varnish, acrylic primer, knife, brush, sponge and acrylic varnish.
The decoupage process itself includes the following stages of work.
Surface preparation
First of all, you need to prepare the shoe surface for further work:
- Remove dirt from shoes, for which it should be thoroughly washed and then dried.
- Those places where decoupage is supposed to be degreased. To do this, you can use any not too aggressive solvent.
- If there are scratches on the skin, then their location must be cleaned with a fine emery cloth, then removing the formed dust.
Primer
The next step in the decoupage of shoes with your own hands will be the priming of the surface, which subsequently should contain the picture you have chosen:
- We apply a primer to the proposed area of decoupage.
Important! Application should be carried out in several layers, giving each previous layer time to dry.
- Those areas on which it is not intended to apply jewelry must be sealed with masking tape.
- After the soil has dried, in order to obtain a slightly rough surface, the prepared area is treated with a fine emery cloth.

Directly decoupage:
- Decoupage patterns are cut from decorative napkins, which can be purchased at special stores.
Important! If you want the decoupage of shoes to have a higher density, then magazine clippings can be used as images.
- After cutting, the drawings you have prepared are superimposed on the primed area of the shoe, and covered on top with a layer of varnish-glue intended for decoupage.
Important! It's okay if part of the picture went beyond the soil, it can be trimmed with a scalpel, a sharp knife, and even scissors.
- After the varnish-glue has completely dried, cover the application with several layers of waterproof varnish. It is important to dry each previous layer thoroughly.
to contents ↑Important! The technology of decoupage on leather shoes initially seems to be very difficult, but in reality everything turns out to be quite simple.
Is it possible to make decoupage on fabric material?
If you have a desire to personally decoupage on shoes made of textiles, then the principle of applying pictures remains the same, it is better to work with light-colored shoes, and take pictures more dense:
- They need to be glued to the shoes after the first layer of glue dries a little.
- The upper part of the image also needs to be covered with glue, and the application should begin from the center towards the edges, in smooth movements.
- Do not apply too much adhesive, because the work should look neat.
- Also try not to go beyond the picture. If the glue did come out, then it must be removed with a cotton pad moistened with water.
- In the event of a crease, it can be gently straightened by applying a brush.
Drawing a picture on a surface of boots
When you have already gained enough experience in applying various materials to shoes, to decorate it, you can move on to more complex projects, for example, apply decoupage to shoes or boots. The principle of performing such a decor on boots is practically no different from applying decoupage to children's shoes. But there are some minor differences:
- The pattern for decoupage must be selected so that the cut out parts are harmoniously interconnected. Otherwise, instead of the original and beautiful pair of shoes, you will get a “sticky” abstraction.
- Cut out drawings need to be laid out previously on the table, as they will subsequently be glued to the shoes. This will allow you to form a picture - before applying it to the boots and help you figuratively imagine how it will all look.
- In addition to the drawings, you can stock up on acrylic paint. It is needed not only for gluing drawings, but also, if necessary, tinting individual sections.
Before starting work, cover with masking tape those places where drawing is not supposed to be applied.
Important! The drawing should be imposed strictly on the place intended for it, and from above to fix with a special varnish-glue. The next figure is stacked side by side, neatly combined with the previous one.
This work will require your attention and patience, but it will please the result. After applying all the details of the mosaic on top, the drawing is covered with a transparent waterproof varnish in several layers. Self-made shoes will attract the attention of others and delight the owners with their unusualness.
to contents ↑Decoupage as individual parts of shoes, and its entire surface
Shoe decoupage can be made on the entire surface of shoes or boots, but such a model can only be used for decorative purposes, and will adorn the shelves. But if decoupage is applied to a specific section of the shoe, for example, socks or heels, then they can be worn with pleasure.
You can make decoupage, for example, the heels of old shoes, according to the following instructions:
- Wash the heels, dry them and then degrease.
Important! While waiting for the shoes to dry, you should prepare tools and materials - napkins, pictures, paints, varnishes, etc.
- If necessary, the heel should be tinted with paint of the same color as the shoes. If the shoes are white, then apply a white primer or acrylic paint of the corresponding color.
- To avoid getting paint and other materials on the rest of the shoes or boots, you must close the non-decoupage areas with masking tape.
- Put the image you like on the heel and coat with transparent varnish.
Important! The varnish should be applied very carefully, moving from the center to the edges of the picture.
- When all the necessary patterns are glued to the heel and the adhesive varnish is completely dry, it should be covered on top with several layers of transparent waterproof varnish.
- Between the application of layers, wait a while to allow the protective compound to dry.
Stock footage
When using various motifs of the drawings, it is possible to obtain a beautiful ornament on shoes that will look stylish and attract attention. We hope that do-it-yourself shoe decoupage, the master class of which we have presented to you, will help to cheer you up, show your own creative potential and give originality to shoe products.
- How to choose a vacuum cleaner taking into account the characteristics of the house and coatings?
- What to look for when choosing a water delivery
- How to quickly create comfort at home - tips for housewives
- How to choose the perfect TV - useful tips
- What to look for when choosing blinds
- What should be running shoes?
- What useful things can you buy in a hardware store
- Iphone 11 pro max review
- Than iPhone is better than Android smartphones


