

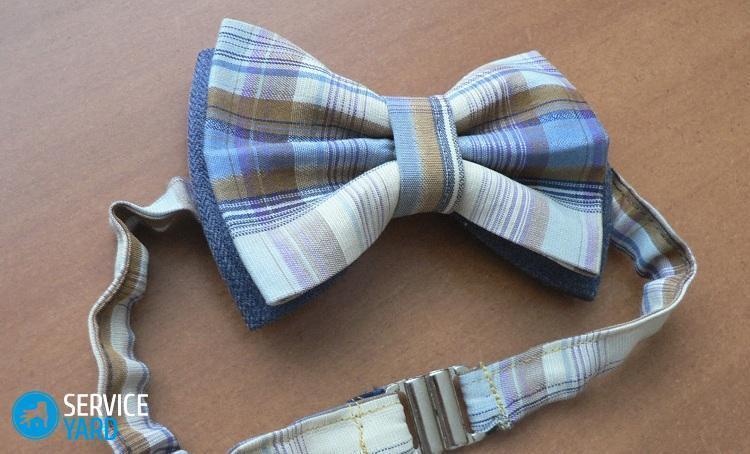
How to make a butterfly for a shirt with your own hands?

A butterfly is an element of a man’s wardrobe that is worn exclusively for special occasions. Nevertheless, today it is not only a “grand day-off” accessory, but also daily. It can be combined with various types of men's shirts, and sometimes even with t-shirts. Of course, in this case you cannot do with one black butterfly, and not everyone can afford to buy several at once. Therefore, to always look stylish and original, while not incurring special financial costs, you can make a lot of such accessories for any clothes yourself. How to make a butterfly for a shirt with your own hands?
to contents ↑Types of Bow Ties
Despite its uniform form, there is a whole classification of different variants of butterflies.
By tying method:
- Self-tied. It got its name due to the fact that it is tied immediately on itself. There are both one-sided and two-sided models.
- Attaching. On the back of the butterfly there is a special metal retainer with which to put it on.
By age and gender:
- Men's
- Women's
- Baby.
Important! To date, the boundaries between the male and female bow ties have been erased and are conditional.
In shape:
- Butterfly This is the most versatile and classic option. It got its name due to the fact that on the edges it looks like butterfly wings. The width of the “wing” is about 6-7 centimeters.
- Large Butterfly. An analogue of the previous one, only larger in size. It is designed for people with a large physique.
- Batwing A narrow butterfly with long wings.
- Diamond point. It got its name from the fact that when folded, it resembles a diamond.
- Rounded club. It has an original design with rounded ends. It is used for extraordinary meetings and parties.
- Western. In essence, it resembles a bow tie tied around the neck.
On the occasion of:
- For special occasions. A classic version of a black or white butterfly worn with a tuxedo.
- Daily use. Today, stylists offer many different solutions on how to brighten up your bow with a butterfly.
Sew a bow tie
This is a very easy-to-make accessory. But even for its sewing, you should adhere to several rules, so that in the end the product turns out to be of high quality:
- Try to choose dense fabrics that will hold the desired shape of the finished product. Best to take polyester, cotton or silk, but it is better to refuse woolen fabrics.
- The color of the future butterfly should be chosen in accordance with the costume.
- Neck measurements are not required per person. You can just know the size of the gate.
- When cutting a classic bow tie, it should be borne in mind that the finished product should not go beyond the shirt collar.
Required Inventory
In order to make a butterfly from a fabric onto a shirt with your own hands, you need to prepare such materials and tools:
- Mat for future layout;
- Pattern with the right sizes;
- Sewing machine;
- Ruler;
- Centimeter;
- Long knitting needle;
- Thin sewing needles;
- Iron;
Important! It is desirable that in the technical characteristics of the iron was the formation of steam.
- Chalk, tailor's marker or bar of soap;
- Scissors;
- A piece of fabric about 20 centimeters wide;
- Fasteners;
- Flizelin or doubler (if necessary);
- Thin elastic;
- Threads matching the fabric of your choice.
Workshop on sewing a bow tie on an elastic band:
- Make all the necessary measurements and blanks in the form of a pattern.
Important! You can make a pattern yourself or download a ready-made one from the Internet.
- Next, you need to cut out the elements of the future butterfly from the fabric, observing its size.
Important! Standard blanks for making a bow tie are made in the form of rectangles in the following sizes: 13 * 24, 22 * 12, and 8 * 13 centimeters.
- Take the largest workpiece and fold it in half along. Next, iron and steam carefully, especially the bend point.
- After stroking, straighten the rectangle and fold it in half again, only across the previous fold. You also iron well.
- Spread the finished workpiece so that the folds are at the bottom.
- For the third time, add a rectangle along, but in a different way. You need the edges of the patch of fabric to be in the middle, and the crease line should be below them. Iron again with iron.
- Without turning the finished workpiece, it should be folded so that the raw edges are on the line of the vertical fold with an overlap. Ironing again.
- With a medium-sized rectangle, we do the same.
- We fold the smallest rectangle along and iron.
- Open it and fold it so that the edges meet at the fold level. Ironing.
- Without unfolding, fold again in half and iron.
- The largest workpiece should be flashed with an ordinary seam, while slightly tightening. Also do with the middle.
- The smallest workpiece is given the appearance of a ring.
- Sew: on top of the largest element we impose the middle one and fix it with a “ring”.
- In order to sew the elastic band on which the bow tie will be attached, you need to conduct an individual measurement of the neck. After - cut the rubber band of the right size and stretch it through the ring on the butterfly. Fasten with a thread and a needle.
Important! When making an elastic band, you should take into account the fact that this accessory should in no case be used to squeeze the neck. But at the same time, and not be too free.
Workshop on sewing a bow tie on a hairpin
A butterfly on a shirt with his own hands can be on a hairpin. To make it you will need:
- Piece of fabric;
- Scissors;
- Threads;
- Needles;
- Special hairpin.
Operating procedure:
- Cut two blanks measuring 18 * 24 and 4 * 5 centimeters. Lay them on top of each other.
- Now fold them into 3 layers.
- The edges of the resulting workpiece rotate in the middle. This must be done so that the halves are bent with an overlap.
- Now fasten everything with a thread and a needle. Stitch a little while stapling to create a beautiful crease.
- A small piece of fabric should be folded in three. Wrap it in the middle of a bow tie, sew it.
- Sew a metal fastener on the wrong side of the finished product.
Important! When fastening the fastener, you can use ordinary tailor's glue.
Simple pattern bow tie
To create such a model you need to have:
- A small piece of fabric;
- Doublerin;
- Scissors;
- Tracing paper or other pattern paper;
- A piece of chalk;
- Iron;
- Sewing machine.
Operating procedure:
- You need to cut two parts with dimensions of 5 * 7, 16 * 16 centimeters. The third element should be 5 centimeters wide and equal to the length of the neck circumference, to which 4.5-5 centimeters should be added.
- Glue the blanks with doubler.
- Fold the largest square in half. Sew it, while leaving a hole in the center. The finished element is turned on the front side.
- Turn a long strip in half. After - bend the tips inward and flash.
- Do the same with the second workpiece.
- Sew the center of the large rectangle so that folds form.
- Wrap the finished element of the future butterfly with a smaller workpiece, and fasten it with the help of threads.
- Sew a long strip so that it looks like a strap.
- Sew Velcro to the ends of the third element.
Double sided model
The double-sided butterfly is very versatile, as it can be combined with completely different costumes. In order not to purchase or sew a separate accessory for each bow, we suggest you make a two-sided bow tie for a shirt with your own hands.
To make it you will need:
- Pattern or pattern;
- Scissors;
- Crayon or bar of soap;
- Ruler;
- Knitting needles;
- Sewing machine;
- 2 shreds of fabric with different colors;
- Non-woven;
- Clasp for future product.
Getting started:
- Transfer the pattern to the fabric.
Important! In order not to spend a lot of time on transferring patterns, stitching elements, put one fabric on another and fasten with pins.
- Sew both elements with a sewing machine.
- After two halves have been stitched, they should be cut out.
Important! If you have a breadboard mat, then cut it out better on it.
- Using a knitting needle, turn it on the front side. Well ironed.
- Tie a knot and sew on the fasteners.
Silk ribbon bow
In order to make a butterfly on a shirt, you need to take two ribbons measuring 5 * 30 and 2.5 * 25 centimeters, needles and threads in color. Farther:
- 3 centimeters should be cut from the longest tape.
Important! Satin ribbons tend to crumble, so they should be scorched with a match or lighter.
- Form a bow, while the slices need to be overlapped and fixed with a needle.
- With the second tape do the same.
- Two bows should be chopped off. Sew them together so that they fold in the middle.
- Fold a large part with slices inward and iron.
- Finally, hem and straighten everything.
- Fasten a special fastener or Velcro on the back of the finished product.
Women's bow tie
A butterfly in a women's wardrobe is a great accessory that will brighten up even the simplest image. In order to make it yourself, you need the following materials:
- The cloth;
- Satin ribbon 1 cm wide;
- Threads;
- Needles;
- Scissors.
Operating procedure:
- From the fabric we cut two strips 10 centimeters wide and 20 and 25 centimeters long.
- Fold slices to each other and iron.
- We impose on each other.
- The tape should be cut into two pieces with sizes equal to the volume of the neck and 3-4 centimeters.
- We wrap the product with the smallest piece of tape, fasten it with a thread and a needle.
- Pull the other segment through the formed hole on the wrong side of the butterfly.
- Sew Velcro to the ends of the tape.
Stock footage
A bow tie is a very simple, but at the same time, an original accessory for both men's and women's wardrobe. It can completely complement the image, regardless of what style you are wearing. To have several different options for butterflies at once, you do not have to spend a huge fortune on their purchase. Thanks to the above tips and tricks, you can make a bow tie with your own hands without much physical effort and in the shortest possible time. The most important thing is to have imagination and a little patience, and you will succeed!
- How to choose a vacuum cleaner taking into account the characteristics of the house and coatings?
- What to look for when choosing a water delivery
- How to quickly create comfort at home - tips for housewives
- How to choose the perfect TV - useful tips
- What to look for when choosing blinds
- What should be running shoes?
- What useful things can you buy in a hardware store
- Iphone 11 pro max review
- Than iPhone is better than Android smartphones
 (No ratings yet)