

How to sew a jumper from knitwear?
Autumn and winter are cold and at the same time beautiful seasons. But the charming wilting of nature is not at all a reason to become discouraged, since autumn always pleases us with something new. Many people in this period begin to mobilize new projects, to realize their plans previously, but for some reason postponed to a better time. Meanwhile, autumn brings certain difficulties to the life of women, since it is necessary to radically change the wardrobe. Sundresses and dresses go to the shelves, warm, cozy things come to the fore. A great alternative to them can be a sweater or sweater. In this article we will tell you how to sew a jumper from knitwear yourself.
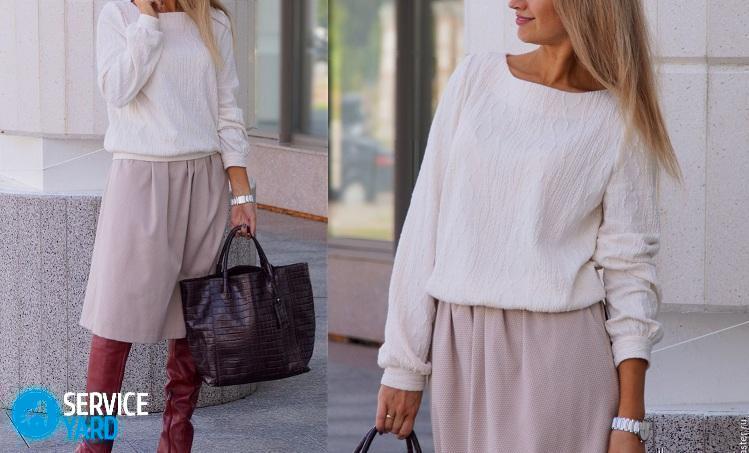
to contents ↑Sewing a light knitted cardigan with your own hands
First of all, let's find out how to sew a stylish summer sweater from thin knitwear as a cardigan, because summer has not completely receded, but in the evenings it is quite cool. If you decide to start making clothes yourself, it is better to use the option without the use of patterns. Even without sewing skills, you will get a great thing. Work takes literally thirty minutes. Sewing is better from rectangles, because in this case you will get a transformer thing.
A cardigan is made according to this scheme:
- On the fabric, draw a rectangle 100 cm long and 140 cm wide, then cut it.
- Measure the width of your back.
- Fold the fabric with the inside side, set aside a half measure (back width) from the fold line and draw a straight line about 30 cm long. This will allow you to get a shoulder point.
- Draw armholes. It is enough to measure 13 cm from the point of the shoulder and make an incision.
- From two rectangles 30 cm wide and 70 cm long, make sleeves. Just fold the fabric in half, then sew on the machine. Make all the lines in a zigzag seam.
- Sew all the details.
to contents ↑Important! Such a lightweight cardigan can be worn wide open or stabbed with a brooch.
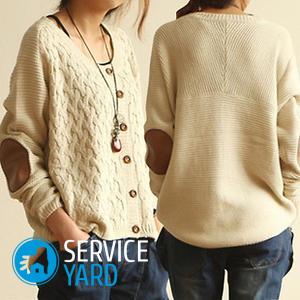
Knit Pullover
Do you want to diversify your wardrobe with trendy clothes? Then sew a jumper from a jersey with your own hands. You will not need a finished pattern, we will build it in the course of action.
This master class includes the following steps:
- Take as a basis for building patterns old clothes that fit perfectly on you. Or make all the necessary measurements, transfer them to the fabric, then cut with ordinary scissors. As a result - you should get the details of the back, front, sleeves, collar.
- Next, cut all sections of the back, front and sleeves. Fold the back and front part facing each other, precisely combining the upper edges, pin with pins. Perform shoulder seams, leaving an un sewn neck section in the middle of a neck length of 35 cm. Align the edges of all seams. Flatten the seam allowances.
- Make side seams, while leaving a 25-27 cm long section for armholes on top of each side. Before reaching the bottom edge of the back 31 cm, finish each line. Flatten the seam allowances along the edges of the cuts on the wrong side.
- Fold the collar part inward with the front side, grind sections 39 cm long. Smooth the seam allowances with an iron. Inside out, fold the collar in half. Sew open sections together.
- Insert the open edges of the finished collar into the neck face to face, while combining the seam of the collar with the middle of the back.Stitch the collar, breaking the stitch only at the shoulder seams.
- Fold each sleeve in half along, face inward. Stitch them to a length of 58 cm. Iron allowances in the same way as the rest of the parts. Insert the sleeve into the armhole with the front to the front, aligning the sleeve seam with the side seam. Stitch the sleeve, starting and ending with a stitch near the side seam.
- Lay out allowances at the edges of the slices. Iron the hem allowances on the wrong side, sew at a distance of 1.2 cm. Again, unscrew the seam allowances on the seamy side and stitch in the same way by sewing across the ends of the cuts. Follow the same procedure for bending.
We sew independently knitted jumper
Perhaps you never had to sew something from a knitted fabric. In fact, it is a great pleasure to work with such material. In this section, we will tell you how to sew a jumper from knitted knitwear using old things that have long been littered with shelves in the closet. Every housewife can find knitted knitwear at home that can be incredibly transformed. The work is divided into three most important stages, we will consider each of them in detail.
The first stage - cutting
There is nothing complicated in drawing up a pattern; this happens according to the following scenario:
- First, wash the fabric so that it does not sit or deform during wear. It is better to wash with a wool product, then dry on a horizontal surface.
- Then you can take on the scissors. To complete the work faster and ensure a perfect fit, use the old sweater that sits well on you. Fold it in half the folded fabric, circle without sleeves, taking into account the shoulders. In length, decide for yourself which you prefer.
- Form the neck at your discretion.
- There will be few seams - on the sides and on the bottom of the sleeves, that is, two long seams - from the beginning of the sleeves to the very bottom of the sweater. Therefore, it is recommended to cut the product in such a way that the upper line of each sleeve falls on the bend of the material.
- Then measure the length of your arm from the shoulder, put the resulting value on the fabric from the shoulder in two opposite directions.
- Measure the width of the sleeve in the area of the brush, lay it perpendicular downward from the line of the sleeve.
- Draw a line from the tip of the sleeve to the beginning of the waist to form the desired silhouette. Add 1 cm to the seam allowances, 4 cm on the bottom and on the sleeves.
The second stage - tailoring
How to sew, because this peculiar fabric, quite shaggy and perforated, will probably come out from under the paw, distribute unevenly, the needle will not be able to capture it? There is a solution - it remains to do manual sewing.
It is better to do this with an overcast seam so that then the edges do not open, and everything looks neater from the inside. The work itself consists in stitching all the details with a matching thread and needle, nothing is complicated about it. Fortunately, seams on this fabric do not stand out.
The third stage - edge processing
The edges of the sleeves and the bottom of the sweater, first bend, gently amass, then steam through the fabric. Then, carefully sew through the overcast seam, while picking up a few threads from the main knitted fabric. This will hide the seams as much as possible.
to contents ↑Important! The neck is better to handle crochet and sewing thread. It is necessary to tie it with three rows of single crochet, then everything will turn out beautifully.
Stock footage
This information is incredibly useful for beginner needlewomen, thanks to it, everyone can figure out on their own how to sew a knitted sweater at home. We hope you succeeded, and now your wardrobe has replenished with a couple more beautiful things.
- How to choose a vacuum cleaner taking into account the characteristics of the house and coatings?
- What to look for when choosing a water delivery
- How to quickly create comfort at home - tips for housewives
- How to choose the perfect TV - useful tips
- What to look for when choosing blinds
- What should be running shoes?
- What useful things can you buy in a hardware store
- Iphone 11 pro max review
- Than iPhone is better than Android smartphones
 (No ratings yet)