

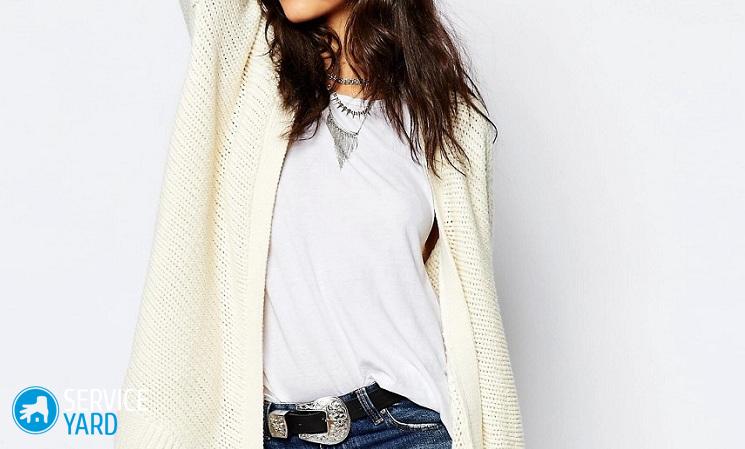
How to sew a cardigan with your own hands quickly and without a pattern?

Since a cardigan is a universal thing, due to its free cut, each fashionista has it in her wardrobe. Girls who do not have the opportunity to purchase new ready-made clothes in the store are interested in how to sew a cardigan with their own hands quickly and without a pattern. If you have a good piece of knitted fabric, then do not hesitate and get to work. You do not have to look for ready-made patterns, because you can do everything yourself. This wardrobe item helps a lot, especially in cases where you need to urgently find what to wear. You can take it with you on a trip, so as not to engage in ironing. He will save you in cool weather, will envelop you with home warmth. This article will tell you how to cut a cardigan on your own, to prepare for fitting.
to contents ↑How to cut a cardigan yourself?
As you already understood, you can’t quickly sew a cardigan with your own hands without a pattern; you still have to make an independent cutting. To get started, prepare everything that is useful in your work:
- Knitted fabric, the length of which corresponds to the length of the product, plus the length of the sleeves, plus 20 cm.
- Chalk board and cutter.
- Iron.
- Tailor pins.
- Threads with a needle.
- Tailor's chalk.
- Tailor's scissors.
- A long line.
- Patterns of the back, shelves and sleeves.
- Centimeter tape.
- Overlock.

Preparatory stage:
- Before you sew a cardigan with your own hands, you must check the material for any possible defects, holes, knots. If you find something, you should chalk these places.
- At the initial stage of cutting, the decating of the fabric is very important, because if it is not performed, the details can be deformed during sewing. This leads to distortions and asymmetries in the finished form.
- Now you should fold the inside of the fabric along the edges to determine the direction of the loops.
Important! Knitwear is created by machine knitting, because of which it has loops that can be dissolved if desired. This is recommended to take into account, since the loops should open exclusively from top to bottom. To do this, just pull the thread in the direction transverse to the loops.
- Having decided on the top of the canvas, align the bottom with a ruler, drawing a straight line with chalk. Then, from the bottom of the product, it is necessary to set aside an allowance width of 3-4 cm, and again draw a line that will play the role of bending. Mark the length of the cardigan up from the received line.
Cut
This process allows you to sew a cardigan with your own hands qualitatively, without the help of professionals, but it is important to do everything clearly, performing all the necessary steps at each of the four stages.
The first stage is the layout of the patterns on the fabric
Take the patterns of the back and shelves, carefully lay them out so that the extreme upper point of the shoulder on the shelves coincides with the length mark on the product. In turn, the center of the back should coincide with the fold of the material. In this case, the distance between the elements of the back and the shelf should be equal to the width of the allowances along the seam on the side, multiplied by two.
The second stage - modeling the back and shelves
All control lines indicated on the patterns of the back and shelves should be located at the same level:
- Outline the details with chalk, tuck into the armhole, so that in the finished form it was less noticeable.
Important! This option is ideal for girls with magnificent breasts. In addition, due to this, you will exclude creases and creases in the armhole area.
- Also shorten the end of the tuck from the center of the chest by 3-4 cm.
- On the back, the tuck can already be removed by reducing the shoulder seam by the width of the tuck, and lifting it by 1 cm.
- Draw a straight line from the received point starting from the extreme point of the neck.
- Mark the width of the allowances along the lines of the armholes and shoulder lines.

The third stage is modeling the sleeve:
- Position the sleeve near the top of the hem.
- Set aside its length with an allowance on the bottom 3-4 cm from the shoulder allowance of the shelf.
- Depending on the available pattern and model, calculate the width of the sleeve at the bottom and re-shape the inner and elbow lines.
- Then apply 1.5 cm allowance along the sleeve’s sleeve, 2 cm along the inside and elbow lines.
- Check again for lengths and widths.
Important! Be sure to make an addition to a loose fit, it depends on your physique and model.
The fourth stage - pattern details
Given all the allowances, cut out all the elements of the cut. So that they do not move out, chop them between themselves with tailor's pins.
to contents ↑How to prepare the product for fitting and make it?
It remains only to try on and sew a cardigan from knitwear with your own hands. Patterns are ready, so it's time to get ready for fitting. To do this, translate all the chalk lines:
- Using a board and a cutter, transfer them from one part to another.
- On the details of the shelf, sweep all the tucks, connect the elements of the shelf with the back along the shoulder and side seams.
- First, sweep away only the right sleeve, since we will try on the cardigan on the right side.
- All changes then simply need to be transferred symmetrically to the other side.
Important! If you plan to decorate the product with a decorative collar, pockets or cuffs, you can just make paper mock-ups for the first fitting.
You probably can’t wait to try it on? This is quite natural, before you sew a cardigan, you need to check everything, visually evaluate how it sits. In the process of fitting, insert the sleeve directly into the armhole to clarify the width, length of the product itself, neckline, sleeves, outline the location of the decor elements.
to contents ↑Important! It is not always possible to find a pattern in the public domain, so it’s easier to cut the product yourself using the basic patterns of the most suitable size. They are used as a basis, then the necessary adjustments are made, rather large allowances are made. Trying to help you see where and what is better to release, or - on the contrary, remove.
How to sew a cardigan with your own hands?
In this section, we will describe in detail how to sew a beautiful female cardigan with your own hands using an already finished pattern. This process will take the most time, but as a result of the work done, you will get the finished product.
Adjustments
It all starts with making changes after trying:
- Mark the places where the fabric was chipped with pins, with chalk, so that it prints immediately on both sides of all the parts.
- Then chop the pins.
- To make adjustments more convenient, remove all threads from the shoulder and side seams.
- Measure the distance from the points to the slices, horizontally on each part using a ruler.
- Summarize the results to get the surplus obtained in the fitting.
- Distribute this value evenly on the side seams.
- Do the same in other areas marked with chalk.
- Connect the received marks with lines.
- Fold the back in half, connect the chalk marks and combine the slices with smooth lines using a curved pattern.
- Connect the back part on the side seam with the part of the shelf, outline an allowance of 1 cm, cut off all the excess.
Stitching all seams:
- Knit all tucks with a knit seam. If you did not find a special tool, then sew everything on a regular sewing machine using a knitting needle.
- Shorten all allowances to 1 cm, overcast sections.
- Iron up tuck allowances.
- Stitch seams on the sides of the shelves.
- Then iron the seams on the back.
Cardigan Fit
- Fold the product in half, combining the side seams and sections, fix everything with pins.
- On the armhole, mark the chalk marks with smooth lines, apply 1 cm of allowance.
- Align the bottom of the product and the center of the shelf.
- Use a tape to measure the armhole, the sleeve ridge and determine the difference.
Important! The armhole should be 3-4 cm more okata. If the difference is greater, then you will have to distribute the excess at the seam.
- Align the seams and the seam with the help of patterns, add an allowance, remove the excess.
- Connect the shoulder seams and on the sleeves.
- To prevent the seams from stretching while wearing, glue an iron strip of adhesive fabric on the back allowances even before sewing.
Pocket Processing:
- From the fabric, remove the details for making pockets.
- Bend the upper allowance and sew with a flat seam.
- Fold the pockets of the pockets, then sweep.
- Fix them with pins on a cardigan, bast.
- Stitch pockets with a flat seam, remove basting threads.
- Fold the bottom of the product and sleeves, sew in the same flat seam.
Collar processing and connection with the product
The shape of the collar resembles a turndown, smoothly turning into a bar, which, as a rule, is processed by the sides of the shelves:
- Cut a strip from the fabric so that its length is equal to the sum of the lengths of the sides, neck, and allowances.
- Fold the collar in half, then align in accordance with your model, cut off all excess from the collar.
- Grind the lower ends, twist and iron.
- First notice, then stitch the part to the cardigan.
Important! The ends of the collar should be clearly aligned with the bottom edge of the product.
Sleeve stitching
Sweep the sleeves directly into the armholes, then grind from the side of the product. Carefully iron all allowances.
to contents ↑Stock footage
If you do everything, following the above instructions, then you can make a wonderful, stylish, warm cardigan with your own hands. Sewing is easy and simple from knitwear, since this fabric lends itself well to processing, problems with it practically do not arise at any stage of manufacture. If you wish, you can make a belt from the same material, or decorate the product with a stylish brooch, strap, flower. Knitwear is combined with almost all clothing options, especially when there is no time to make up some new look.
- How to choose a vacuum cleaner taking into account the characteristics of the house and coatings?
- What to look for when choosing a water delivery
- How to quickly create comfort at home - tips for housewives
- How to choose the perfect TV - useful tips
- What to look for when choosing blinds
- What should be running shoes?
- What useful things can you buy in a hardware store
- Iphone 11 pro max review
- Than iPhone is better than Android smartphones
 (No ratings yet)