

How to sew a jacket?
The jacket - both male and female, is considered a rather complex product. That is why novice needlewomen are in no hurry to take up such work - the pattern must be accurate, and the work must be neat. However, nothing is impossible. If you have a sewing machine and you already know how to handle it a little, why not try it? You will learn about how to sew a jacket from this article.
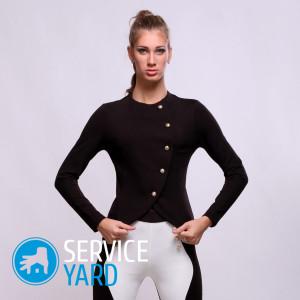
to contents ↑Women's jacket
Initially, the jacket was exclusively a men's wardrobe. But even in the last century, the fair sex mastered it, and it turned out that he gives the ladies a special charm. Chanel style jackets were especially popular, and it’s very tempting to sew just that in the first place. But where do you start?
The answer to the question of how to sew a women's jacket with your own hands step by step, like many other things, begins with taking measurements. In this case, you can hardly do without a pattern, but even a perfectly made pattern will have to be adjusted, and for this you need to know the sizes:
- half girth of the chest;
- waist circumference;
- half-circumference over the chest;
- half neck circumference;
- product length;
- the length of the back to the waist;
- shoulder length.
Important! All horizontal measurements are first taken completely, then divided in half - to build and adjust patterns, you need exactly half sizes.
In fact, those who begin to engage in sewing, it is better to immediately take and write down the main measurements, and then, as necessary, add to them those that are needed for some specific products.
to contents ↑What you need?
Of course, if you are considering how to sew a jacket, you already have a sewing machine. Otherwise, you would not have risked it; it’s quite difficult to manually execute the main seams manually. Surely you already managed to acquire other tools necessary for tailoring:
- sharp large scissors;
- a long ruler (best such as in a fabric store);
- a square (you can take a school one);
- needles for machine and manual sewing;
- tailor pins;
- chalk or aquamarker;
- tracing paper or graph paper.
But in this situation, a pattern is needed, as accurate as possible. For cutting other products, it’s suitable, for example, to open a satin blouse or even a T-shirt, but this number will not work with a jacket - unless, of course, you have a well-worn, but suitable-sized jacket that you want to copy. So it’s better to order a pattern or transfer it from a magazine, and you need to take a jacket, not a dress or a blouse.
to contents ↑Important! It is not necessary to make a pattern from paper for a jacket - you can use muslin. The sequence of work will be slightly different, but a jacket made in this way sits especially elegantly.
Tweed, wool or cloth?
To sew a female jacket with your own hands, you will certainly need fabric. It could be:
- tweed;
- gabardine;
- wool;
- wool with lavsan;
- canvas;
- Coat or jacket fabric, suitable for texture.
Besides? The jacket differs from other products in that it has a lining. So you need more lining material - in tone or contrast. But that is not all. For a classic ladies' jacket, prepare:
- non-woven or doubler;
- accessories (most often these are buttons);
- threads to match the fabric.
Important! The calculation of the fabric depends on your size and cut width.As a rule, modern materials have a width of 140-150 cm, so a slender young lady who wears a 42-44 size will be enough for one length of the product. Ladies with a more solid build should add the length of the sleeve to the length of the product - then it will definitely be enough, and there will not be too much left, because a lot of fabric is needed on the collar and the processing of the fastener.
The lining fabric will need a little less - it is only needed to duplicate the main parts, it will not be required for processing.
to contents ↑Start to cut
There is nothing special in the cutting process itself. It is only important to remember that all the details are cut along the shared thread. In this case, it is necessary to increase in the middle of the back. A ready-made jacket should not be pulled; you need to be comfortable in it. Therefore, add a strip to the crease of 2 cm.
Details are conveniently laid out like this:
- Fold the cut in half lengthwise.
- Lay the back piece so that between the fold line and the middle of the part there is a distance of 1 cm - then you will sew this fold 2.5 cm above and below and iron it.
- Next to the back, place the shelf part so that there is a sufficient distance between them for allowances.
- Apply a sleeve pattern to the free space.
You should have a rather large flap from which you will make cut details, a collar and patch pockets, if the model of your choice has them. Cut out the details from the lining fabric in the same way.
to contents ↑Important! If you are making a pattern from muslin, you need to cut out all the details in the quantity that you need for sewing. The main fabric is decomposed in one layer.
We sew a jacket in the style of Coco Chanel
The great French trendsetter was especially fond of booklet fabrics, so this material is best suited for this model. He drapes superbly, and in addition, the jacket will turn out soft and warm. In general, if you wondered how to sew a women's jacket for beginners, it is best to choose this particular model, fortunately, you will find a lot of patterns, and in almost all reputable sewing publications, technology is also described in detail.
However, there is a certain sequence of processing parts, and it looks something like this:
- Spread the lining upside down.
- Put on it the details of the top - they should be placed face up, the shared threads coincide.
- Stitch the details of the base layer and the lining.
- Cut parts out of lining material.
- Quilting details, making lines at a distance of 2.5 cm from each other - they should be straight, so it is better to outline them in advance.
- Fix the ends of the threads between the layers - it is best to make knots.
Handwork
The complexity of this model lies in the fact that quite a few seams will have to be done manually - at the first stage, in fact, the top layer of the shelf and back is completely sewn together with your hands. At the same time, it is impossible to touch the lining:
- We sew all the details along the seam lines with small stitches in the order that is always done, that is, the shoulder and side seams are sewn together and the sleeves are stitched.
- Unscrew the lining parts from the seams as much as possible and pin them.
- Walk along all the seams with the walking foot, making large stitches.
- Try on what you got.
- Correct problem areas.
- Sew all the seams, usually with a stitch, with medium-length stitches.
- Pull out the basting.
- Cut allowances as close to the seams as possible - note that the fabric from which the jackets are sewn usually crumbles quite strongly.
- Flatten the allowances.
- Overcast sections.
- Take a lining along the contour, bending the allowances inward - the seams should completely coincide (the marking starts and ends at a distance of 3-5 cm from the bottom).
Important! Oversizes can be ironed out before being attached.
Sew in a sleeve
The sleeve should fit perfectly. It must not be allowed that it was set crookedly, so that the armhole contracted or wrinkled. Therefore, for starters, we sew it in manually, again capturing only the details of the top. The stitches should not be very large:
- The sleeve itself can be sewn up immediately.
- Having swept the part, try on the product.
- Tighten the seam if necessary.
- Stitch the typewriter
Important! For sewing such complex products, a mannequin can be a very useful thing.
Neck and strap
Each grinding of the neck of the shelf is covered by one piece with the bottom of the bar. It is more comfortable. Next, proceed as follows:
- Fold the main part and the trim under the front sides to each other.
- Sew, grabbing only the top of the shelf and not touching the lining.
- Cut the allowance as close to the seam as possible.
- In the corners of the allowance, cut obliquely.
- Iron the trim on the wrong side
- Process the neck of the back.
- Sew the details of the shelf and back.
- Work on the edges - you can overcast, you can bend if the fabric sprinkles a little.
- Hem the hem (manually).
- Sew buttons and sew loops.
- You can trim the jacket with braid by sewing it along the line of the fastener, neck, bottom and bottom of the sleeves.
Far from the classics
Modern fashion allows for different liberties. For example, the question often arises of how to sew a sleeveless jacket. There are such models too. In fact, this is a lined vest. You can cut according to the main pattern, only the bottom of the armhole needs to be slightly lowered - 3-5 cm, putting a dot on the side sections of the shelves and backs and connecting them with the arches of the armhole in smooth lines.
As for everything else, such a product is sewn in much the same way as a regular jacket, only you don’t need to sew in sleeves. The order looks like this:
- As in the previous case, we fasten the lining and the top.
- Manually sew the side and shoulder seams, as well as tucks, if any.
- We try on and correct, if there is something to correct.
- Stitch seams on a typewriter.
- The armholes are treated with trim parts, as well as the neck.
- We hem, sew buttons, make loops.
Without pattern
Is it possible to sew a jacket with your own hands without a pattern quickly? Is something bothering you? Only it will not be a classic jacket.
Important! If you really need to sew it in a couple of hours, it is better to do it without a lining and from a fabric that does not crumble. Great options are raincoat fabric, polyesterthick cotton. You can make a jacket even without buttons, with a wide belt.
Operating procedure:
- Regardless of whether you have a pattern or not, you need to mark the material - you need to cut 2 shelves, 2 sleeves and a back.
- The jacket will turn out to be one-piece, so we fold the fabric in half and postpone the length of the product along the fold, and then from this mark - half the circumference of the hips, divided in half.
- From the starting point along the transverse line, we also postpone the half-girth of the hips, divided in half, connect the points - we get a back, in the middle there is a fold line.
- On a free section we cut a shelf - on the upper cut we put a point, from it along the shared thread we mark the length of the product. On the transverse - the same measure, that is, half of the hips, plus twice the width of the bar, if it is and draw a rectangle; draw the bar.
- The sleeves are 2 rectangles cut out along the shared - their width is arbitrary, but such a model would look better if the sleeve is wide enough.
Modeling a cutout
It is not necessary to sew a women's jacket with your own hands under the neck. It can be, for example, with a V-shaped or square neckline:
- We take one of the parts of the shelf.
- We look on which side of the clasp.
- On the line where the middle of the bar, we outline the point - the depth of the cut.
- On the upper line, we outline the length of the shoulder seam.
- Connect the points with a straight line.
- We do the same on the second shelf - the parts must be symmetrical.
On the back
We fold the back detail in half - or, more precisely, do not deploy it after cutting:
- On the fold, lay down 2-3 cm and put a point.
- From the end of the shoulder suture, we postpone its length towards the neck.
- Connect the point with the bottom of the neck in a smooth line.
Putting on a jacket
The operating procedure is standard, only in this case the cut is quite loose and there are no tucks. Therefore, we proceed as follows:
- We mark on the shelves and back the bottom of the armhole (half the width of the sleeve).
- Sew shoulder seams.
- We sweep and attach the sleeves.
- Stitch one side seam and sleeve seam.
- We process the neck in the same way as with a classic jacket.
- We bend the bar to the wrong side, smooth it and bend the edge.
- We process the bottom.
- Sew buttons, if necessary, and make loops.
We sew a man's jacket
Sewing a men's jacket is not much different from making a classic women's jacket. You can find it by a suitable, but lost the look of an old jacket. There is only one fitting - when you need to sew in a sleeve. Then there are places for buttons.
In total you have to combine the following details:
- 2 lower parts of the sleeve;
- 2 upper parts of the sleeve;
- 2 picks, one of them with a pocket;
- pocket valve;
- 2 shelves;
- 2 backrests;
- 2 barrels.
To sew a men's jacket, first of all, we strengthen all the details with a doubler. The collar is usually cut after and adjusted according to the parts already assembled. Next, we work in the following sequence:
- Cut out the details.
- Make a chest pad of adhesive non-woven and bortovki.
- Unfasten the main parts, paying particular attention to the slots and sides, and slightly extend the sleeves on the elbows.
- Sew tucks on shelves.
- Tops strengthen with pieces of non-woven fabric.
- Sew a barrel.
- Flatten what happened.
- Sew a pocket with a flap.
- Strengthen the shelves with three layers of bortovka and adhesive padding polyester.
- Quilting layers - it is best to use a zigzag for this purpose.
- Place the gasket on a shelf and grind it along the contour of the armhole.
- Stick the tape on the upper section of the lapel.
- Iron the shelf.
- Make a reinforcing pad for the back at the level of the shoulder blades.
- Glue the neckline, armhole, barrels and edges of the shelves with a edge.
- Stitch the middle back.
- Make back slots.
- Sew a lining along the contour of the fit.
- Flatten.
- Make a pocket on the pick.
- Sew on the valve.
- Stitch the elbow seam.
- Slot trim, grind, work corners.
- Iron the elbow seam and smooth out the allowances, then turn the corners of the slots.
- Mark the loops and mark them, cut until needed.
- Strengthen the sleeve sleeves.
- Stitch the axillary pad into the seam of the barrel, then twist the product.
- Sew on the collar, then sweep the sleeve and try on what happened.
- Stitch the sleeve, then sew on the buttons and cut through the loops
Stock footage
The jacket is not an easy subject; its manufacture has its own nuances. Your first assistant is an iron, without it it is very difficult to do a thing that will sit well. And it is very important to carefully perform all operations. If this is your first experience in tailoring such a complex product, start with the proposed simplified model without a pattern, and then practice in the classic versions.
- How to choose a vacuum cleaner taking into account the characteristics of the house and coatings?
- What to look for when choosing a water delivery
- How to quickly create comfort at home - tips for housewives
- How to choose the perfect TV - useful tips
- What to look for when choosing blinds
- What should be running shoes?
- What useful things can you buy in a hardware store
- Iphone 11 pro max review
- Than iPhone is better than Android smartphones
 (No ratings yet)