

How to sew a hat from knitwear with your own hands and patterns to them?

In everyday life, hats are an indispensable accessory, as they have numerous options and can be worn all year round. If desired, almost every needlewoman, having shown her creative abilities and imagination, is able to make a beautiful headdress. Moreover, a hat can be created for both boys and girls, and even for the smallest women of fashion and fashion. In this article we will look at how to sew a hat from knitwear with your own hands and patterns for them.
to contents ↑How to sew a knitted hat for a girl?
In order to make a beautiful headdress for a girl, it is necessary to prepare the following materials:
- knitted fabric as the main color, and white finishing material;
- sewing pins;
- needle with thread;
- sewing machine;
- scissors;
- one button.
Consider the manufacturing process:
- First of all, it is required to cut two parts from the main knitted fabric according to the prepared pattern.
- After that, fold them with their faces and fasten with sewing pins.
- Then you need to sew them on the oval side, while departing from the edge of 6-7 mm.
Important! The bottom should remain open.
- Excess material must be cut off.
- Next, we need to fold our product in half and on the received side it should be noted 6 cm down from the top edge.
- The next step is to push the material apart.
- Next to the lines you need to lay lines that are 1-2 mm away from them.
- After this, it is necessary to turn the bottom of the cap by 5-6 cm and sew along the edge.
- Then we turn out the hat on the front side.
- When we independently make a hat for a girl, it also needs to be decorated. In our case, we will decorate with a self-made flower.
- To design our product, we need to cut out 7 white circles from white knitwear, lay them out and sew along the core.
- The prepared button must be wrapped with the main material, sew in the middle of the finished flower and attached to the top of the cap.
Important! The decoration for the hat can be made in another way. For this:
- It is necessary to cut 5 circles having a diameter of 5 cm, and 4 circles with a diameter of about 4 cm.
- Next, you need to fold 4 large blanks in half so that a triangle forms.
- After that, you need to lay them on the 5th blank and stitch in a circle in the middle.
- In exactly the same way you need to fold small circles, then lay them out in a second layer and stitch them in a circle.
- Then you should attach the flower made to the hat.
Such jewelry options can be made out not only knitted, but also knitted or any other hat.
to contents ↑Knitted hat for baby
Consider how to sew a comfortable hat for a 5-year-old child. For this, it is necessary to prepare the following materials in advance:
- knitted fabric:
- a pencil and a sheet of paper;
- sewing pins;
- sewing machine;
- scissors;
- needle with thread.
How to sew a knitted hat for a child with their own hands:
- First of all, you need to take measurements from the head of the child.
- Next, according to the parameters taken of the head, cut out the template.
Important! For a child of five years of age, you need to put aside a width of about 23 cm and a height of 25 cm.
- After that, cut out a rectangle from the prepared web having a length of about 50 cm and a width of about 46 cm.
- Then fold it in half.
- Next, attach the blank to one edge of the fabric, while you need to step back from the template 3-4 mm and cut the corners.
- Exactly the same procedure is performed on the other hand.
- Turn the resulting workpiece on the back side and overlay with a zigzag seam along the edge.
- After that, fold the workpiece in half and make a triangular incision both from below and from above. The cuts should be located against each other, they need to be sheathed with a seam.
- Next, through the second incision, it is necessary to unscrew the cap on the back side and sew up the hole.
- Then straighten the workpiece, and in the lower part there are incisions sewn by hand.
- Raise the lower end to the upper, i.e. inward.
This type of hat is worn in early autumn or spring. Therefore, for its creation, material in bright shades is perfect.
to contents ↑Important! If the children are very small, then such a hat can be embellished with additional elements that serve as an imitation of the muzzle of any animal. To do this, add eyes, ears, nose with antennae.
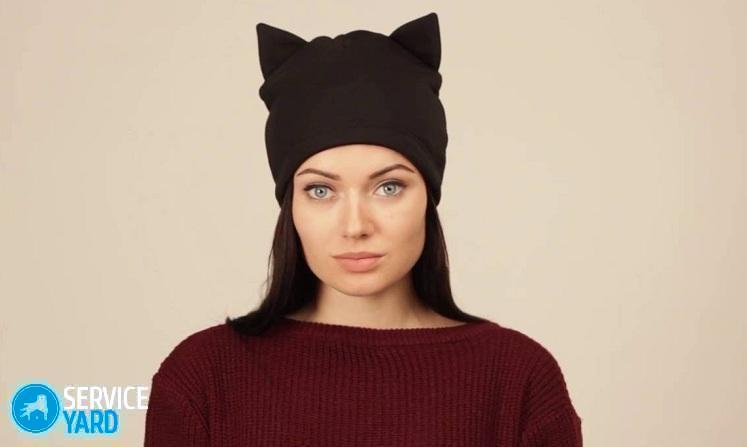
How to sew a baby hat with ears?
Now consider the production of a baby hat with ears.
To create such a product, we need:
- white knitted fabric, as well as some colored material;
- needle with thread;
- sewing pins;
- scissors;
- sewing machine.
How to sew a hat from knitwear with ears using a pattern:
- On a horizontal surface we lay out a white prepared canvas.
- From it it is necessary to cut 2 parts for a hat and 2 blanks for ears.
Important! We use colored knitwear only for cutting 2 pieces of ears.
- After that, the details for the ears must be folded with the front sides and stitched them around the perimeter. In this case, the lower edge is not stitched.
- Next, turn the blank for the ears onto the front side, fold it in half and sew about 2-3 mm from the middle.
- Then face the folded cut blanks for the cap, between which you want to insert the blank for the ear.
- At the end of the process, sew along the edge of the rounded part, after which the product is turned on the front side.
- Wrap the bottom edge up 2 times and fasten on the sides.
The hat with ears is ready!
to contents ↑Hat with long ears
Consider the step-by-step process of making a soft, comfortable and exquisite hat with long ears. For this option, hats require a plain knit and fleece lining.
To implement the creative process, it is necessary to prepare the following materials:
- a piece of knitted fabric that has a light gray, gray or dark gray color;
- a piece of fleece, which can be light tones;
- a cord of any color that has a length of about 60-65 cm;
- matching thread color;
- scissors;
- tape measure;
- sewing machine (if it is missing, then there should be a thin needle);
- a piece of knitted material of a dark color, which will serve to trim the cord.
We carry out preliminary calculations:
- the size of the head circumference, or the volume of the head, is 51-52 cm;
- the height of the cap, which is determined from the edge of the eye located below and to the upper seam, corresponds to 24.5 cm.
Important! The pattern should be tailored to your size. To do this, use a centimeter to measure the circumference of the head and the height of your product. Next, fold the selected fabric in half, attach the pattern, pin with sewing pins and cut according to the template, while leaving allowances for seams of about 0.6-0.8 mm.
How to sew a knitted hat using a do-it-yourself pattern:
- Build a pattern on paper.
- On this pattern, cut and fleece for lining.
Important! It is necessary that the fleece be 0.5-0.7 longer than the selected canvas, since it is necessary to sweep the edging out of it.
- We use a dark knitted fabric to cut 2 strips for ties. The width of the strips corresponds to 3 cm.
- Next - cut off the cord, which is about 47.5 cm.
- After that, cut the cord in half.
- Sew the strips and turn them on the front side.
- Thread the cord inside the tie.
- After this, sew the side seam, and then sequentially sew all the other seams.
- Next they need to be ironed.
- Then you need to trim the corners and sew the seams of the cap.
- After this, the remaining seams must be sewn up and ironed, with the shortest seam located in front of us.
- Similarly, stitch fleece lining.
- The front of the lining must be folded to the front of the main fabric. For convenience, you need to chop with sewing pins.
- Next, use a pencil or chalk to mark the place where the ties will be.
- With the stitches in place, grind the main fabric and cut out lining together.
Important! It is not necessary to completely sew the seam so that in the future there is the possibility of turning the product on the front side.
- At the end of the process, you should unscrew the cap on your face, and then sew a section of the product through which you turned it with a secret seam.
Important! If you sweep the edging, then the hat will look great, but you can just iron it.
The hat is ready!
to contents ↑Stocking cap
Consider another no less popular model of a hat, which is very easy to make - this is a stocking hat. A cap that is independently sewn from knitted fabric or cut from a dense T-shirt is an indispensable accessory in spring or early fall. These hats are very light and do not occupy space in a backpack or bag at all. Double knitwear is very suitable for creating this product.
First of all, it is necessary to prepare the following materials:
- piece of knitted fabric;
- scissors;
- sewing pins;
- needle with thread;
- sewing machine.
Important! The preliminary consumption of fabric material for a double cap in the form of a stocking for a head size of 52-56 is about 50-60 centimeters.
How to sew a knitted hat-stocking with your own hands:
- Roll the selected fabric so that the wrong side is on the outside and the front is inside.
- After that, turn the prepared fabric from left to right, and the back seam of the cap should be on the right side.
- You need to adjust the pattern to the size of your head. In general, you should get 4 paper parts.
Important! Your stocking cap should be about 28 cm long and about 44-45 cm wide.
- After making the pattern, apply it to the selected fabric, fix it with sewing pins.
- After that, circle with chalk, add 1 cm for allowances, then cut.
- Now you can remove the pattern.
- Next, expand the prepared canvas in full width.
Important! The material must be folded so that the front side is inside and the wrong side is outside.
- Using a sewing machine or overlock, process the back seam.
- After that, go to the top and sew the top of the stocking cap.
- Then you need to turn our product on the front side.
- Next, fold the cap in two layers so that all the seams coincide and chop them with sewing pins.
- Sew the upper seam on a sewing machine. The back seam is thus completely closed.
- At the end of the process, you should unscrew the stocking cap on the front side.
Knitted hat-stocking is ready!
to contents ↑Hat with pompom
On one of rainy and free days, you can independently make a fashionable version of the cap with a pompom. You can create such an original masterpiece in just 30 minutes.
For the process of creating a hat with a pompon, you will need:
- a piece of knitted fabric, which is about 55-57 cm;
- paper, which is used to build patterns;
- threads of color suitable for a knitted fabric;
- scissors;
- needle with thread;
- sewing pins;
- sewing machine.
How to sew a hat from knitwear and build patterns for them:
- We are preparing a pattern.To do this, measure the volume of the head and draw a rectangle with sides 55 and 26 cm.
- On one side of the triangle it is necessary to draw a semicircle.
- On the other side, draw exactly the same semicircle, for this you need to fold the fabric in half and redraw the desired element. In the end result, the pattern resembles an oval of elongated shape.
- Then you need to start the direct sewing process. To do this, fold the selected canvas in half so that the front side is inside.
- Next, attach the pattern to the fabric and circle it with chalk, and it is necessary to add 1 cm for allowances for the seams.
- Now you need to grind the seams, and it is imperative to leave an un sewn section of the seam so that you can then turn out our product.
- After that, unscrew the cap on the front side and sew up the hole using a blind seam.
- Our product is almost ready. Next, you need to fold the cap in half and make a mark. The second mark must be placed after 3.5 cm.
- Now you need to fill the smaller half of the product into a larger one, while you need to focus on the first marked point.
- Next, from the bottom, we need to bend out 6 cm and sew the fabricated pompom.
- Now it is necessary to fix both halves of the cap on the marked points.
The hat with the pompom is ready!
to contents ↑Knitted hat for a boy
For boys, you can also make a hat from knitwear, which will be convenient and practical. To create such an option, you just need to prepare a knitwear that stretches very easily.
How to sew a knitted hat for a boy with his own hands:
- By the taken measurements to build a rectangle, then transfer it to the selected fabric and carefully cut.
- After that, fold our blank four times, because for convenience we make a double hat.
- Next, you need to sew the middle seam. As a result, we had a part like a pipe.
- Now you need to walk along the seam with an iron to iron it well.
- After that, our pipe should be turned to the front side.
- Then fold the double cap so that the middle seam is exactly in the middle.
- Next, sew up the top of the cap.
- Then turn the corners of the cap to the middle, while they should be located on both sides of the middle seam.
- With a straight line, everything needs to be fixed.
- At the end of the manufacturing process, it is necessary to unscrew the cap on the front side.
Important! As a decoration on the front of the cap, you can glue the thermal sticker or sew the applique.
The hat for the boys is ready!
to contents ↑Stock footage
In this article, we offered you several options for how to sew a hat from knitwear with your own hands, patterns for them. From them you can now choose the model suitable for yourself and try yourself in sewing such useful things.
- How to choose a vacuum cleaner taking into account the characteristics of the house and coatings?
- What to look for when choosing a water delivery
- How to quickly create comfort at home - tips for housewives
- How to choose the perfect TV - useful tips
- What to look for when choosing blinds
- What should be running shoes?
- What useful things can you buy in a hardware store
- Iphone 11 pro max review
- Than iPhone is better than Android smartphones
 (No ratings yet)