

How to sew slippers from fleece with your own hands? Patterns

We all want to feel comfort and coziness at home. To do this, we do our best to equip our home, creating from it a cozy space for relaxation. We wear clothes that are pleasant to the touch, maybe not according to the latest fashion trends, but so necessary that you don’t want to take off as long as possible. Warm clothes, of course, are good, but what about slippers, because they are so necessary. Slippers are easy to buy, but you will spend a lot of time looking for them, overpaying a decent amount of money. Why not sew warm fleece slippers yourself, adding a twist to the designer? It is from our article that you will learn how to sew slippers from a fleece with your own hands, you can take ready-made patterns or make them yourself.
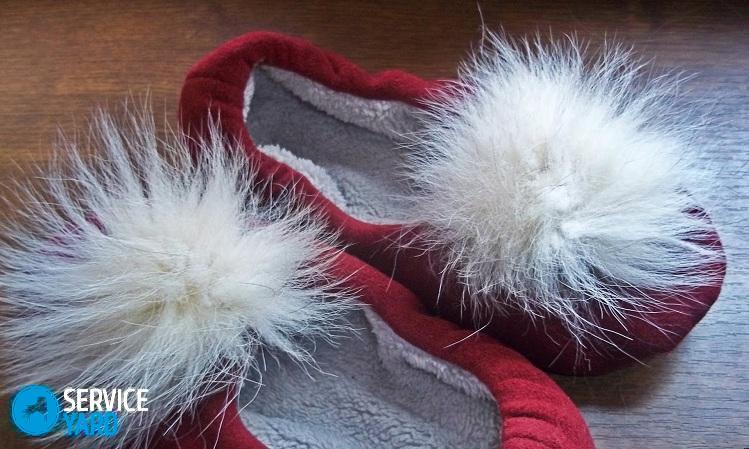
to contents ↑Bunny slippers
The unusual design of these slippers sets them apart from the rest of the shoes for the home. They look funny and a little childish, but at the same time, they are very comfortable and extremely pleasant. The main design secret of such slippers lies in the drooping ears and a fluffy cute tail. They make such indoor shoes in the form of socks that perfectly warm the legs to the knee line. Any woman can sew such slippers bunnies. In a detailed master class, we will share instructions on how to sew original fleece slippers at home.
Materials
For work, we will prepare the necessary materials and tools:
- Fleece in two colors (for the inside and outside of the boot).
- Fabric for the sole (raincoat fabric, leatherette, jeans and other dense fabrics).
- Insulation.
- Paper for a pattern.
- Chipping pins.
- Needle.
- Threads of two colors.
- Ordinary scissors.
- Zigzag scissors.
- Remnant for drawing on fabric.
- Sewing machine.
Helpful hints:
- As the main fabric, you can use any soft fabric, for example, velor or plush, and others.
- For the sole, it is better to put a waterproof cloth so that you can not worry about the dry feet in the bathroom.
- If you plan to just watch TV or read a book on the sofa in such slippers, then for the sole you can use the same fleece or felt.
- As a heater, you can use a synthetic winterizer, which not only insulates your slippers well, but also gives the product the desired shape.
Workshop on drawing up patterns and sewing:
- The pattern consists of three parts: the sole, sidewalls and shaft parts. Sew the inner boot. We redraw the pattern on the fleece, cut it out with an allowance of 1 cm for seams.
- After that, we need to cut 2 rectangles for our shaft.
- We chop off the details with pins with the front sides, we sew. So we get two soles with sides of different colors.
- Now, on rectangular fleece blanks, we cut allowances for seams, we connect the upper and lower parts of the product, grinding the back.
Important! Do not forget to leave a small hole so that you can turn out slippers at the end of the whole work.
- We cut off the formed allowances, which turned out along the line of the ankle.
- Now we need to stitch the insulation to the slippers. Trim the excess material.
- We chip together the lower and upper parts of slippers with their faces to each other.
Important! We recommend starting splicing from the heel or toe, so as not to collect the fabric into an accordion.
- We grind and trim the seam allowances using special zigzag scissors. If you do not have such scissors, then make notches on the bends of the product.
- We do the same manipulations with the external details of the slippers without leaving holes for further eversion.
- We glue the selected material for the sole with non-woven. So we have to cut out 2 details of the sole.
- Now we need to cut out the details of the ears for the bunny and grind them with the front sides to each other.
- We twist the ears and make a neat line, retreating 5 mm from the edge.
- Attach the ear to the front side of the inner boot. Do not forget to take into account that the ear will be outside the slipper during subsequent eversion.
- We do the same actions with the second ear, attach it on the other side of the boot.
- Now we need to unscrew the outer part, insert it into the inner part and fix it with pins on the top of the product. We fold all the details with their faces to each other.
- We grind everything along the upper edge and again cut the seam allowances.
- We turn the slippers-bunnies through the hole we left.
- Sew a hole using a blind hem.
- Now insert the inner slipper into the outer one.
- In the center from the very top we sew our boots, stopping at the center.
- Pull the bottom edge of the thread, forming visible folds on the front of the boot.
- We fix and hide the threads inside the product.
- We make 2 pompoms for ponytails. You can use the same fabric and stuff with cotton wool or take a finished fur bubo.
- Sew tails to the back of the slippers.
Stylish slippers are ready!
to contents ↑Important! Such slippers can be sewn without ears, decorated with a satin ribbon or beads.
Bunny slippers for the baby
Now we will look at step-by-step instructions for making funny slippers for your baby. Why not? They are very warm and comfortable! Moreover, such slippers are worn for a long time and lend themselves well to washing, without losing their original shape. We are sure that such a little mischievous slippers will really please your little mod.
Important! We recommend using two colors of fabric, which gives the product more originality. They work well together: blue and white, pink and gray, coral and coffee, yellow and black.
So, we start sewing children's slippers:
- Cut 3 paired parts. The upper part should be of bright fabric, and for a soft inner lining we use fur or any wool fabric.
- We chop off the fabric and insulation together, and then sew them on a typewriter, making a small indent from the edge.
- Now we need to connect the sole and the top of the product. If you do not have a machine, then sew the two parts manually with a buttonhole stitch. You can make both visible and invisible line of the bottom line of slippers - as you like.
- Now the turn has come to the muzzle and ears of the bunny.
- First you need to embroider the eyes, nose and antennae on a fabric of the same color with the upper material. For this work we use black threads.
- Pin a piece of fabric with embroidery up the slipper and sew it by hand.
- We bend the previously made ears slightly at the base and sew on the sides of the product.
Wonderful DIY shoes for the baby are ready to serve their little master.
to contents ↑Important! On the topic of animals, you can make a lot of different indoor slippers: slippers, cats, slippers, mice, slippers, cubs and others. It all depends on how your imagination can roam!
Simple fleece slippers
This is the fastest and easiest way to make fleece slippers. For work, we need a fleece in two colors (with a pattern and plain) and additional tools (needle, thread, pins and scissors).
We start tailoring simple but warm slippers:
- In mirror reflection, we cut 3 parts (the sole and sidewall) into the right and left legs. Do not forget to make allowances for 1 cm seams.
- We sew the back seam at the upper parts.
- Now we need to fold the details of the upper part with the face to the inside of the slipper, stitch and twist. If you have an overlock machine, then you can sew all the details with a knitted seam.
- In pairs, we add the sole details with the wrong side inside the product.
- Now we connect the upper parts with the sole, and then we sweep and stitch it with a sewing machine.
- It's time to remove all the basting, thread the threads and turn the product.
Hooray, your slippers are ready!
to contents ↑Important! In order to make a foot pattern, use the insole from your shoes as a template.
How to sew homemade slippers from fleece with your own hands - patterns with sizes
Take the following materials and tools:
- Special pattern for printing on thermal transfer.
- Pattern for the insole.
- Colored and light felt.
- Cork sheet 3 mm thick.
- Quick-drying adhesive.
- Iron.
- Scissors.
- Needle.
- Threads.
- Stationery clips.
A step-by-step process of work to sew slippers from fleece with your own hands:
- We need to translate the pattern for printing on felt. To do this, we lay out the pattern with the front side on the fabric and heat the iron to the maximum temperature. We pass with a hot iron over the entire surface of the printed image, without missing the corners and edges of the sheet.
- We iron the entire paper pattern for about a minute, cool slightly and carefully remove the upper cell layer. Now our picture is transferred to the fleece.
- We cut out all the details of the slippers without taking into account the seam allowances. We recommend that you try on the top of the product at this point so that you can trim the excess tissue.
- Now you need to mark the patterns for a pair of slippers on felt. Since the material will be on the inside of the product, you can take fabric of absolutely any color.
- Using a semicircular seam, we sew all the details.
- We cut out our 2 parts along the contour, which will be the top of future slippers.
- We create a pattern for the insole, which can be taken by circling the soles of old slippers or any of your shoes. It is important only to circle the insole, but not cut.
- Next, you need to sweep the top of the slipper to the foot pattern, starting from the middle of the toe of the product.
- We carry out the machine line and pull out the marking thread.
- Now, slippers with the sole can be cut out 3 cm from the edge of the line.
- We do the same with the second tobacco.
- Now we need to apply superglue to the fleece sole and stick it to the cork sheet.
- Cut the slippers so that the cork surface protrudes beyond the edges of the felt.
- With clerical clips we fix the cork and fleece layer, we wait for the glue to completely dry.
- We cut our slippers along the contour of the insole, cutting off the excess lower part that extends beyond the boundaries of the product.
- You can stop there or additionally flash slippers around the entire perimeter.
to contents ↑Important! When transferring the picture to felt from a special pattern, it is better to overheat the iron, because if you iron the picture with a cold iron, you will get only fragments of the translated image, and this can finally ruin the pattern itself and the felt.
Stock footage
We have provided you with various ways to sew fleece slippers for yourself, your child, or as a present to a loved one. Which option to choose is up to you. Let your legs always be in the warmth that you created with your golden hands!
- How to choose a vacuum cleaner taking into account the characteristics of the house and coatings?
- What to look for when choosing a water delivery
- How to quickly create comfort at home - tips for housewives
- How to choose the perfect TV - useful tips
- What to look for when choosing blinds
- What should be running shoes?
- What useful things can you buy in a hardware store
- Iphone 11 pro max review
- Than iPhone is better than Android smartphones
 (No ratings yet)