

How to sew a tunic with your own hands? For beginners, patterns

In the summer we want to look easy and relaxed - we put on light dresses to feel as confident and comfortable as possible, especially when it is very hot, you don’t want to constrain the body with a tight thing. Today we offer you to sew very practical clothes - a tunic. It can be used both in everyday wear and as a work uniform. It goes well with almost all things, which is important when you are in a hurry somewhere. So let's make our life easier with the tunic developing in the wind! So, we begin to slowly figure out how to sew a tunic with our own hands - we also prepared patterns for beginners.
to contents ↑DIY tunic without a pattern quickly
When you decide on the style and buy your favorite fabric, the next thing to do is take measurements.
Important! Although we will describe the progress of tailoring a tunic without a pattern, we also need to know our measurements, since we will transfer them to the fabric, and then cut our product. Therefore, prepare a centimeter and a notebook for notes in advance.
So, we begin to understand the question of how to sew a tunic with your own hands for beginners.
Take measurements
The list of measurements for sewing the simplest tunic:
- Length of the product.
- Dress width (hips + allowances for a loose style).
- Sleeve width (girth + allowances for a free sleeve).
- The distance from the middle of the arm to the desired length of the sleeve (if you want a tunic with a long sleeve).
That's all the necessary measurements!
Materials for work
We will prepare the necessary materials and tools:
- Lightweight fabric 80 cm long and 50 cm wide.
- Scissors.
- Chalk or remnant for drawing on fabric.
Important! In order to sew a tunic, better take stretch fabric. If you are an experienced seamstress, then you can sew a knitted product that we do not recommend using for beginners, since this fabric loves “professional hands”.
Step-by-step sewing algorithm:
- Fold the fabric in half with the front side inward (the edge should go along the sides), cut a piece of fabric into two parts. Visually we got blanks for the back and front half of our future product.
- Now, directly on the fabric, we will begin to make a pattern. To do this, you need to fold each part still in half face to face and lay both cuts on each other (by folding the fabric of one fabric on the fold of the other).
- All measurements should be taken from the fold of the fabric (from the upper corner).
- We measure to the right of the bend about 7 cm.
- We go down from the upper right corner down by 4 cm. We connect both marks of the line - this will be the shoulder line.
- Now we need to measure for ourselves the desired width of the neckline. To do this, just take a centimeter, apply it and measure it. In our case, we make a width of 24 cm. We mark half of this measure (12 cm) horizontally to the shoulder line.
- We retreat another 4 cm down the fold of the fabric, draw the desired neckline of the neck of the back of the product.
- For the front we need a larger cutout. Therefore, we go down 8 cm and draw the line of the front of the neck, stopping at the previously marked line of 12 cm.
- Next, we need to measure the length of the future dress by the same fold of fabric - we took 80 cm.From the bottom of this mark, we lay to the right the width along the line of our hips, that is, a quarter of a measurement. For example, if you have hips of 100 cm, then you need to take 25 cm. This mark will be the width of the sleeve.
- If you want to make a fitted dress, then you need to postpone a 40 cm fabric by the fold, and then measure another 22 cm from this point to the right. This point will be the border of our waist.
- We connect together all the measurements: the mark of the sleeve, waist and hips with one flexible line. At this point, our simple pattern is ready.
- Add 1.5 cm allowances to each drawing. Now you can cut out the pattern and start tailoring your new tunic.
- We process the edges with an overlock, and if you used knitwear, then you can completely not make them out.
- Optionally, you can optionally grind 3-5 cm wide. To do this, postpone the desired length from the central part of the neck to the beginning of the shoulder line. After that, cut the facing of the front and back parts, taking into account the allowances for the seams.
- Everything, our incredibly easy and free tunic is ready!
You see, sewing a tunic with your own hands without a pattern is quick and easy.
to contents ↑Important! You can create absolutely any neckline for both the front and back of the product. Turn on your imagination, and move on to creating a unique thing, one and only!
Tunic patterns for beginners
Recently, Boho dresses are gaining more and more popularity. What it is? This is a completely new style, which has a very important feature - it favorably distinguishes femininity and virtues, smoothing out the shortcomings of our figure.
Important! For sewing, you can safely take malleable fabrics such as chintz, calico, linen, viscose and putty knife.
What details do we need to carve:
- Front with detachable yoke - 2 parts.
- Coquette front of the tunic - 2 pieces.
- Flirty back - 2 parts.
- Cutting back - 2 workpieces.
- Sleeve - 2 cut.
- Cuffs for sleeves - 2 strips (cuff width 4.5 cm + seam allowance).
- Collar - 4 pieces, 2 cm wide with allowances.
- Plank on the collar (4 strips 2 cm wide + allowance).
Important! Do not forget to make allowances for seams - this is very important, since without them your tunic will be small. Be sure to add a 2 cm allowance to the bottom of the drawn pattern. And for the remaining details, 1.5 cm.
Start sewing:
- First we need to process small details: a collar, cuffs for sleeves and a collar level. We flash all the small details.
- Now we have to arrange a round yoke with embroidery. To do this, take two cuts of the yoke, put it together face to face, and then grind it. We bend 2 times the edges of the coquette, sew and iron. After that, we sew the front of this part to the shelf, after collecting small folds along its entire length.
- We collect the bottom of the sleeve a little manually. We put cuffs on the lower part of the sleeve, sweep, stand idle and iron the wrong seam.
- On the back of the tunic we should have an assembly. Now we need to assemble the longest edge of the backrest manually and expand the assembly across the entire width of the back half.
- Fold the yoke back of the product and the assembly of the front parts inward, sweep and flash. We carry out the same actions with the other half of the back. Stitch the middle seam of the back, and then iron it.
- Fold the front and back of the tunic with the front sides. Sew the front seams, also iron.
- Sew the collar to the neck of the yoke, after having swept away all the details.
- Sew together the side seams.
- Combine the upper point of the sleeve with the finished shoulder seam. Sweep the sleeves, collecting fabric at an angle. Now they can be downloaded.
- Turn the bottom of the product, and then fasten the line.
- If desired, we decorate the tunic with beads, embroidery or lace.
to contents ↑Important! To sew a summer tunic with a zipper on the back, you need to divide its back into two parts, sew a zipper, carefully processing the edges of the zipper.
How to sew a tunic from satin with your own hands?
Have you ever thought that you can sew a very beautiful tunic from satin scarves? But in vain. Such clothes will look romantic, elegant and, at the same time, easy on you.
For work, you need to prepare only two identical scarves (you choose the sizes yourself). For example, you can take one plain scarf without a pattern, and the second with a pattern (this scarf should match the color of the first). Add a small list of braid and buttons that will decorate the finished tunic.
Step-by-step algorithm of actions:
- We draw in chalk one line, from which all future measurements will be marked.
- Draw a neckline 20 cm from the previously drawn line.
- We mark the distance by which we plan to open our shoulders, and after that we sew over the seams.
- Try on our tunic. If something does not suit you in the appearance of the product, or simply uncomfortable, then we fix all the problem areas.
- Next - mark and stitch the side seams.
- Well iron all seams and the product itself.
- For decoration, you can take fringe, lace or decorative braid. A wide elastic band or satin ribbon to match the tone of the main fabric will look elegant at the waist.
- So fast we sewed a beautiful tunic.
to contents ↑Important! This method is perfect for those girls who are concerned about the question of how to sew a tunic with their own hands for the full. Such a dress would be an ideal option, since the width of the product is up to you.
Chiffon tunic - how to sew with your own hands from a t-shirt?
For this outfit, we need a T-shirt with a wide seamless sleeve. This is precisely the style of the tunic that is very easy to translate into reality even the most inexperienced seamstress. Having made just a few seams, choosing the right accessories, you will get a stylish summer, and most importantly - a comfortable tunic.
So, let’s consider a step-by-step master class:
- Before starting a pattern, take measurements - waist circumference, length and width of the future product.
- A rectangular piece of fabric is applied to the T-shirt, changing or leaving the shape of the neck. Add 5-7 cm to the waist and hips. We form a sleeve width of at least 20 cm.
- We draw all the borders with chalk and cut them out.
- We turn and stitch the edges of the neck, sleeves and bottom of the product several times.
That's all the manipulations. This is just unbelievable!
Now you know how to sew a tunic with your own hands quickly and without a pattern. As a result, you will get a tunic with a flirty narrowed hem that fits the hips so beautifully and forms light folds on the product.
to contents ↑What to wear a tunic with?
Tunics come in a wide variety of styles, but for some reason many girls do not know what to combine such a thing with. That is why we offer you the following options to help you look great:
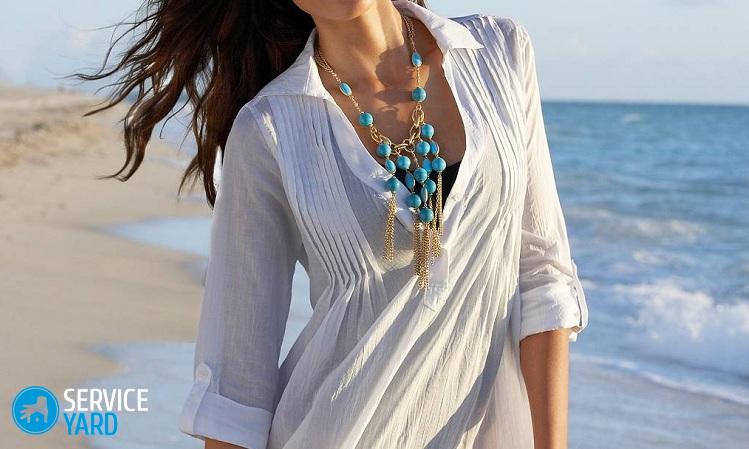
- Long tunics with large necklines look good with short trousers and high-heeled shoes. And if all the clothes are in white or beige, then you will get a luxurious and noble image of a business woman.
- A white tunic will work well with blue piping jeans, which can be slightly worn. Finish off your look with colorful pumps or ankle boots.
- Burgundy, red, black and gray tunics can be worn with black jeans of different styles.
- Not too bright dresses (white, beige, gray and black) look stylish with black leather trousers.
- Sheer colors can be combined with short shorts, adding a classic hat to your outfit.
- You can wear clothes such as dresses, for example, as a beach addition to a swimsuit.
- In cool weather, dense tights, high boots or boots can be added to the tunic as an addition.
Stock footage
It turns out that you can sew a tunic without a pattern with your own hands. Despite the fact that in some cases the threads and the sewing machine are not even used. And most importantly - it is done very quickly and simply, which is so important for inexperienced tailors. Use different techniques and change your clothes, because now you can afford it!
- How to choose a vacuum cleaner taking into account the characteristics of the house and coatings?
- What to look for when choosing a water delivery
- How to quickly create comfort at home - tips for housewives
- How to choose the perfect TV - useful tips
- What to look for when choosing blinds
- What should be running shoes?
- What useful things can you buy in a hardware store
- Iphone 11 pro max review
- Than iPhone is better than Android smartphones
 (No ratings yet)