

How to sew a skirt in a crease?
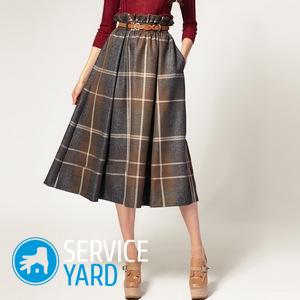
A pleated skirt can be part of an evening, casual, and business wardrobe. A strict English blouse, a thin sweater, and even a T-shirt look equally good with her. In a word, having one or two similar items in your closet, you can always look elegant and elegant. How to sew a skirt into a crease, if you have recently taken up needlework, will be discussed in our article.
to contents ↑Where to begin. Step-by-step instruction
If you like a pleated skirt, do-it-yourself sewing something interesting with your own hands will not be difficult. A pattern for such a product will be needed only in one case - if you choose a model on a yoke. But this is a more complex style, so it is better to leave it for later, when you will feel confident behind the typewriter.
You need to start by choosing a model. A pleated skirt can be:
- short;
- middle length;
- long.
Important! A light summer skirt can be very short or very long, but for a business suit it is better to choose a length just above or slightly below the knee. For an evening toilet, floor or ankle lengths are suitable.
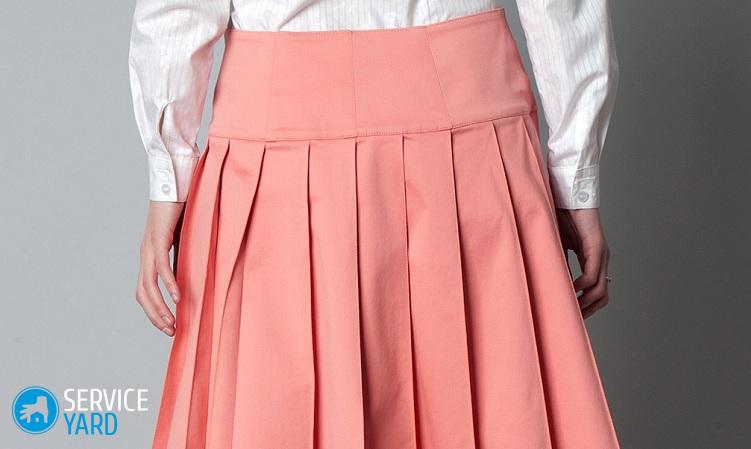
Types of folds
Before you sew a skirt with pleats, decide on the type of pleats themselves. They may be:
- circular;
- oncoming;
- bow.
In addition, in magazines you can find models when folds going in one direction are not located all around, but, for example, only from the side or only from the front. Making such a skirt is no different from the version with circular folds, only the calculation of the fabric will be slightly different.
to contents ↑Important! Before you stop choosing a specific model, evaluate the features of your figure:
- any skirt is suitable for a slender woman, as well as the owner of wide hips with a thin waist;
- if the figure resembles a square - it is better to choose the option with an oncoming or bow fold.
What to sew from?
How to make pleats on a skirt so that they are ironed from top to bottom or not? The choice of material depends on this. For strict sharp folds, fabrics that are well smoothed and keep their shape are suitable:
- wool;
- plaid;
- wool with lavsan;
- dense satin;
- thick silk.
In the second case, the fold is something like a pinch - it is laid at the waist, but is not smoothed out to the end. For such skirts, soft fabrics that drape well are suitable:
- velvet;
- crepe de chine;
- georgette and crepe georgette;
- natural or artificial silk of any density;
- denim.
Take measurements step by step
When deciding how to sew a pleated skirt with your own hands, be sure to take some measurements. Although you do not need to build a pattern, you need to know your sizes. Measure:
- product length;
- waist circumference
- hip girth;
- distance from waist to hips.
Circle pleated skirt
A beginner needlewoman is always looking for an answer to the question, how much fabric will go to each fold?
- First you need to determine their depth. To do this, you need a calculator or piece of paper and a pencil.
- You already know your hip circumference. Designate this measurement as OB.
- Then the number of folds can be calculated by the formula (OB + n): n = KS, where n is the width of the fold, and KS is the number.
to contents ↑Important! If the sum of the hips and the width of the folds is not completely divided by n, you need to round up to the nearest suitable number in a larger direction - then you will remove the excess anyway, and the folds should be the same.
We calculate the amount of tissue
All calculations for skirts are done on the circumference of the hips. To understand how wide the cloth should be, you need to multiply this measure by 3. If, for example, your hips are 105 cm wide, it turns out that the whole cloth should be at least 315 cm. Remember to also add 10 cm to the allowances and free a fit. A total of 325 cm is obtained.
Yes, but there are only curtain fabrics of this width. You can, of course, sew the original skirt to and from it, but what to do in other cases? The answer is simple - to sew from two or even three panels.
I.e:
- With a cut width of 140-150 cm with the indicated thigh volume for a skirt with circular folds, three lengths of the product will be required.
- Owners of narrower hips can fit in two lengths, plus an allowance for hem and 10 cm in the belt.
Cutting and sewing skirts
In order to cut a skirt with circular folds, you need:
- long ruler (tailor's meter is ideal);
- piece of chalk or dry remnant;
- a tailor's square - metal or wood - can be very useful.
The cutting order will be as follows:
- Spread a piece of cloth on the floor or large table.
- On the edge, lay the width of the belt.
- On the edge, set aside the length of the product.
- Set aside the hem allowance.
- Set aside one more length of the product and one more allowance along the same edge.
- Divide the second edge into the same lengths.
- Connect the marks in parallel lines. Make sure that the lines go exactly perpendicular to the edges - for this you need a square. And if the fabric with plain weave - you can control the transverse thread.
- If the product will be in three pieces, postpone the same measurements again.
Crease marking
Before you sew a skirt in a crease on the belt, you need to mark the folds themselves. It is better to trim the strip for the belt beforehand. You can divide the panels, so that it is more convenient to cut. The markup for all parts will be the same:
- Set aside 2 cm from the edge for allowance.
- From this point, lay the width of the fold - it is also half the depth of the fold.
- Set aside another crease width - full fold.
- And once again set aside the width - the inner layer of the same assembly.
- Thus mark the entire panel from above, and then do the same from below - do not forget that the assembly lines should go strictly parallel to the edges.
- Mark the second panel in the same way.

Assembly
The assembly of a pleated skirt begins with the fact that the production of other models usually ends - with the combination of pieces and hem of the bottom. Do not stitch the product in the ring yet - you should get a full-width panel, but without a back seam. Fold the bottom cut by 0.5 and 1 or 1.5 cm to the wrong side and sew or sew by hand with a hidden seam, without slightly departing from the edges.
Further, the procedure will be as follows:
- Draw a line of hips.
- Lay each assembly, pin it from the waist line to the hips line and iron it.
- Remove the pins.
- Sew folds from the thigh line to the bottom with a basting seam.
- Try on what you got.
- From above, the model is much wider than it should be - you have to tighten it, and to do this, remove excess tissue evenly across the entire width into the depth of the folds.
- Sew the basting seam from the waist to the hips.
- Press down.
- Stitch the back seam, leaving room for a zipper.
Belt:
- Fold the strip for the belt in half with the front side out.
- Iron the bend.
- Iron allowances inward.
- Having turned the belt inside out, stitch short seams.
- Insert corsage tape inside.
- Sew over the allowances.
- Put the upper edge of the product inside the belt, stitch and sew close to the edge.
- Sew a hidden zipper.
- Remove the basting seams.
to contents ↑Important! For such skirts, you should not make a belt with an elastic band.
Cross pleated skirt
When deciding how to sew a skirt with pleats without a pattern, pay attention to models with oncoming or bow folds. They are sewn exactly the same. In the oncoming folds converge in one line.In a bow, on the contrary, the folds “look” in opposite directions, and between them there is a smooth piece of fabric. Actually, the bow fold - this is the oncoming one, only turned inside out.
The calculation of fabric in these cases will be the same - and it is much simpler than for circular folds:
- Take measurements, as for the previous skirt.
- Determine the width of the half of the oncoming fold.
- Multiply it by 6.
- If there are several assemblies, multiply the result by their number.
- Add what happened to the hips.
Important! If the total number with added 2-4 centimeters for allowances is less than the cut-off width, one length is enough. In all other cases, you need to take two lengths.
One-fold model
The most important thing is to determine the location of the fold. As a rule, such skirts are made with a seam at the back. A very good option is when the back is straight with tucks, but for this you need a basic pattern. But you can do this:
- Spread the cut on the floor or large table.
- On one of the edges, set aside the doubled width of the belt.
- Set aside the length of the product and the hem allowance.
- Do the same along the other edge and connect the marks with lines. If the product is in one piece, then the first part of the marking is finished, if in two pieces, set aside the length of the product and the allowance on both edges and connect.
Markup
If there are two panels, sew them together. Bottom up immediately. One fold should be located exactly in the middle. Therefore, spread the workpiece and find the middle of the upper cut. From this point to the right and left, set aside three times the width of the bend. Do the same on the bottom line.
Important! The marking in this case is more convenient to do on the front side.
Assembly
The assembly of such a model is not much different from the model with circular folds. The main thing is to lay the assemblies themselves and fit them along the waistline:
- Lay both halves of the bend towards each other so that they touch on the midline.
- Between the lines of the waist and hips, pin them with pins, from the line of the hips to the bottom - sew with a basting seam.
- Iron the folds where they are chipped and remove the pins.
- Lay out the basting seams to the end, that is, to the waist.
- Remove excess fabric along the waist in the depth of the assembly.
- Stitch back seam.
- Make the belt the same as with the skirt with circular folds.
- Sew a zipper.
- Iron the assemblies and remove the basting.
If there are several assemblies
Very popular models in which there are two opposite bends - front and rear. They are sewn in the same way as a product with one fold, only it is necessary to accurately determine the places of bends. Front - marked as in the previous case, but in the back it is better to hide the seam. Therefore, we do this:
- All markup, up to the front fold, is done in the same way as in the previous case.
- From the sections of the back seam we set aside the width of the allowance on both sides, then three times the width of the fold.
- We connect the seam, and then lay the bend in the same way as the one that will be in front.
to contents ↑Important! The model with bow folds is sewn in exactly the same way as with the counter ones, only the marking must be done on the wrong side.
Stock footage
So simple and easy you can sew yourself some original skirts that will emphasize your grace and tenderness, femininity of the image.
- How to choose a vacuum cleaner taking into account the characteristics of the house and coatings?
- What to look for when choosing a water delivery
- How to quickly create comfort at home - tips for housewives
- How to choose the perfect TV - useful tips
- What to look for when choosing blinds
- What should be running shoes?
- What useful things can you buy in a hardware store
- Iphone 11 pro max review
- Than iPhone is better than Android smartphones
 (No ratings yet)