

How to sew a vest for a boy with your own hands?
Every mother wants her child to be no worse than other children, but only better. I want to dress the child as if from a needle, but sometimes bought new clothes are very expensive. Do not rush to be upset - this problem is completely solvable. Today we will tell you how to sew a vest for the boy with your own hands, because there is nothing nicer than a product made with love with your own hands. The first rule to remember is to do needlework only with a good mood, and then everything will work out!
to contents ↑Materials and Tools
Before starting to cut and sew a vest, we prepare working accessories:
- Sewing machine.
- Pattern.
- Fabric for warp.
- Lining fabric.
- Sewing and sewing threads.
- Buttons
- Chalk or soap.
- Needle.
- Scissors.
- Tailor pins.
The choice of fabric must be given special attention, since only dense fabric that can hold its shape is suitable for the manufacture of such a vest. From this it follows that you need to abandon flying, streaming and other light materials, since for these purposes they are completely unsuitable - just waste your money.
For sewing children's vests are well suited:
- Woolen fabric
- durable jeans;
- knitwear;
- leather or leatherette;
- raincoat fabric;
- bologna and nylon.
The choice depends primarily on the purpose of the vest for the boy - to study or walk on the street.
to contents ↑Important! If you want to decorate a vest with cute embroidery or other decorative elements, then do not forget to ask your child’s preferences before that. In this case, the baby will wear the clothes of his dreams!
How to sew a vest for a boy on a lining with your own hands?
We come to the most important thing. Now we will consider in detail how to independently manufacture such a product without much effort. Our master class describes all the steps to create a vest for boys.
Training
So, we start sewing sleeveless jackets:
- At the very beginning, it is necessary to circle the shelf and back on the lining fabric, and after that - put it off for a short while.
- Now you need to grind the tucks on the back of the future vest, taking into account the depth of the tuck, about 1 cm, and then iron it towards each other.
- At the next step, we fold the back in half so that the wrong side is inside the product, we pin it off with pins.
Important! Consider the width of the groove in the area of the side seam - it should be 5 cm, and the width in the area of the side of the product - 7 cm
Cut out the grind for the shelf and back:
- The first step is to fold the fabric in two layers, put a strip on top and overcast, and then remove the shelf and draw an internal cut of the overlay.
- Now again, you need to fold the fabric in the manner described above, lay the back and overcast.
- At the next step, remove the back of the product, draw a section of the chalking.
- We cut out the outlined stripes and backs.
- We put our linings on the lining and outline.
- We remove the resulting stitches from our lining, since we need to leave allowances for the seams - 2 cm. Only after adding passes can we cut the lining.
- Now take the finished grinders and gently duplicate them.
- Face to face, we impose a backing to the back of the product, pin it off with pins and grind the neckline.
- Next - we sew the seam on the grind, grind a slanting strip of finishing material from the back from the side of our grinder.
- After that, you need to put the grind on the strip facing each other, then grind the sides first, and sew the line of the resulting grind on the grinder.
- Next - we stab the grind at the bottom and neck of the product and flash the bottom of the shelf.
- Now you need to carefully grind the lower corner of the vest.
- We adjust the seams in the places that you can get and trim the extra corners.
- We grind the neck of our strip, to grind the seam where we can get the machine.
- On the neck, on the side and bottom of the shelves we grind an oblique strip folded in half, leaving an allowance of 2 cm.
- Turn the strip on the front side and straighten the corners.
- Now you need to iron and check that the grinder does not peek from the outside. If it protrudes, we cut off the excess tissue.
- Grind and iron the resulting side seam.
- Flashing the shelf and backrest, ironing.
- We do the same manipulations with the shelf and back of the vest.
- Next, you need to fold the main part of the product facing each other, connect the seam with pins to the side with the seam of the facing.
- We are engaged in turning the armholes, we adjust the seam for turning in all available places.
- We turn out the already processed armhole of the strip, inserting it into the armhole of the back so that the facing turns face to face, and the shelf is turned to the back.
- We sew together the shoulder seams of the shelf, the seams of the stitches.
- We turn out the processed strip, connect the shoulder seams of the facing with the main product, and flash the empty seats.
- Now again, we turn the vest on the front side, sweep the strip along the armhole, align the shoulder seams in different directions, fold and carefully iron.
- We sew all the side details of the lining, the seam in the middle and the tucks, leaving an unstitched opening, which will be needed to process the bottom of the product.
- After this, you need to iron all the side seams, iron the tucks and the middle seam in one direction, trim the bottom of the lining material.
Important! Do not forget to start and end the seams at a distance of about 2 cm from the shoulder seam, if this is not done, the vest will be small.
Sewing a vest for a boy is not as difficult as it seems at first glance, you just have to start, and everything will work out!
Sew the lining to the vest
The process of attaching the lining to the main fabric consists of several stages:
- Combining the centers and seams on the sides, you need to notice the lining of the back to the hem of our back. Then turn on the front part, check whether it sits well. If everything is fine, then sew the backrest lining.
- Now we sew the lining of the shelf to the shelves of the main fabric, we turn it out, in the same way we check the correctness of the seam. If all is well, then sew the lining of the vest to the shelves.
- We turn the bottom of the product and its lining through the side hole, combine and sew it, and then we turn the vest back to the front side.
- In the next step, we fasten the linings to the side seams and grind it by hand from the wrong side.
- We put together the raw side seam, fix it with pins and adjust it, leaving an allowance from the edge of 1-2 mm.
- At the final stage, we remove the outlined threads, clean and iron the vest.
That's all, the vest for the boy is ready! Now you can easily sew a vest for the boy, because the soul was invested in him.
to contents ↑Recommendations for sewing and wearing a vest:
- A vest for a boy is a rather universal product, since it can not only warm in the winter, but also perfectly complement any look. It can be worn, for example, with a T-shirt or a classic shirt. Therefore, in order to accustom a child to good taste from childhood, then dress him only in beautiful and fashionable things. Maybe someday your son will be a famous designer, who knows!
- To combine a vest with a bottom, jeans or regular straight trousers are suitable.In other words, this type of clothing is very useful, as it goes well with almost all things in a wardrobe.
- Pay particular attention to the choice of fabric color for the vest. For example, if your child is less than 5-6 years old, then give preference to darker, dimmer shades. Children at this age often get dirty, and soiled clothes are not very suitable, but on a dark background, spots will not be especially noticeable.
to contents ↑Important! A dark vest goes well with a white shirt, so do not miss the chance to use this option.
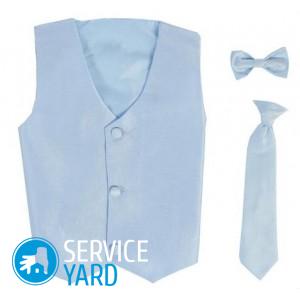
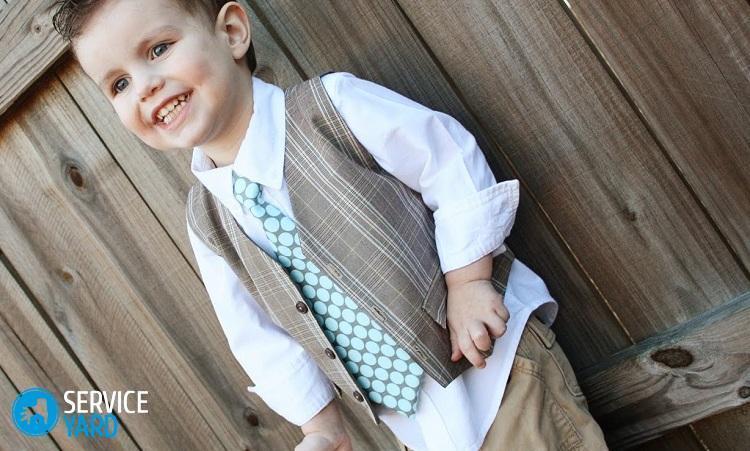
Stock footage
We told you about how to sew a vest for the boy with your own hands. Of course, I had to work a little, but agree that it was worth it. Now your child will look fashionable and tasteful, and the girls will be delighted. Do for people close to you, and good will definitely come back!
- How to choose a vacuum cleaner taking into account the characteristics of the house and coatings?
- What to look for when choosing a water delivery
- How to quickly create comfort at home - tips for housewives
- How to choose the perfect TV - useful tips
- What to look for when choosing blinds
- What should be running shoes?
- What useful things can you buy in a hardware store
- Iphone 11 pro max review
- Than iPhone is better than Android smartphones
 (No ratings yet)