

How to sew a vest from fur with your own hands?
- What fur is suitable for sewing a vest?
- Tools for sewing a fur sleeveless jacket
- Do it yourself fur vest - pattern
- How to sew a fur vest with your own hands? Step-by-step instruction
- How to sew a vest from a fox with your own hands?
- DIY knitted fur vest
- How to care for fur?
- DIY faux fur vest
- Stock footage
Recently, fur vests have become very popular, because you really want to wear cozy and stylish fur not only in winter, but also in autumn and spring. A fur vest can be thrown over a dress or turtleneck, while not ruining the sophisticated look on a cool evening. This garment is universal, as it fits both trousers and jeans. Today we will tell you how to sew a vest from fur with your own hands inexpensively, quickly and originally. Believe me, it’s easy to sew such a thing, since it does not have pockets, and most importantly - sleeves and complex processing of the fastener. If you adhere to our recommendations, then a fur vest, hand-sewn, will look no worse than the purchased one and will cost several times less.
to contents ↑What fur is suitable for sewing a vest?
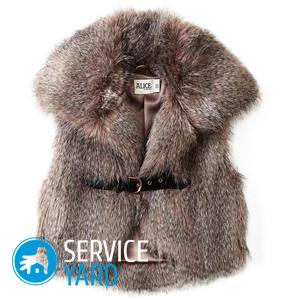
Fur vests are back in fashion, which is understandable. Beautiful, comfortable, stylish products from mink, fox, rabbit or faux fur are suitable for women of any age. The vest is very comfortable to wear in the offseason when damp and cool. A universal wardrobe item can be worn on an evening walk, or on a trip out of town. Women driving fur vests were especially appreciated. That is why in recent years, the beautiful half of humanity has increasingly been wondering how to sew a vest from fur with our own hands from existing skins or from old fur products. However, you can even sew a vest made of faux fur with your own hands.
Important! Working with fur is a painstaking and difficult process. It is better for beginners to start with the option of sewing a product from an old fur coat or skins available in the house.
A few nuances
If you think that you will build a unique product by cutting off the sleeves and shortening the fur coat, then you are mistaken, because such a thing will not look good.
Important! It must be remembered that the condition of the pile on the collar and on the shoulders worsens the most from the sock.
To sew a fur vest with your own hands:
- First you need to completely disassemble the fur coat.
- Then select the areas of fur that look best.
- From the selected pieces and should be sewn a new product.
Shoulder seams and armholes “go around”, as they wear out the most. Do not use the old lining and insulation of the fur coat - buy a new contrasting lining and a lightweight modern insulation. They “refresh” the fur sleeveless jacket.
Important! Of course, a vest made of natural fur will look best. It is soft, warm and looks respectable, elegant. But if you decide to buy fur for sleeveless jackets and never sewed anything like that, then it is better to contact the studio so as not to spoil the expensive material.
Advice:
- Before deciding to cut existing skins or a fur coat onto sleeveless details, check their condition. Connect a furry seam over a small area of the fur and try to break it.
Important! If the seam is torn from the slightest effort, then despite the fact that the pile is well preserved, you should not waste time sewing vests from such material.
- It is necessary to check the condition of the fur, especially if you want to sew a product from an old fur coat.
- Make sure that the skin tissue is not loose or brittle.
to contents ↑Important! The most short-lived types of natural fur are rabbit and nutria. Such material sometimes breaks even at the touch of a needle, so a vest from a rabbit with your own hands may not work. It is best to sew a fur vest with your own hands using an old mink or fox fur coat if its fur is well preserved.
Tools for sewing a fur sleeveless jacket
Working with fur requires great qualifications and experience, as well as many special tools, including a sewing furrier machine. But if you firmly decided to sew an original and unique fur thing, then prepare the following materials and tools:
- Skins of fur.
- Stationery knife or blade.
- Measuring tape, pencil or pen.
- Comb for pile.
- Hammer and small carnations.
- Stapler.
- Wooden board for stretching skins.
- Fur needle and spool of thread in a suitable color.
- Tracing paper (for a pattern).
- Lining fabric. Choose a fabric or knitted lining (the yarn should be in the color of the fur).
- Insulation (optional).
- Gasket and adhesive materials to strengthen the neck, armholes and sides.
- Sewing accessories (buttons, hooks, lock). Choose accessories according to your preference and desire.
Do it yourself fur vest - pattern
First of all, you need to build a pattern. To “fit” the pattern for yourself, measure the main parameters - waist, hips, shoulders, neck and arms. Next, follow the pattern on the tracing paper and cut out the details from the fabric. Allow seam allowances of 1-2 cm.
Advice:
- According to the pattern, the inside of the product is sewn. If you want the sleeveless jacket to fit perfectly, sew the parts before they are trimmed with fur to fit the shape.
Important! Do not worry if the pattern is not perfect - all defects will be hidden by volumetric fur. The most important thing is that the vest is not crowded.
- If you have an old jacket, suitable in volume and length of a future sleeveless jacket, then you can use it for a pattern. To do this: Vaporize the sleeves, adjust the width and length, trying on yourself, and distribute the product at the seams. This method of constructing a pattern is quite primitive, but reliable. And since you will cut expensive natural or artificial fur, you cannot make a mistake.
- When placing tracing paper on the material, consider the fact that the fur should be directed exclusively downward. In addition, if the pile is heterogeneous in color, then carefully select adjacent skins by color so that the seams are not noticeable.
How to sew a fur vest with your own hands? Step-by-step instruction
Now we proceed directly to the process of creating a new thing. This creative work is carried out in several steps.
Step 1. Stretching the fur
Before cutting the skins, it is necessary to stretch the fur. Proceed as follows:
- Moisture (skin cloth) moisten a little with water.
- Stretch the material on a wooden surface (plywood possible) with a slight tension.
- Nail the edges of the skin tissue with small postal cloves (push pins) or a stapler.
- Give the material time to dry. Dry the stretched fur at normal room temperature for a day.
- Remove the skin. It should be even and smooth, connecting seams should not be visible.
Now you can transfer the pattern of parts of the product to the material.
Step 2. Cutting the fur:
- Lay the skins on a plastic table with the fur down.
- Pin the pattern to the leather fabric.
- Mark up with a gel pencil or pen.
- With a clerical knife or blade, cut out sleeveless details.
Important! Cut the skin with short sharp movements, preferably on weight, so as not to damage the pile. The skin of the skin should remain intact, so first practice on unnecessary pieces of material in order to learn how to carefully cut the fur with a knife.
Step 3. Sew the fur
It is necessary to connect fur parts to each other with a special manual furrier seam or with the help of a furrier machine. To make a furrier seam on a typewriter, the skin at the seam place is folded inward, gently tuck the hair inward (with a finger or awl) and sew the edges of the leather fabric over the edge. This “double piercing" technique provides high bond strength.
Important! Do not try to stitch the skins on a sewing machine, as the fur structure will not withstand such an impact. If not immediately, then after a while, the seams will necessarily tear at the puncture sites with a needle.
Several recommendations will help you to complete the necessary steps at this stage clearly and accurately:
- Before starting work, fold the parts and make sure that they are ideally suited for the shade and length of the pile. If one skin has longer fur, place it with a slight upward shift to hide the differences.
- When stitching parts, the hairs must not fall into the seam. If the hair fell into the seam when joining the skins, then gently pull it out with an awl from the stitch.
- Combine the skin joint with a metal brush, and then the joint can be distinguished only by the shade of the sections connected to each other.
Step 4. Sew the lining:
- Sew the lining on a regular machine and iron.
- Sew the seams on the fur with a hammer or press down with the back of the scissors.
- Fold the fur and lining with the front sides and sew, leaving a small area on the back to turn the product.
- Carefully twist the product, sew the left hole with hidden stitches.
- Smooth the seams under the lining on the fur with your hands. Ideally, the joints should not be noticeable.
- You can complete the finished product with hooks, buttons or a belt. This is a matter of taste and preference.
to contents ↑Important! Wear the product over cardigans, sweaters, and golfs. The main thing is that the clothes are combined in color. The fur vest will look equally good with skinny jeans, leather pants and a sheath skirt. However, it should be noted that the fur itself looks quite bright, so the optimal choice is muted dark tones.
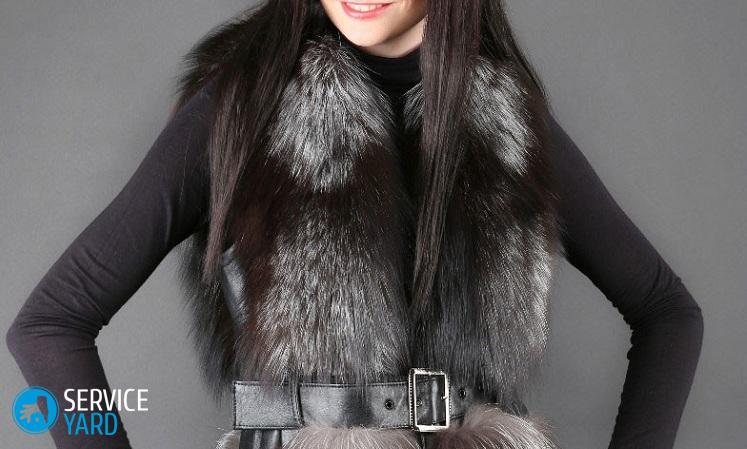
How to sew a vest from a fox with your own hands?
A fox vest will require a minimum of 4-5 skins (not short, but long).
Important! It is very important that all skins are of the same color and have no marriage, as bald spots can ruin the whole work.
How to sew a fur vest with your own hands, having patterns, we described above. Here are just a few recommendations for assembling a fox product:
- Choose fox skins carefully. In appearance, the skins can be the same, but the length of the pile and shades can be different. For example, the back of a fox may have a brighter hue than the abdomen. Carefully look at the cooked patterns and check them on the skins.
- A wet fox skin can be slightly expanded and even slightly extended if, for example, the armhole of the shelf does not pass slightly. Remember, expanding the skin is much easier than extending it. Keep this in mind when superimposing product parts.
- If you choose the right fur (the same shade and length of the pile), then the longitudinal connecting seams will not be visible at all. If you want to grow and lengthen the skin, then the seam will be noticeable. Therefore, carefully select the pieces according to the color and length of the pile.
- Since fox products are visually stout, use leather or suede inserts on the sides of the tank tops to attenuate this effect. A vest made of fur and leather with your own hands will look spectacular. From leather, you can sew a sleeveless belt and other finishing details. For example, if you use a zipper, then on the edge of the side you can put leather parts. One vest will require 60-70 cm of leather or suede.
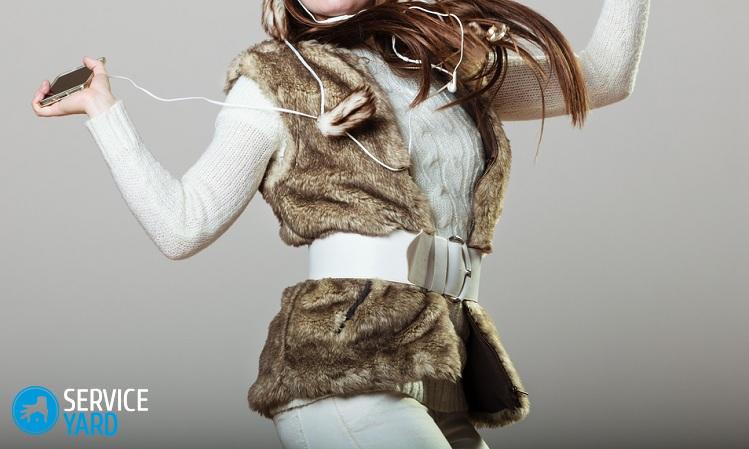
DIY knitted fur vest
If for the manufacture of a fur vest special tools and experience with skins are needed, this is not necessary for a knitted sleeveless jacket.The essence of this method is that a ready-made knitted vest from knitwear is taken as the basis of the product, and strips of fur are simply sewn or threaded through loops, forming a fur fabric. You only need to cut the fur into strips, and thanks to this method, simply and quickly make a completely unique sleeveless jacket, combining colors and material.
to contents ↑How to care for fur?
To make the product from natural fur last as long as possible, adhere to the following recommendations:
- Keep the fur in a dark place. Sun rays and heaters negatively affect the structure of the material.
- The fur should hang freely and not be crushed by other things.
- Do not use hair spray and perfume near a fur product. Tobacco smoke is also harmful to the product. It is extremely difficult to remove the smell of caustic from fur products.
- Do not use a hairdryer or other heaters to dry the product. Shake wet fur and let it dry under natural conditions. After that, lightly comb the hairline.
- If the fur is dirty, then remove the stain with a mixture of salt and ammonia in a ratio of 3 to 1.
DIY faux fur vest
Sew a warm, comfortable and fashionable thing from faux fur. We invite you to create your own model of faux fur and leather belt products.
To make it you will need:
- Faux long pile fur (70 cm).
- Thick lining fabric (70 cm).
- Sharp scissors.
- Needle and thread in color.
- Leather for the belt.
Step-by-step instruction:
- Prepare a vest pattern (2 shelves and a back).
- Lay out the pattern details on the material, secure them with pins.
- With sharp pointed scissors, carefully cut the product parts. Thread only the fabric base, slowly cut the material so that the entire pile remains and does not cut off.
- Sew side seams.
- Cut a leather belt across the width of the product. Fold it in half and sew.
- Sew the belt into the vest. You can sew pieces of fur on the subject of the accessory, as if the belt was inserted into the vest.
- Put the product on the lining fabric, circle, cut.
- With the front sides, align the fur product and the lining.
- Sweep the lining (except for shoulder seams). On the back, leave an unstitched section for eversion.
- Sew the strap from the lining fabric, insert it into the leather belt. Make incisions, stick out the fabric strap a little.
- Sew the lining to the vest, leaving holes on the front walls in order to push the fabric belt in.
- Turn out the vest, spread the lining.
- Turn the vest out through the bottom on the back, stitch the fur with the lining with one seam.
- Unscrew the vest, sew the bottom of the back with a hidden seam.
- Sew fur pompons on the belt.
Stock footage
As you can see, you can sew a vest for autumn colds from any fur and even artificial fur. The main thing is desire and patience. We hope that our tips have helped you create a unique, warm, beautiful vest. And at what time of year and with what things to wear it - you really decide for yourself!
- How to choose a vacuum cleaner taking into account the characteristics of the house and coatings?
- What to look for when choosing a water delivery
- How to quickly create comfort at home - tips for housewives
- How to choose the perfect TV - useful tips
- What to look for when choosing blinds
- What should be running shoes?
- What useful things can you buy in a hardware store
- Iphone 11 pro max review
- Than iPhone is better than Android smartphones
 (No ratings yet)