How to decorate a knitted hat with your own hands?

There is a knitted hat in almost every wardrobe. However, not everyone likes to wear it - knitted hats without any decorations look somewhat rustic. But you can even turn the most uncomplicated beret into an attractive, and even vintage little thing, if you make a little effort. How to decorate a knitted hat with your own hands? There are many ways, and new ones are constantly appearing. We’ll talk about some simple options.
to contents ↑Caps, stockings, berets
Among knitted patterns are especially popular:
- stocking cap:
- hat with a lapel;
- beret;
- kepi;
- a hat;
- earflaps.
Any of them will look original if you come up with an interesting decoration for a knitted hat and make it qualitatively. But you need to consider the type of mating:
- very large;
- large;
- small hand;
- small machine.
Important! Products associated with a very large viscous, as a rule, do not need additional decoration - well, unless a pompom, a brush or ears can be attached to a hat with a lapel, and “scatter” sequins or beads on a mohair beret. Coarse knitting in itself can be very decorative.
The greatest chance to show their creative abilities is provided by products made by small hand or machine viscous. Here everything is permissible.
to contents ↑Talk about materials
Puzzled by the question of how to decorate a hat, first of all look into your needlework box. Maybe there are:
- the remains of yarn in different colors;
- pieces of fleece or other soft tissue;
- pieces of fur;
- rhinestones;
- Chains
- veil or tulle;
- pieces of skin;
- beads;
- beads.
In addition, you will need some additional materials and the most common tools:
- cardboard;
- needles for embroidery;
- scissors - manicure and sewing;
- blade;
- compass;
- glue for rhinestones;
- glue for the skin;
- paints for the skin.
Let's start with pompons
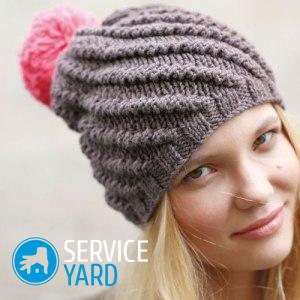
The easiest way to decorate a knitted hat with your own hands is to sew a pompom on it. This option is suitable for almost any hat - well, perhaps the pompom on the hat will look a little strange.
You can make one big fluffy ball and attach it to the crown, or you can make several small ones. They are attached on a lacing (it is possible from the same threads) to different parts of the cap:
- top beam;
- two bundles in the manner of a jester's cap;
- one at a time in random order.
Making pompom
To begin with, in any case, you need to make the pompom itself. To do this, take two identical pieces of cardboard. For a large pompom, pieces of about 10x10 cm are suitable, for small ones - at your discretion, but not less than 3x3 cm, otherwise it will simply be inconvenient to work with them. Farther:
- Put the pieces of cardboard together.
- Draw the largest circle you can.
- From the same center, draw a different circle, smaller (for example, if the diameter is 10 cm large, then 6 cm small).
- Cut out the ring.
- Tie a ball to the ring - it should be of such a size that it can freely pass into the hole.
- Wrap the ring with threads, laying the turns close to each other.
- When the row ends, tear the thread, but so that the tail remains 10-12 cm long.
- Thread the tail into the large-eye needle.
- Pass the needle under the turns in a small circle, pull it slightly.
- Cut the turns in a large circle.
- Tighten the thread going in a small circle, tighten it tightly.
- Sew a large pompom to the cap with threads matching the tone of the product.
If you have small pompoms, laces can be tied to them. These are just chains of air loops. Nothing prevents and weave them in the form of ordinary braids of three strands, or use a ready-made braid that matches the color.
to contents ↑Important! The pompom can be both monophonic and motley. In the second case, apply layers to half the ring, tear the thread, tie another ball and continue the process.
Tassels
Also a simple but effective way to make jewelry for knitted hats with your own hands. The brush is made even easier pompom. The most important thing is that the edge is smooth, so you need to do this:
- Take a small strip of cardboard (for example, 3x5 cm).
- Wrap it with threads so that the turns lie down in length and tight enough.
- Make 2-3 layers of turns.
- With a needle with a thread threaded into it, grab the bundle along one of the short sides of the strip and pull it well.
- Cut the coils along the second short side of the strip.
- After that, you just have to sew the brush to the lace, which is done in the same way as for a pompom - or used ready-made, from fabric or leather.
Sew chain
An interesting option, how to decorate a hat with your own hands, will tell a metal chain.
Important! This method is suitable for making caps with a cap, a hat or a hat with a lapel.
In this case, the chain does not have to cover the whole head. It can be only in front, only on the side, or arranged in fragments around the entire circumference. To make such a decoration for a knitted hat with your own hands:
- Arrange the fragments of the chain as they will lie.
- Mark where the starting and ending links of each piece will be.
- Sew short pieces for the first and last links.
- If the chain is long, you need to grab it in several more places.
to contents ↑Important! Between the fragments, you can sew on matching colored beads or buttons fitted with knitwear. A chain on a lapel or a circle does not at all interfere with a stylish pompom or a flirty button on the crown.
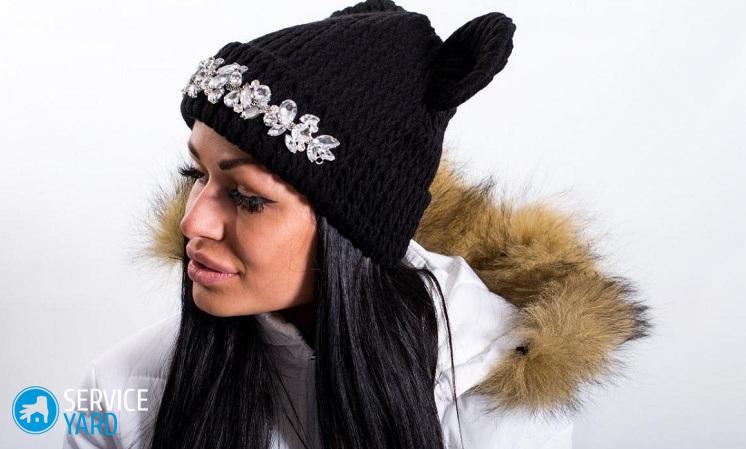
How to decorate a hat with rhinestones?
You can decorate a hat of any type with rhinestones - crystals imitating precious stones. You can buy them at the sewing store. There you will be sold both glue and a hoop, which in this case will be very convenient.
Important! In fact, in the store you can find rhinestones with an adhesive layer and without it. The first option for decorating knitwear is not very suitable, since not every knitted thing tolerates heat well. However, for fine machine knitting products, such an option is also suitable. In other cases, it is better to use special glue.
Before decorating the hat with stones, select the appropriate glue. Not suitable:
- formulations containing acetone;
- silicones with acetic acid;
- acrylic dispersion.
Important! Such adhesives do not hold rhinestones very well, and besides, they spoil their appearance.
Having picked up suitable glue, get down to business:
- Come up with an ornament - it can be a vegetative, geometric or just an alternation of stones of different types.
- Draw a life-size ornament on the sheet - you can simply outline the places where the rhinestones will be.
- Transfer the pattern to the cap - pencil sticks very poorly on knitwear, so take a sheet with a pattern, and then outline the place with a needle with a thread of contrasting color.
- Hoop the knitwear by pulling it slightly so that the place for the rhinestone is even, but the cap does not lose shape.
- Glue the rhinestones according to the instructions on the packaging of the glue.
to contents ↑Important! The pattern can only be made of stones. But artificial crystals work well with embroidery or applique.
Decorate the hat with ears
On a children's or youth hat with a lapel, ears look great - cat, hare, squirrel, foxes. They are made very simple. They can be:
- knit from yarn of the same quality;
- sew from fur.
In addition to the main material, you will need:
- pieces of wire;
- thread and needle;
- cardboard;
- ruler;
- ball pen;
- chalk or soap.
Option 1
Fox or cat ears are just triangles of fur matching in color. We design them according to this scheme:
- Make a piece of cardboard, for example, an equilateral triangle with a side of 6-8 cm.
- On this triangle, cut 4 blanks from the fur - no allowances should be left, you can sew between the seams on the front side with a seam “over the edge”.
- Sew the blanks in pairs, leaving one edge open.
- Bend 2 triangles from the wire along the cardboard pattern.
- Insert the frames into the ears.
- Sew the ears to the hat.
Option 2
Triangles can also be knitted. It is best to make them from the same wool as the hat itself. It is more convenient to crochet:
- Tie a chain of 20 stitches.
- Make a row of single crochet in each column of the chain.
- Starting from the second row, do not knit 2 columns in each row to the end.
- Knit until one loop remains, tighten and tear the thread.
- Tie the second triangle.
- Fold the parts, tie them around the perimeter with half columns or single crochet.
- Inside, as in the first case, you can insert the frame.
Option 3
The ears of a bear, mouse or Cheburashka are simply circles of the appropriate size. They can be sewn or crocheted, while the frame is not required to be inserted inside.
to contents ↑Applique
The applique looks great on a knitted hat. It can be:
- flower arrangements;
- fancy patterns;
- faces of animals.
Important! Elements can be knitted from the remnants of yarn, but pieces of suitable fabric texture, for example, fleece or fine cloth, are also suitable. If you make an ornament with repeating elements, it is better to first make a pattern, on which and cut out all the same fragments.
Cat, fox or bunny
The animal face consists of several elements. Need to do:
- eyes;
- iris;
- pupils;
- nose;
- mustache pads;
- mouth.
Important! You can get by with a completely stylized option - sew only eyes. It is best to find a suitable stylized image of the animal's face and take a section of the eyes from there.
We decorate a children's knitted hat:
- Cut your eyes out of white fleece or cloth.
- Cut out irises - it's just circles of green, bright yellow, blue or brown.
- Cut out the pupils - black circles or stripes (for a fox, for example).
- If you make a nose, cut out a triangle of black, brown or pink.
- The whisker pads are circles and the mouth is an obtuse triangle of red or pink.
- Mark the places where you will sew the details of the face - the eyes should be approximately at the same level.
- Sew the iris and pupil using black threads.
- Sew the contour of the eye and the iris with threads in the color of the iris.
- Keep your eyes on the hat.
- Sew them in black thread using the “over the edge” seam, stitching the stitches as tight as possible to each other.
- Sew pillows of whiskers with thread to match the details, and mouth with red ones.
Hat with a veil
Ten years ago, this could not have occurred to anyone. To a knitted hat, yes with a veil? But now is the time when you can decorate both a knitted hat with brim and a hat with a lapel.
You will need:
- finished veil or a piece of transparent fabric 25x60 cm;
- threads in tone with a hat and veil;
- needle.
Important! For such work, of course, a ready-made veil is preferable, but in general any transparent fabric that passes air well is suitable. The veil can cover only the face or be located around the entire circumference.
Option 1
Sew the finished veil along the upper cut with a basting seam, in small stitches:
- Gather a little.
- Sweep to the cap from the wrong side.
- Try and stack the assemblies to make them look beautiful.
- Sew the veil with threads in the tone of the cap, the cut should be at the back - it can be sewn up or left as is.
Option 2
If you just have fabric, cut a rectangle of the right size out of it:
- Determine which side will be sewn to the cap.
- Make a basting seam and assembly.
- Sew on the part.
to contents ↑Important! You can decorate the veil, for example, with beads or embroidery, but try not to overload it with decorative elements.
Roses and daisies
A flower is a popular decoration for a knitted hat. It can be embroidered, made using the applique technique, but it can be done separately and sewn.
Option 1
It is very simple to make a flower if you know how to crochet at least a little:
- Tie a chain of 40-50 stitches.
- Make 3-4 rows of double crochet in each column of the previous row, at the end of the last - tear the thread.
- In the row from which you started (that is, through the air chain), lay the basting stitch with the same threads, tighten and fasten the knot - the flower is ready.
Option 2:
- Tie a chain of 10 loops and lock it into a ring.
- Make 2 loops to climb.
- Tie a row of columns into a ring so that they fit snugly together.
- Knit a row of double crochet into the columns of the previous row.
- Knit a row with half columns.
- Sew the flower to the hat.
- In the middle, you can sew a bead.
Option 3
You can connect the elements of flowers, and then make up a pattern from them. For example, an apple tree flower is five small circles, a clover leaf consists of three circles, a chamomile is a strip (air chain), etc.
Important! You can use mixed techniques - tie and sew the petals, and stitches - embroider with a looped or stalked seam.
Option 4
How to decorate a knitted hat with your own hands? It’s great if there are pieces of fleece, felt or cloth - in general, any material that does not show off the edge and which holds its shape well.
Important! A suitable picture can be found in any book on stitch embroidery or applique. It is better to transfer the pattern to the fabric, of course, using carbon paper (sold in sewing stores), but it is also possible by spraying.
The procedure is as follows:
- First, assemble a complex flower from several parts into one blank.
- Sew it to the hat.
- Sew additional decorative items (such as beads or pieces of leather).
- Embroider the remaining elements - antennae or stems.
What else to come up with?
Decorating the hat with beads is quite simple. It is necessary to pick up beads of a suitable shape and size (from natural stones, plastic or wooden) and sew them firmly with threads to match. In this case, you can make an ornament, or you can arrange them in random order.
Lace
Knitted hat - and lace? Why not? Of course, synthetic white lace, which is sewn to nightgowns, in this case will not work. And here:
- Knitted or made using tatting technique from the same wool - very good.
- A contrasting lace strip on the cap of the cap or the lapel of the cap will look spectacular.
- With a thin lace strip you can sheathe the field of the hat. A hat with a tulle decorated with lace circles in the Brazilian style will also look interesting. By the way, the same circles, which are made with just a piece of paper, a compass and a needle, look spectacular on a stocking cap, knitted with small handmade or machine knit.
Stock footage
Are you convinced that decorating a knitted hat with your own hands is very simple, there are a myriad of ideas? Now it's time to act! Once again, go over all the ideas, correlate them with what skills you have and in what style you prefer to dress, and then it's a matter of technology. Good luck
- How to choose a vacuum cleaner taking into account the characteristics of the house and coatings?
- What to look for when choosing a water delivery
- How to quickly create comfort at home - tips for housewives
- How to choose the perfect TV - useful tips
- What to look for when choosing blinds
- What should be running shoes?
- What useful things can you buy in a hardware store
- Iphone 11 pro max review
- Than iPhone is better than Android smartphones


