

How to seal boots?
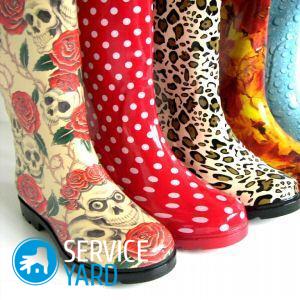
In a holey shoe, a person feels extremely uncomfortable, even if the puncture is not visible from the outside. This, of course, is an excellent occasion to buy new boots, but such an opportunity is not always there. But even if it is - do not rush to throw out the spoiled pair. It may well be that she will still serve. How to stick on boots? Read about it in our article.
to contents ↑What kind of shoes are torn?
It's no secret that repairing rubber boots is different from repairing leather boots, but it has some similarities with sticking on PVC shoes or waterproof material called “EVA”. Leather shoes can sometimes be sewn up, and this is better than putting a patch on the glue, but nothing similar can be done with rubber - glue, only glue, and no extra punctures!
The repair method may also depend on in which part of the boot a hole is found:
- in the sole;
- the top peeled off from the sole;
- on the smooth part of the top;
- on the top;
- at the seams.
Are there any prospects?
- The first option is the hardest. The sole rubs and experiences severe mechanical stress, so the connection must be strong. Most often, a hole appears because a person has stepped on a nail or something like that.
Important! It is possible to seal the gap, but it is unlikely that it will be possible to make it so that the boot lasts for several more seasons. In extreme cases, they will last a month.
- The peeled off top is also a bad option. Friction is less, mechanical loads too, but they are enough to make the newly repaired shoes fall apart after a couple of times. Better - if there is even the slightest opportunity to sew the top to the sole at least in this place.
Light damage
- The hole on the smooth part of the top and the top is usually sealed quite easily and the patch costs a long time. In this case, it is very important to choose the right glue. This is especially true if there is a hole in the bottom that gets water and dirt.
- A hole in the shaft appears if you run into an armature sticking out of the ground or run into a nail that has come out of a wall. In this case, there are almost no mechanical loads on the gluing place, so you can think about aesthetics - make a patch that will not be very noticeable (or vice versa - turn it into a decorative element).
- A broken seam is also repaired quite simply. This defect is typical, of course, for leather shoes or leatherette boots. The seam will hold better than gluing.
Repair leather boots
Expensive model shoes are best taken to the workshop. True, repairs are sometimes more expensive than a new pair, so each case must be approached individually. But a patch overlay on the upper part can be considered a minor repair, so it will cost relatively inexpensively.
to contents ↑Choose glue
The first thought that comes to mind when you need to glue a small but important detail is to use superglue. In this case, it is better to discard this idea immediately. The glue, of course, dries quickly, but it affects the structure of the skin or leatherette badly, the place of gluing becomes fragile.
Important! When you try to walk in boots repaired in this way, the hole will simply increase and its edges will become brittle.
Professional glues suit you:
- “Dismacol”;
- "Nairit."
These are the compounds used by professional shoe makers. They are not always on sale, and it is best to look for them in stores where they sell leather trimmings and other goods for decorative and applied arts. If there is no such specialized store nearby, you will be helped by the “Moraton Moment” or other elastic composition.
to contents ↑Important! Before you start work, be sure to read the instructions and act in strict accordance with it.
If the seam is on the boot
In this case, you will not need glue at all. You need:
- thick kapron threads;
- needle;
- awl;
- plank;
- blade.
Important! An awl and a board are needed just in case the needle does not go into the existing holes.
Sew:
- Additional holes do not need to be done, they reduce the strength of the product.
- Gently blade support the lining.
- Pass the thread into the needle, fold it in half and make a knot at the end.
- Insert the needle from the wrong side into the outer hole.
- Pull the thread to the front side.
- Insert the needle into the outer hole on the opposite side of the seam.
- Pull the thread so that the stitch on the outside becomes flat, but do not pull it too tightly - the nylon thread can tear the skin.
- Insert the needle from the wrong side into the second hole from the side from which you started sewing.
- Make the second stitch - into the second hole on the opposite side.
- Having finished the seam, bring the thread to the wrong side and fix it in any convenient way (you can even melt it).
Glue the seam
Many modern models look like stitched, but in fact the seams on them are purely decorative, and gluing provides strength. In this case, stitching the hole is useless. It’s better to act like this:
- Cut 2 strips of leather 1 cm longer than the hole.
- Glue them to each side of the seam so that an allowance of 0.5 cm remains.
- Glue stocks together or sew with nylon threads.
Top torn in a smooth place
The most unpleasant option is that any patch pasted outside will be perfectly visible. There are two options:
- stick patch inside;
- stick on the outside, making an application,
Important! In the second case, another boot will have to be repaired, even if it is completely intact. Therefore, the skin on the patch needs twice as much.
Option 1
A piece of skin pasted from the inside comes into contact with the foot and may begin to rub. Therefore, the patch should be made of thin skin or even of waterproof fabric:
- raincoat fabric;
- Bologna
- Adviser.
But the size of the flap can be anything. To seal the boots, proceed as follows:
- If possible, turn the boot with the wrong side out.
- Cut the patch so that it completely covers the puncture and there are still allowances on all sides.
- Apply glue around the hole 3-5 mm from the edge.
- Apply a patch on the wrong side.
- Join the edges of the hole and press.
- Turn the boot to the front side.
- Lubricate the edges that are not stuck, gently with glue (you can use a cotton swab).
- Press the edges firmly.
- Remove excess glue immediately.
Option 2
It is much simpler than the previous one, because all the work is done on the front side:
- Cut 2 identical leather details - in tone or contrasting.
- Lubricate them with glue.
- Close the hole with one piece, and glue the second symmetrically to the second boot.
Torn sole
In this case, a tube of glue and a small piece of skin will not work. You will also need:
- skin;
- acetone or white spirit;
- wire or elastic bandage.
Before sticking boots at home, put them in order. Shoes should be clean and dry.
Farther:
- Clean the gap from old glue.
- Walk on it with a fine sandpaper.
- Degrease surfaces with white spirit or acetone.
- Apply glue according to the instructions.
- Press the parts firmly against each other - they can be wound with wire or bandaged with an elastic bandage.
- Wait for the glue to set - this usually takes a day.
Sole hole
If you stepped on a thick nail, the shoes will also have to be sealed. You will need:
- epoxy resin;
- patch material;
- scissors or a sharp knife.
The place of the gap is best filled. Epoxy is suitable for leather soles and for plastic:
- We bring the composition according to the instructions on the package.
- Fill the hole.
- Let harden.
- We close the puncture site with a patch or insole.
How to care for leather boots?
No one is safe from some damage - anyone, even the most accurate person, can fly into a reinforcement or a nail. But sometimes the boots crack and tear simply from improper care:
- After you come from the street, put your shoes in order - clean from dirt and dry.
- Clean your leather boots with cream regularly.
- Periodically lubricate shoes with castor oil.
to contents ↑Important! If you need to put boots or shoes on long-term storage, do not forget to stuff them with napkins or newsprint. Napkins will help you out when drying - by filling them with the socks of your boots, you can be sure that the shoes will not lose their shape.
How to fix rubber boots?
It seems to many that repairing rubber boots with your own hands is impossible, it is better to immediately throw it away and buy new ones. This is not entirely true. Shoes will last you a very long time if you carefully glue it, and before you get down to business, follow a few simple steps:
- Wash your boots thoroughly.
- Dry them well.
What to make a patch from?
There is always a patch of leather in the house of the needlewoman, but where can I get a piece of rubber? Nothing complicated. You will be helped out:
- old bicycle tire;
- old rubber boots;
- hammer;
- a flap of rubberized fabric.
You still need rubber glue (you can use universal shoe glue if you can get them), as well as sandpaper with a fine fraction or a file.
Important! Rubber gloves or old rubber toys will not work for you: the first ones are too thin, and the second ones are made of another grade that is stratified.
Getting Started Repair
The rubber patch can be cut just with sharp scissors. It should be bigger than a hole, but not by much. Unlike leather shoes, which sometimes diverge simply because the threads are rotted, a hole on rubber boots appears most often from mechanical damage. Therefore, you can easily encounter a situation where a piece is simply torn out and it will not be possible to align the edges.
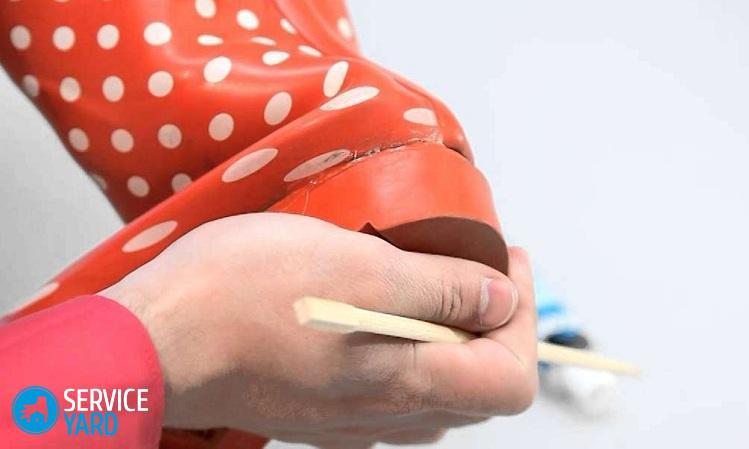
It is better to glue on the front side, acting in this way:
- Cut the patch.
- Treat the underside of the workpiece with a sandpaper or a file - this is necessary so that the surface becomes rough, then it will hold on better.
- Wipe the surfaces to be bonded with acetone or white spirit.
- Lubricate both surfaces with glue according to the instructions.
- Press the patch firmly to the boot.
- Tap the place of gluing with a hammer.
- When everything is dry, walk along the seams with sandpaper to make the gluing place uniform and mask the patch.
How to glue PVC boots at home?
In everyday life, all boots made of waterproof materials are usually called rubber. However, this is not the case. For the manufacture of such shoes are used and PVC, and polyurethane, and "EVA".
The repair technology in all cases will be the same as when working with rubber, but another glue is needed. It should indicate what kind of material it is intended for. And, of course, when buying boots it is very useful to remember what they are made of - there may not be markings on such products, but they are usually on the price tag in the store.
Repair without a patch
Waterproof shoes can be repaired without a patch:
- Turn the edges of the hole out.
- Lubricate them well with glue.
- Press the edges against each other so that there is no gap between them.
We use a repair kit
If you have rubber boots in which you go hunting or fishing - buy a regular bicycle repair kit, with it you can repair shoes in the field.The kit has ready-made patches on special protective films. In addition, there you will find glue (designed specifically for this material), and a piece of sandpaper of the desired fraction. The boot is sealed in the same way as a independently cut piece of rubber, but you do not need to degrease the patch, because it has a protective film on it that needs to be removed.
Important! A hole in the sole is sealed in the same way as in the bootleg.
Women's rubber boots
Rubber boots are not only worn by hunters and fishermen. They can be seen on the capital's fashionistas. However, stylish boots are torn no less than those in which lovers of extreme relaxation go.
But in this case, it is important that the gluing place is not noticeable, and the boots retain their attractive appearance. Silicone sealant will help you out:
- Degrease the bonded area with acetone or another compound.
- Lubricate the edges of the hole with sealant.
- Press them firmly against each other.

Vulcanization
The most reliable way to repair rubber shoes. But it requires determination, certain skills and special equipment - a vulcanizer:
- The flap, before sticking, you need to hold a little gasoline.
- Apply a patch to the hole.
- Clamp the entire structure with a press.
- Turn on the vulcanizer and let it run for about half an hour.
- Turn off the vulcanizer.
- Let it cool completely.
- Remove the press.
Two words about leaving
Rubber boots - unpretentious product. However, it also needs care:
- After you take off your boots, wash and dry them well.
- Pay special attention to the lining - if it is not dry well enough, it will begin to rot and will tear quickly.
- Wipe rubber products from time to time with a cloth soaked in glycerin.
Stock footage
In this article, we told you about all the ways to repair boots from a variety of materials. Now, we hope that in any situation you can find the right solution and repair your shoes using improvised tools.
- How to choose a vacuum cleaner taking into account the characteristics of the house and coatings?
- What to look for when choosing a water delivery
- How to quickly create comfort at home - tips for housewives
- How to choose the perfect TV - useful tips
- What to look for when choosing blinds
- What should be running shoes?
- What useful things can you buy in a hardware store
- Iphone 11 pro max review
- Than iPhone is better than Android smartphones
 (No ratings yet)