

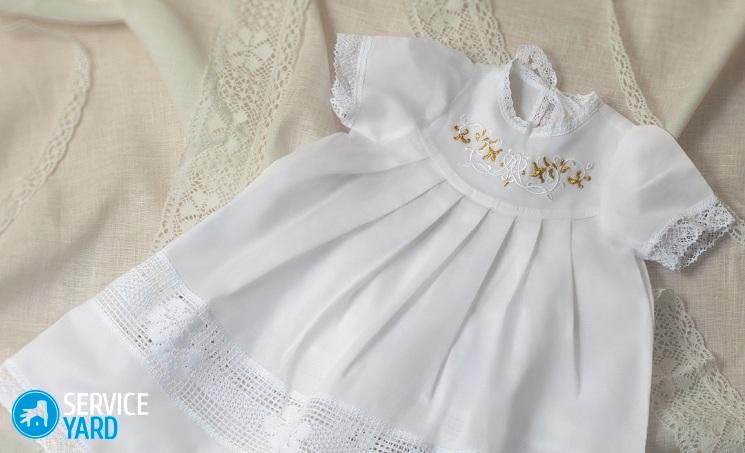
Baptism shirt for girls - do it yourself

Each family at the birth of the baby decides for herself at what age to introduce the child to the sacred sacrament of spiritual birth - baptism. For the baptism of the baby, you can buy a ready-made shirt, but, you must admit, the clothes made by your own hands have special value and significance. Today we will tell you what a christening shirt looks like for a girl. To sew such clothes with your own hands is very easy and simple. In addition, a shirt made with love and affection for the child will keep the whole warmth of my mother’s hands and the grace of Baptism.
to contents ↑DIY baptismal shirt
For those parents who decided to baptize a child in infancy, we picked up a simple pattern with a one-piece sleeve. For babies, the option of a shirt with a smell on the back is perfect.
Important! A baptismal shirt for a boy with his own hands is made according to the same patterns as for a girl, the only difference is in choosing the color of the product. Choose a finish that is modest and simple. Perfectly for this purpose, sewing or lace (not prickling) is suitable. You can embroider a cross and the initials of a child on the product using white or dim threads.
A baptism shirt for a girl with her own hands is made from natural fabrics. The following materials are perfect for this purpose:
- Calico
- Satin
- Batiste.
- Thin flax.
- White thin canvas.
You can sew a shirt for the baptism of a boy from the same natural fabrics.
For work, in addition to fabric, you will need the following materials and tools:
- Sewing machine.
- Scissors.
- Threads in tone.
- Paper for a pattern. You can use a sheet of A4 format (for large size A3), wallpaper, and even a regular newspaper.
- Pins
- Ribbon (lace) for decoration.
DIY baptism shirt for a boy (girl) - step by step instructions
To sew a baptismal shirt for a boy with your own hands, proceed according to the following instructions.
Step 1. Measure
To build a pattern, the following measurements are required:
- Chest circumference.
- Length of the product.
Step 2. Build a pattern:
- On paper, draw a rectangle with a width equal to the circumference of the chest, divided by 2, plus 2-5 cm to the seams and a length equal to the length of the product plus 1.5 cm to allowances.
- Set the sleeve width aside from the right corner of the rectangle. Calculate the width according to the formula: girth of the arm divided by 2, plus 8 cm. Set the length of the sleeve as desired (plus 1.5 cm - allowance for seams).
Step 3. Cut out the pattern
Before cutting the workpiece, attach it to the child (baby's clothes) to make sure that all measurements are made correctly.
Step 4. Transfer the product elements to the fabric:
- Fold the fabric in half.
- Attach a pattern so that the shoulder seams are aligned with the fold of the fabric.
- Pin the workpiece with pins.
- Circle the pattern.
- Remove the paper blank and chip the fabric.
- Calculate the neck using the formula: neck circumference divided by 4, plus 0.5 cm - seam allowance.
Important! The cutout should not be made too wide; it can always be enlarged after fitting.
- Attach the neckline to the fabric, circle and cut the blank of the shirt.
- Expand the fabric and fold it like a finished product.
- On one of the halves of the workpiece from the center of the neck, set aside 10 cm and make a cut.
Step 5. Sew the blank
Before you sew a baptismal shirt for a boy with your own hands on a typewriter, sweep it and try on.Eliminate all defects, determine the length of the sleeve and neckline. Then fold the shirt face down and sew the sides 1 cm from the edge.
Step 6. Process the seams and neck of the shirt.
Overcast the seams or use the zigzag function. To process the seams on the sleeve, first bend 5 mm from the edge, and then another 1 cm from the edge. Before sewing, iron and steam the seams. Sew a line close to the edge. Similarly, process the bottom of the shirt.
To process the neck, proceed as follows:
- Fold the edges 3 mm first and then 5 mm.
- Sweep the neck or secure it with pins.
- Sew the edges of the neckline.
- Make 2 cuts 1-2 cm in each direction from the central cut in the neck. The deeper the notch, the deeper the notch. At the corners, make an incision of 45 degrees and a length of 0.5-1 cm.
- Work the edges of the neck. First, bend the edges by 0.5 cm, and then bend more, focusing on proportionality.
- Sweep the edges of the neckline or pin with pins.
- Sew the edges on a typewriter.
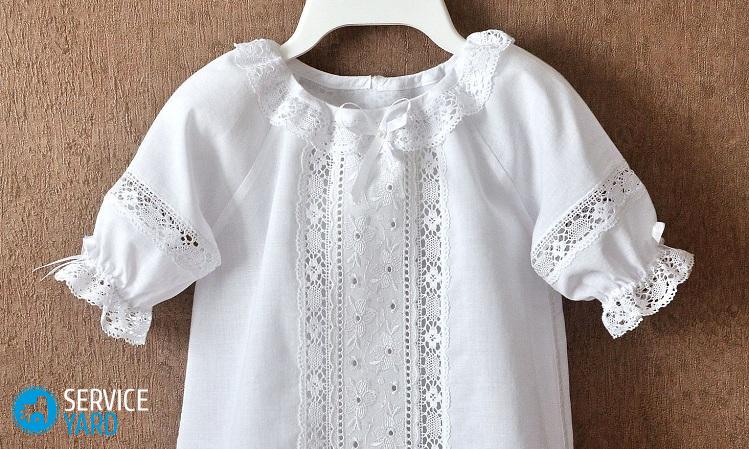
Step 7. Decorate the shirt
For decor, you can use ready-made lace or inlay (ribbon). Sew lace over the neckline, the edges of the sleeves and the bottom of the product.
Advice:
- You can also process the neck with a slanting inlay. Sew manually one side of the inlay first, and then the other. From the remains of a slanting inlay you can make a cross and sew it on the back. The bottom of the product and sleeves are better to be sewn.
Important! Sew on the tape carefully so that there is no movement during machine stitching.
- If you have prepared a lot of fabric and lace, then in addition to the shirt, sew a diaper (1x1 m), in which you will receive the child from the font. The shirt and diaper will look great in a single style.
Stock footage
Infants are usually baptized 40 days after birth. This is due to the fact that during the baptism of the baby and over the mother, a cleansing prayer is read, and until 40 days after birth, a woman should not enter the temple. You can attach a child to the sacred sacrament of spiritual birth at any time, and a baptismal shirt for a boy (girl) sewn with his own hands will help to keep the grace of Baptism for many years.
- How to choose a vacuum cleaner taking into account the characteristics of the house and coatings?
- What to look for when choosing a water delivery
- How to quickly create comfort at home - tips for housewives
- How to choose the perfect TV - useful tips
- What to look for when choosing blinds
- What should be running shoes?
- What useful things can you buy in a hardware store
- Iphone 11 pro max review
- Than iPhone is better than Android smartphones
 (No ratings yet)