

Dress wrap dressing gown 🥝 how to sew with your own hands
A dressing gown can be considered universal clothing. In fashion collections you will find a variety of models - from home to evening. But you should not think that you can order such clothes only in an expensive studio. If you ever sat down at a sewing machine, you can certainly do something interesting. To sew a dress a dressing gown with a smell, a pattern is not required. In an extreme case, any one will do, and it is very easy to model it for the desired style. All this is stated in the article.
to contents ↑Which model do you want?
Sewing a dressing gown with your own hands is no more difficult than just a dressing gown. But first, decide what kind of clothes you need:
- home
- everyday summer;
- everyday winter;
- business;
- festive or evening.
The choice of fabric depends on the nature of the model.
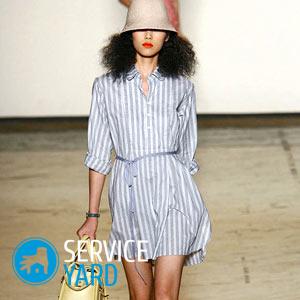
Home and summer
For home wear, depending on the season, chintz, satin, flannel, fleece are suitable. If you are going to sew a summer dress with a smell, the choice will be wider:
- thin cotton fabrics;
- gauze;
- linen;
- silk;
- crepe de chine;
- poplin;
- batiste;
- many other delicate materials that are often called paid in stores.
Important! For the first experience is good polyester - it is easy to sew, allows air to pass through, and besides, it is very cheap, so if you spoil it, you don’t mind. But a dressing gown with a smell is difficult to spoil.
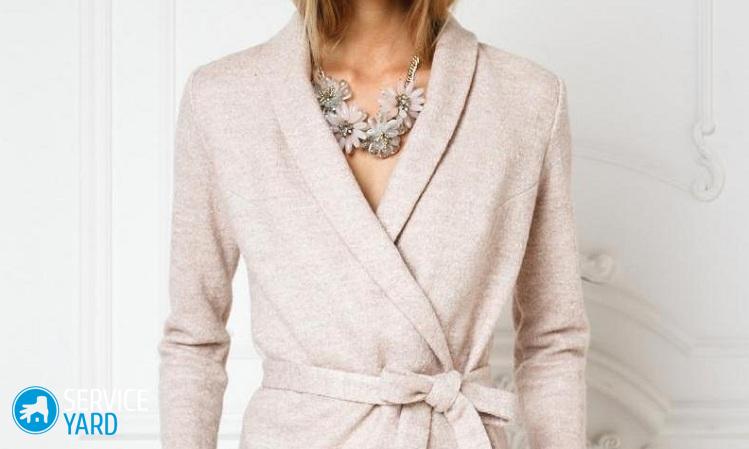
Business and evening dressing gowns
For business clothes, mixed fabrics, fine wool, any silk, knitwear are suitable, for the winter version - fine cloth. Finally, in the manufacture of festive and evening wear, you can give full rein to your imagination. Can be used:
- fine knitwear with or without lurex;
- velvet;
- brocade;
- all kinds of silk fabrics.
to contents ↑Important! If this is your first time undertaking such a thing, do not buy silk - you need some experience to work with it.
With or without a pattern?
If you are thinking about how to sew a dressing gown, it will be useful to understand how such models differ from dresses and gowns. Then you will quickly figure out what pattern is needed and whether it is possible to do without it at all.
In principle, a dressing gown can be:
- with a fastener;
- with imitation fastener;
- no clasp at all.
Dressing gown with a fastener
In fact, this is an ordinary bathrobe, only from a higher quality fabric. Most often, with fasteners, winter models are made of cloth, velor, velveteen, thick woolen materials. It is sewn on a dressing gown pattern, but loops are made, like a coat, and large buttons are sewn.
Important! A very interesting option may be a zipper. You can wear such a thing with a turtleneck or sweater.
Imitation clasp
At first glance, this is also a bathrobe. In any case, buttons are sewn on the front, and it seems that they are even fastened. In fact, this is just an imitation. Such patterns are also sewn most often by the dressing gown pattern. But you can use a dress pattern. This is part of the business and everyday wardrobe.
Important! Similar styles are also with a smell, when the clasp or its imitation is strongly shifted to the side.
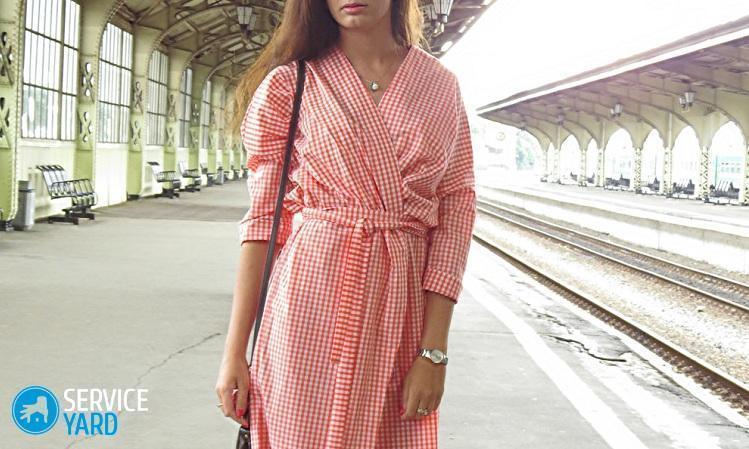
Without clasp
The most interesting styles of dressing gowns are with a smell when there are no buttons or zippers at all. Most often, the pattern of the shelf is a pattern, in which the waistline is extended towards the opposite armhole, and a long tied belt is cut to it. This is a universal style, so you can sew both home and everyday, and elegant clothes.
to contents ↑Pattern options
Since there are a lot of varieties of dressing gowns, different cutting methods are used:
- on the basic pattern, with all armholes and tucks;
- with raglan;
- one-piece without a pattern.
We start with a home model
How to sew a wrap dress with a wrap for the home? It’s better to start with the summer option - and the fabric is cheaper, and nothing particularly terrible will happen if you do something wrong. A pattern for such a model is not needed, everything can be done directly on the fabric. But if you are not very confident in yourself, you can make a pattern on the graph paper or on the back of the wallpaper remaining after the repair.
You will need the most common tools and materials:
- sewing machine;
- threads to match the fabric;
- basting threads;
- needles for machine and manual sewing;
- tape measure;
- long ruler;
- crayon or soap;
- square (best tailor's, wooden or metal, but also suitable for school).
As for the materials, you need, of course, the fabric, as well as the inlay of a suitable color (in tone or contrast).
Important! Instead of inlay, you can take a satin or crepe ribbon. Need a little button and two shoelaces.
Take measurements
First you need to take measurements. They are standard:
- product length (from the cervical vertebra to the hem section);
- hip girth;
- chest girth;
- neck circumference;
- armhole height (from the shoulder to the armpit, plus another 2-3 cm);
- distance from the bottom of the armhole to the waist.
Important! Divide all horizontal measures in half - in the patterns are usually used half-girths. Neck circumference divided by 4.
Fabric calculation
For a model with a short one-piece sleeve, it is extremely simple:
- If the fabric is wide (140-160 cm), 2 lengths will be required.
- If 70-100 cm - 3 product lengths.
The fact is that the shelf of this model is 2 times wider than usual, and the back has the same width as always.
Important! An additional 6-10 cm should be added to the calculated length for processing the bottom.
Cut
The cutting method depends on the width of the cut.
Option 1. For narrow fabric
The back of this model is a rectangle. Its width is equal to the width of the cut, and the length is to the length of the product, plus a strip for processing the bottom:
- Cut such a piece - you need to do this as carefully as possible so that the cut is strictly perpendicular to the edges.
- Determine where you will have the top and where the bottom.
- Divide the top cut in half, mark with a stitch or dot.
- From the mark on both sides, set aside a quarter of the circumference of the neck.
- Set aside 2-3 cm from these points on both sides, the main thing is that the distances are the same.
- From the corners between the top cut and the edges, set the height of the armhole.
- Draw a neckline - from the middle of the upper cut, lay down 2 cm down and connect this point with the edges of the neck with an arc.
Before in such a scheme consists of two parts and is as follows:
- Cut the exact same rectangle.
- Determine where he has the upper hand.
- Decide which side the sleeve will be on and the neck on which side.
- On the side of the sleeve from the upper corner, set aside the height of the armhole along the edge.
- On the other hand, on the upper cut from the corner, set aside a quarter of the circumference of the neck and a couple of centimeters (as much as they were laid on the back).
- On the edge on the side of the sleeve, set aside the distance between the bottom of the armhole and the waistline.
- Connect this point to the neckline mark with a straight line.
- Open the second shelf in the same way.
Option 2
The dressing gown is made of a wide fabric in about the same way - you need to get a rectangle for the back with a width equal to half the circumference of the hips with 10 cm added to it for drapery, and 2 rectangles of the same size for the shelves. The shelves themselves are modeled exactly the same as on narrow fabric. So, if you want to sew a dress-dressing gown with a smell - the pattern is simple, that is, done in case of emergency.
Important! The length of the product should coincide with the shared thread.

Take the needle
If you confidently made blanks and you get smooth cuts, it's time to move on to assembly. Before stitching parts on a typewriter, it is better to sweep them or chop them with tailor pins:
- We sweep or cleave the shoulder seams - from the ends of the neck to the corners of the armhole.
- We concentrate them.
- Sweep the side seams.
- We try on, paying special attention to the neckline, if necessary, we adjust it.
- We sew the side seams, leaving a small hole on the waist line from the side of the shelf, which will be on top - through this hole the belt will go out.
- We take a skein of tape, wide braid or inlay.
- Fold along the length (not necessarily all at once).
- Starting from the lower corner of the shelf, which will be at the bottom, we begin to sheathe the hem - this is done manually, with a basting seam.
- Having noticed the hem to the hem, we bend it and continue to sew, but along the front edge of the shelf to the waistline.
- Mark the length of the belt from the last stitch and cut it off.
- The end of the skein is tucked at the waist line under the edge.
- We continue to sew along the edge of the shelf, the neckline of both shelves to the waist line.
- Again we measure half the length of the belt and cut it off.
- Sew the last piece from the waistline to the bottom, cut the hem and close the edge.
- We attach the stitching - if you have a tie, the belt will also have to be stitched, and if the tape is not necessary.
- Sheathed with the same material armholes.
- Sew a loop on the edge of the lower shelf, and a small button under the armhole of the other shelf (you can also attach thin laces).
Dressing gown is ready!
to contents ↑Wrap dress with a pattern
Such clothes can also be sewn according to the pattern. But you have to redo it a bit before - expand it and arrange the smell. The pattern of the back and sleeves remains unchanged:
- Transfer the pattern of the shelf to graph paper or another large piece of paper so that it turns out not half, but the whole part - with all the darts and alignment points.
- Set aside the odor width to the left from the midline.
- Draw a vertical line parallel to the middle line through this point.
- Circle the part received.
Important! If you sew a dressing gown with a smell according to this pattern, you will most likely get not a smell, but an offset fastener - this is the principle for sewing double-breasted jackets and coats. If you prefer the smell, then connect the end of the neck with this new line where it intersects with the waistline.
As for the assembly order, it will be the most common:
- Sew all the tucks.
- Sew shoulder and side seams.
- Flatten them.
- Sweep and stitch the sleeve, aligning the desired points on the armhole and okat.
- Cut the neckline and fastener lines with trim details.
- Hem the hem and sleeves.
- Sew buttons to capture both the upper and lower shelves.
to contents ↑Important! Such a dress can also be in the form of a dressing gown, that is, with fastening buttons.
Stock footage
In short, a dressing gown is a thing quite affordable if you at least once sat at a sewing machine. The most important thing in this situation is to carefully perform all the seams and pay special attention to the processing of small parts.
- How to choose a vacuum cleaner taking into account the characteristics of the house and coatings?
- What to look for when choosing a water delivery
- How to quickly create comfort at home - tips for housewives
- How to choose the perfect TV - useful tips
- What to look for when choosing blinds
- What should be running shoes?
- What useful things can you buy in a hardware store
- Iphone 11 pro max review
- Than iPhone is better than Android smartphones
 (No ratings yet)