

DIY flower dress for girls
Many parents refuse to buy or sew lush ball gowns for their babies, because they consider them not quite convenient for children. But this is a huge mistake, because any girl dreams of becoming a princess, to go on holiday in a chic outfit. That is why every young lady in the wardrobe should have at least several similar dresses. Children's fashion offers a lot of options for such models. Agree that only a mother can realize her daughter’s dream as accurately as possible. That is why in this article we will tell you how to make a flower dress for a girl with your own hands.
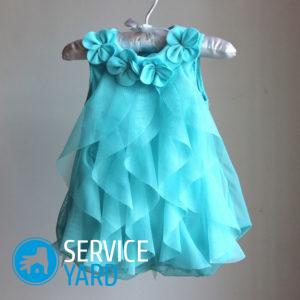
to contents ↑Elegant flower dress for a little princess
If you are interested in how to sew a flower dress for a girl of one year, then it is better to give preference to a model consisting of several separate parts - a skirt and a bodice. Due to age, little children are very moody and restless, therefore it is important that it is convenient to put on and take off the outfit. You can decorate the dress with a beautiful belt with flowers. We will offer two options for making a skirt to choose from - a tutu and the Tatyanka model.
Skirt
To make a tutu skirt, you will need:
- 4 meters tulle pale pink.
- Scissors.
- Clothing elastic 2 cm thick.
Sew according to this pattern:
- Cut the tulle into rectangles 20 cm wide and 30 cm long.
Important! It is better to cut them in packs, folding them several times, then cut them off.
- Take an elastic band, tie it to the back of a regular table.
- Tie two elastic knots of tulle to the elastic. Thus tighten the entire elastic band.
- Trim the ends of the material so that the product looks neat.
To sew the Tatyanka skirt, prepare:
- 0.5 meters white guipure with floral patterns.
- Scissors.
Sew the product according to the instructions:
- Cut a piece of material measuring 15 by 100 cm.
- Sew the fabric on the smaller side so that you have a double rectangle with sides of 50 and 15 cm.
- Make a hem of 3 cm along the long side of the rectangle, sew. The length of the skirt will be 12 cm, do not forget to leave a hole for threading the elastic.
- Take the necessary length of elastic, thread it, iron it.
- Treat the bottom edge of the product in any convenient way.
Bodice
Make the bodice as follows:
- Take the white guipure fabric and any shirt of your baby. Attach it to the newspaper, circle the outline to get a bodice pattern.
- Make allowances for the seams, increase the width slightly so that it is convenient to wear and remove it.
- To give along the notes of the holiday, make sleeves in the form of wings. Cut small segments along the oblique line, round the edges, overlay with a zigzag seam, assemble them a little and fix them.
- To make it easier to wear the bodice, make a back closure on the back with buttons and hinges.
- Suture the hem with an open hem with a hem.
Belt with flowers
As we said earlier, the dress will be decorated with a chic belt with flowers, so at the last stage we will make it.
For work, prepare:
- Guipure size 1 m by 8 cm.
- 1 m satin ribbon of lilac shade.
- 2 m pink ribbon.
- A piece of green satin ribbon.
- A candle.
- Needles.
- Threads are pink.
Do the following:
- Take the guipure fabric, fold it in half so that you get a double piece of material 4 cm wide and 1 m long.Iron it for easy flashing, then stitch it on both sides.
- Now you need to make flowers. You will need three flowers: one lilac, two pink. First of all, we will make purple roses. Cut 11 petals for a flower, 3 petals for a bud. That is, you will need to divide 1 m of tape into 14 identical pieces. Cut out the circles by folding together several pieces of ribbon and cutting out so that you get 14 circles. Take a candle, scorch the edges so that the material does not crumble.
- To make a rose, take one circle, fold it in a tube, sew on the bottom so that it does not open. Twist the second circle on both sides, sew to the first petal. Sew 4 more circles by analogy. You will have 3 lilac mugs, each of them twist and sew.
- Take the green satin ribbon, cut three squares. Singe the ends, glue along the diagonal to get a triangle.
- Now we take the lilac circle, dip it in glue with the end, insert it into the green triangle. Do the same with the other two triangles to get 3 buds.
- Cut from a green ribbon 3 figures similar to flower petals. Burn them over a candle.
- It remains to make two roses from pink fabric. To do this is simple, using the scheme that we used to create the lilac rose.
- Measure the middle of the belt, glue the lilac rose, glue the pink flowers at the same distance from it, then the buds and petals.
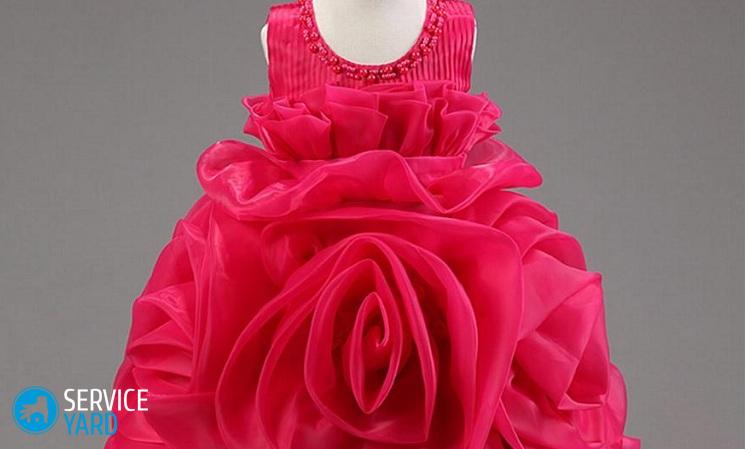
Such a gorgeous flower dress for a girl with her own hands can be made by any loving mother who knows for sure how to please her child. It will not be embarrassing to lead the baby to any holiday or celebration.
to contents ↑Festive outfit with long sleeves and a full skirt
In this master class, we will look at how to sew a flower dress for a girl of preschool age, which will be decorated with long sleeves from materials different in color and structure:
- The top of the product is made of chocolate-colored velvet.
- A fluffy skirt of pale pink curtain silk with an embroidered, rare, brown pattern.
- The outfit will be complemented with a belt of brown satin ribbon with a chic rose.
Taking measurements
To take measurements, follow these steps:
- Band the baby at the level of the intended waist, but not tight.
- Measure the length of the bodice, starting from the shoulder seam to the braid at the waist.
- Determine the length of the sleeve from the shoulder seam right through the elbow to the bone on the wrist.
- Measure the length of the skirt from the braid at the waist to the knees or at your discretion.
- Determine the girth of the brush. With a centimeter, grasp the thin part of the brush, add 4 cm to the resulting figure.
Making patterns and cutting parts
No complicated calculations are necessary. Just use this instruction:
- Take an old T-shirt with sleeves without a collar or a blouse. Iron a thing, cut it at the seams, first of all along the armholes, then - along the side and shoulder seams. For work you need one sleeve, so cut it along the seam. Mark the upper point of the rounded sleeve, using a pair of scissors, make a notch. Chalk, notch or thread mark the front of the sleeve. You will get blanks for the pattern of the back, front, sleeves.
- To get the front pattern, measure the length of the bodice to the front of the T-shirt, use a chalk to draw the bottom line so that it comes out a little convex. Cut the front part along the line. Then put it on the back of the T-shirt, again chalk out the bottom edge and cut it off.
- To get a pattern for the future sleeve, put the sleeve from the T-shirt on the paper, carefully outline it and set it aside. Draw a vertical line in the figure from the top of the okata to the very bottom. Mark on this line the length of the sleeve, starting from the top of the okat. Draw a perpendicular line from the resulting point, then mark the semi-girth of the hand on it. Extend the perpendicular to the other side, starting from the line of the middle of the sleeve, then mark the semi-girth of the wrist.Straight lines connect the points along the bottom of the sleeve with the marks on the armhole. Cut the sleeve.
- Take velvet fabric, turn it on the wrong side, attach the back and front to it, and outline them with chalk. Mark the line of the fastener right in the middle of the line of the back down from the neck of 10-15 cm.
- Put a paper sleeve on the fabric, outline it. Turn the paper blank over to the back and outline the second sleeve.
- Add 1.5 cm to the sections of the armhole, shoulders and back. Add 2 cm to the waist, bottom of the sleeves, back and sides. Increase the sleeve rounds by 1.5 cm. Add 2 cm to the front, lower, elbow sections of the sleeves. .All the details are cut.
- Cut from the remaining velvet fabric along an oblique thread a strip 3-3.5 cm wide and a length corresponding to the length of the neck of the front and back, then to process the neck of the front and back.
- Cut another strip to grind the clasp along the thread of 3-3.5 cm long and 5-5.5 cm wide.
- To make a skirt, cut out a curtain of 1.8-2 m long from the curtain silk and a width corresponding to the double length of the measured future skirt.
- Buy a 3-3.5 m satin ribbon for the belt with a margin so that you can tie a bow at the back.
Sewing dresses
Next, make a flower dress for the girl with your own hands according to the above technique:
- Process the back closure with a grinder. That is, lay the manual straight stitches right in the middle of the back, starting from the neck of about 15-20 cm. Sew one cross and two longitudinal cuts of the hem. Design a hem on the front side of the back, laying it face down and to the neck with a non-swept cut, while trying to combine the middle of the back with the middle of the trim. Lay two parallel stitches at the end of the fastener.
Important! Make sure that the distance between the stitches is 0.5-0.8 cm, and the length of the fastener is 10-15 cm.
- Between the lines, make an incision, not reaching 1-2 mm to the end of the fastener. Turn the inside out. Straighten the edges of the fastener. Along the edges of the fastener, lay the finishing stitches 0.5 cm wide. Connect the shoulder sections, straighten to the sides. Treat the neck with an oblique strip with an open cut edging seam. Overcast a section of this strip.
- Sweep the sleeves in the bodice of the bodice, while combining the shoulder seams with the tops of the ridge of the sleeves. Stitch 1.5 cm wide sleeves in the armholes, then lay a stitch along the sleeve. Neaten all sections and remove the threads.
- Connect the side sections of the bodice with the sections of the sleeves. Fold them in with the front side, trying to combine. With pins, chop the sections of the sleeve and sew, without breaking the lines, grind the side sections. Overcast all sections.
- Work on the bottom edge of the sleeves. Overcast the lower sections of the sleeves, stitch them on the wrong side 1-1.5 cm.
- Handle the skirt. Stitch a strip of curtain silk across the width, then flatten the stitch seam. Stitch the longitudinal section of the skirt with a seam with a hem 1 cm wide. Lay a line on the machine at a distance of 1.5 cm from the second section. Lay the second line at a distance of 2-3 mm from the first line. Pull the ends of loose threads on both machine stitches. Distribute the assemblies evenly.
- Pin the edge of the skirt with pins to the bodice to align the seam of the skirt with the middle of the back. Stitch the skirt to the bodice. Seams should be located towards the skirt. Bottom the skirted section of the skirt inside out and cover the sewing line with the sewing section. On the side seams, pin the pointed edge of the skirt with pins, in the middle of the back and front.
- Sew the sewn-up edge of the skirt with oblique hand stitches to form pleats, gradually remove the pins.
- Fold twice the satin ribbon outward with the shiny side, sew along the edges with a seam 1-2 mm wide, connect the two parts of the ribbon. In the middle of the belt, attach a flower.
- Sew a thread at the end of the fastener. Sew a button on the other side.
Stock footage
These elegant dresses can be made at home with your own hands. Now you know exactly how to sew a flower dress for a girl.If you strictly follow all the schemes and instructions, then you will succeed, and you will be proud of the results of the work done.
- How to choose a vacuum cleaner taking into account the characteristics of the house and coatings?
- What to look for when choosing a water delivery
- How to quickly create comfort at home - tips for housewives
- How to choose the perfect TV - useful tips
- What to look for when choosing blinds
- What should be running shoes?
- What useful things can you buy in a hardware store
- Iphone 11 pro max review
- Than iPhone is better than Android smartphones
 (No ratings yet)