

Russian hats for women do-it-yourself
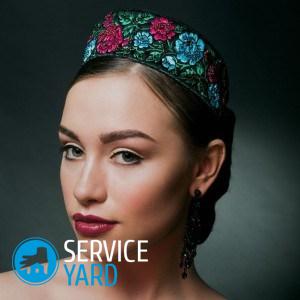
According to some historians, the idea of a kokoshnik was brought by Byzantine merchants. Be that as it may, it is considered a traditional Russian headdress. Married women in Russia did not go bare-headed. “Goofing off" was considered both a sin and a shame. And kokoshnik was considered the privilege of unmarried girls. At the same time, the hair is partially open - for young girls this was permissible. The festive kokoshnik impressed with his elegance and beauty. It was embroidered with pearls, decorated, as far as imagination was enough. For this reason, a large and wide headdress was available only to girls from wealthy families. In the article, we will consider how to make Russian women's hats with their own hands.
to contents ↑Execution technology
In its shape, the headpiece resembles a fan:
- A homemade kokoshnik is made of thin cardboard or using metal tape.
- The basis is made of various types of textiles - canvas, canvas, brocade or velvet.
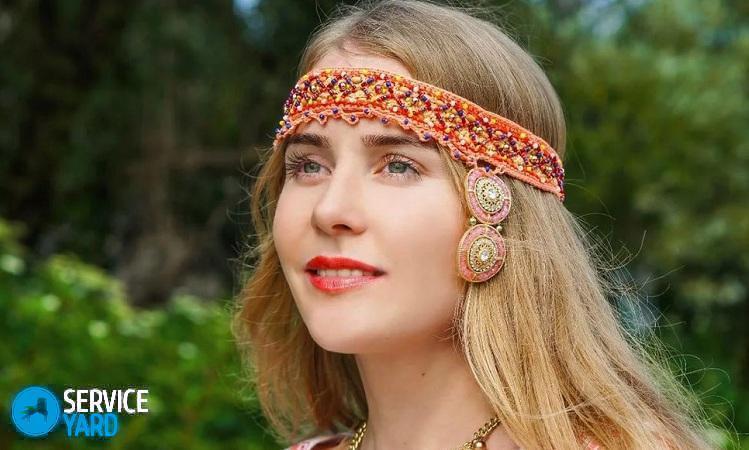
- The upper part is decorated as prompted by the imagination of the craftswoman. Artificial and natural river pearls, bugles, beads, brocade, beads, flowers - this list goes on and on.
- On both sides tapes are sewn, which are needed in order to securely fix the finished product.
Important! There are kokoshniki with wicker decoration covering the entire forehead. Sometimes the product is made so that the translucent fabric completely covers the hair behind.
Consider 2 manufacturing techniques: simple and somewhat more complex.
to contents ↑Option 1
This manufacturing option for a Russian headgear is associated with the assembly of a cardboard product:
- Complete the pattern. It’s not difficult at all, even if you don’t have a hint of artistic ability.
- Using the resulting pattern, transfer the contour to the cardboard. This is the base of the ridge. Next, the resulting frame will be used as a pattern for the manufacture of fabric front and back of the headgear. Of the fabrics, it is best to use satin, brocade or satin.
Important! When cutting parts from textiles, be sure to consider seam allowances (1-2 cm).
- Suppose you want to decorate the finished product with textiles. Cut flowers, stars, geometric shapes from fabric.
- Stick the resulting decor on doublerin - for added rigidity.
- Sew together the front and back halves of the cover, cut out of fabric. Bend the material while inside. Leave the bottom edge unstitched so that you can unscrew the product and put it on the frame.
- Put the fabric stitched cover over the cardboard frame. Sew on the bottom. You can do this manually.
- Sew elastic bands or ribbons on both sides that will hold the entire structure on your head.
- Attach the decor. Decorate the kokoshnik in the direction from the edges to the center.
Important! Do not overdo it with jewelry. Cardboard is not a very durable material, so it is unlikely to withstand much heaviness.
- If you know the technique of beadwork, decorate the frontal part with a thin mesh of beads.
Option 2
This is a technique for making a Russian female headdress with your own hands on a metal frame.
So you will need:
- Steel 3 mm wire.
- Thick cardboard.
- Pliers.
- Brocade.
- Tapes.
- Decor
The sequence of actions is as follows:
- Make a wire rim. For the product to turn out beautiful, it is necessary that the form is perfectly matched.
- Cut the base out of cardboard. This is the part of the product that is adjacent to the head.
- Cut 2 parts of the base from the fabric. It is necessary to do this in advance, because when the base is sewn to the rim of metal, it is unlikely to be able to make accurate patterns.
- Sew the cardboard base to the metal rim. The stitch pitch is 5 mm. More frequent stitches do not need to be done, as the cardboard will simply tear.
- Using the same principle, perform the upper part of the headgear (comb). After everything is done, sew it to the wire base.
- Sew all the fabric parts together. Put on the base carefully.
- Sew the bottom base, and then the ribbons.
- The last stage is the decoration of the finished product. You can decorate a Russian national headdress for a girl with your own hands as your imagination prompts.
Stock footage
So simple you can create an original and cute kokoshnik for yourself or your daughter for a theme holiday. There is nothing complicated about it - try it and see for yourself.
- How to choose a vacuum cleaner taking into account the characteristics of the house and coatings?
- What to look for when choosing a water delivery
- How to quickly create comfort at home - tips for housewives
- How to choose the perfect TV - useful tips
- What to look for when choosing blinds
- What should be running shoes?
- What useful things can you buy in a hardware store
- Iphone 11 pro max review
- Than iPhone is better than Android smartphones
 (No ratings yet)