

Patterns coats for beginners - simple patterns with your own hands
The idea to start sewing outerwear usually scares beginner needlewomen. It seems incredibly complicated - precisely because you have to build or at least customize the patterns. But everything is not as bad as it seems. There are many models that can be done even by those who bought a sewing machine yesterday and just started to master it. Where to get patterns for a quilted coat for beginners? It is not at all problematic to make simple patterns with your own hands - and some models are sewn without a pattern at all, and look great at the same time. About how such miracles work, we will tell in our article.
to contents ↑Classic and non-classic
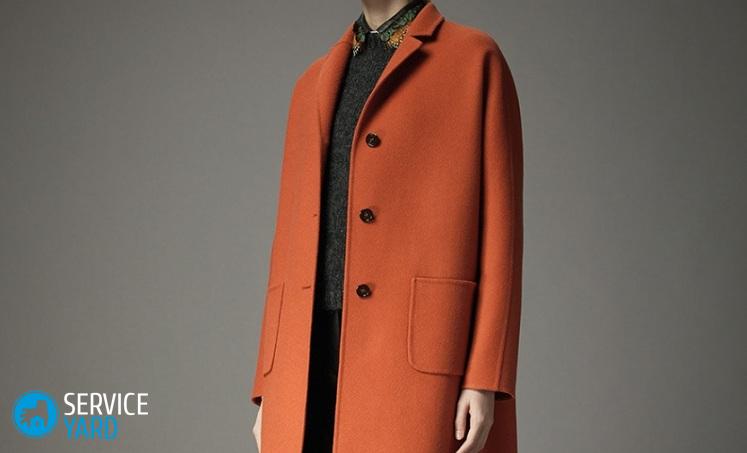
How to sew a women's winter or demi-season short coat of a direct type? Of course, if we are talking about a classic coat, you cannot do without a pattern. And this really is perhaps the most difficult piece of clothing, except for a man’s suit, more trouble. But there are many models of modern coats that are sewn according to the most primitive patterns. Yes, and sewing clothes without a pattern with your own hands is a fairly common and even popular thing, good, modern fabrics allow this.
What outerwear can you sew by marking directly on the fabric? Not so little:
- raincoat;
- cape coat;
- poncho coat;
- coat with one-piece sleeve.
The scariest secret of elegant needlewomen, who have already gotten their hands on such products, is that any of these models can be unlined. Agree, the classic style without lining, as well as bumps, welt pockets and the like, is difficult to imagine. But outerwear without patterns with your own hands without such designer excesses happens. Pockets can be as simple as possible, instead of picks, you can make a bar, a collar is optional - in a word, the style can be simplified to the limit, and it will look great. Is it tempting? Then proceed.
to contents ↑A bit about materials
Extremely simple cut and beautiful fabric, which, moreover, is easy to process - these are two keys to future success. It is better to choose a two-sided fabric that does not crumble and holds its shape well. Many modern coat fabrics have these remarkable qualities. Sometimes very high quality cloth comes across.
to contents ↑Important! For some products, a raincoat fabric or canvas is suitable - if, for example, we are talking about a summer coat that you can throw on yourself on a cool evening.
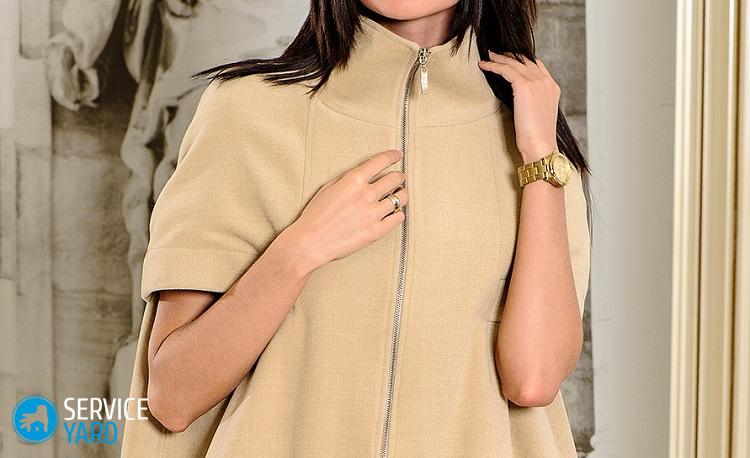
Women cape
Do you want an unusual, fitted and fashionable coat with your own hands? The pattern is done in almost the same way as for a half-sun skirt. The coat-cloak is something like an old cloak, only without a hood - instead, you can make a stand-up collar from natural or faux fur. And you can not do it, options with a neckline are now in great fashion. The length can be any - mini, to the knee or even to the floor. And nothing prevents to make a double cloak - the main and something like a drape.
Important! If you are afraid to spoil the fabric, first make a pattern on paper. True, the sheet will need a very large one, since the entire coat is covered in one piece. You can glue several pieces of graph paper, for example, or even old newspapers. In general, if there are remnants of a wide wallpaper, it will be very good.And, of course, it is better to cut on the floor in a spacious room.
But if you make construction directly on the fabric - many inconveniences can be avoided. To make a pattern you will need:
- pencil;
- long ruler;
- compass;
- button;
- lace.
Important! If you can make or get a large compass, you can do without a lace with a button.

What should we build a pattern?
In order to make a simple pattern of a coat for beginners, you need to know only two measurements:
- neck circumference;
- product length.
As for the amount of fabric, if the coat is shorter than the cut-off, 2 lengths will be needed, and if it is longer, at least 3. You need to leave a strip for the collar and processing the bottom, if necessary:
- Spread the sheet on the floor or large table.
- Draw a straight line - its length should be slightly more than twice the length of the product.
- Find the middle of this line.
- From the middle, draw a semicircle whose radius is equal to the length of the product - for this you need a cord, a pencil and a button: a pencil is attached to the cord, on the other side of the cord this whole structure is pinned to the center, and the length of the rope should be equal to the length of the product.
- From the middle of the line to the edge, draw a perpendicular. On it you need to postpone the girth of the neck, divided by 6.28, or an arbitrary value, but such that the notch fits your neck not too closely, but not too loose.
- From this point, draw a circle with a radius equal to this measure.
- Cut the pattern along the contours - you should have a half ring.
- You can make slits for the hands - this is done by the eye, already on the fabric.
We sew a cape coat
Reversible fabric is just perfect for this model. You will receive two cloaks at once, because your product can be worn on either side - unless, of course, you can arrange everything carefully. In addition to fabric and the most common sewing accessories, you will need:
- edging or braid for processing slots and bottom;
- several buttons (maybe one big one);
- strip of fur or piping for the neck.
Important! In sewing stores you will find edging of a very different kind, but nothing prevents you from making it yourself with your own hands from non-crumbling fabric, suitable in texture and color. Basically, it's just a tape with edges.
Such an unconventional coat is sewn in literally two counts. The most important thing in this story is to make beautiful cuts. They should be smooth, placed slightly obliquely and symmetrically. It is done like this:
- If you cut out a paper pattern, circle it on the fabric, positioning so that the cut of the cape goes along the edges.
- Cut the workpiece.
- Try on a future coat, chipping the neck with a safety pin.
- See where it is more convenient to make cuts, outline them.
- Remove the coat, spread out and adjust the position of the slots.
- Cut the lines (preferably with a blade or a sharp knife, scissors are not very suitable).
- Fold the hem in half and sew to the lines of the clasp, putting the edge of the fabric between the layers of the hem - if the coat will be on only one button, of course.
- Stitch the edging.
- Make out the bottom the same way.
- Slots are formed in the same way, only you need to do this as carefully as possible, paying particular attention to the corners.
Collar
The last step is the collar and fastener. You can, of course, do without a collar, and make out the top with a trim detail or drawstring. But if you like the rack more, do this:
- We draw a strip on paper, the length of which is equal to the circumference of the neck, and the width is the height of the collar, while there should be free space on both sides of the strip.
- Divide the strip in half in length, draw a line perpendicular to the long sides - this line will be on the back of the head, it can be designated as Z1 and Z2 (Z1 - at the top, Z2 - at the bottom).
- We also halve each half and draw two more perpendiculars to the edges.
- Determine where your collar will have a top and where a bottom - you can make notes B and N.
- From the point Z1 and Z2, we postpone 1 cm to the bottom.
- From the lines halving the halves of the collar, lay 0.5 cm up.
- Connect in pairs the points on the occipital line and lateral smooth curves.
- Cut a strip with new lines, transfer it to the fur, not forgetting to leave small allowances.
Important! It’s best to cut such a collar out of faux fur - it is softer, easy to cut and you don’t need special tools for sewing, but you need to cut any fur with short scissors so as not to damage the pile.
- We sew the collar of faux fur on the wrong side, then turn it around, paying special attention to the corners. The allowances are folded inward and sewed all this to the top of the coat-cape, putting the edge of the neck between the layers of the collar. Sew on one side a large button, on the other - we make a wide decorative buttonhole (it is possible from the edging with which you made the slits).
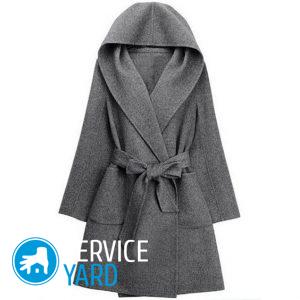
Trench coat
This type of outerwear is very much like an officer raincoat. Ideal for fans of the military style, but according to the same scheme, you can make a very interesting and very feminine little thing. It is covered and sewn in much the same way as a cape coat, but a hood is made instead of a collar (you can sew it so that it fastens with a zipper and, if necessary, turns into a collar). And such a coat is made on a long fastener. But, since the width of the main part is large, no additional strips need to be sewn. It is enough to bend the bar to a width of 0.5 and 3 cm on the wrong side, iron and stitch.
The hood is sewn from the same fabric, it can be lined - for example, from faux fur, but this is not necessary. The pattern is based on the rectangle:
- Build this geometric figure, taking as a basis the distance from the base of the neck to the crown and adding 5-6 cm to it. The other side is the girth of the head, divided in half.
- Determine which side the face will be on - mark this side with points L1 and L2.
- Mark the back of the head Z1 and Z2, while the points L1 and Z1 should be on top.
- Continue the line L1-Z1 towards the face by 5 cm, put the point L3 and connect it with a straight line with the point L2.
- From point Z2 put down 2 cm.
- Connect this new point with point L2 with a smooth arc.
Slots for hands should be decorated with strips with decorative stitching, about the same as when sewing clothes with welt pockets - only burlap is not done. A coat is sewn in the same order as the previous one.
to contents ↑Important! Such a coat can be cut on a sleeveless polyethylene raincoat.
What else will we sew?
And what else can you sew on the most primitive patterns, and even without them at all? Yes, anything. And the most fascinating thing is do-it-yourself home clothes. Simple patterns for bathrobes are made in the same way as for some not quite classic coats. Let's try?
No, this will not be a cloak or a raincoat, but a one-piece product - you can sew outerwear and what you wear at home on the same pattern. For example, a free bathrobe. We take measurements, they are pretty ordinary:
- hip girth:
- sleeve length;
- product length.
After that, we start to cut:
- We lay out the fabric in 2 layers, folding it along the shared thread.
- We cut out a rectangle for the back - it will be solid, and the fold in this case coincides with its middle line. The width of the half of the back is equal to the half-circumference of the hips, divided in half. 3-5 centimeters can be added to this measure, and the length is the same as that of the finished product.
- In free places, we cut 2 shelves by the same standards, only to the middle of the front you need to add another strip 10 cm wide on the fastener.
- Blanks for sleeves are also rectangles, the width is arbitrary, but not less than the distance from the shoulder to the armpit, and if you want to make wide cuffs wrapped up, you need to add another 6-10 centimeters.
- On the back and shelves mark the length of the shoulder seams - it should be the same.
- On the same details, mark the bottom of the armhole, the points should coincide when you sew the side seams.
- You will issue the rest after the main parts are assembled.
Sew a bathrobe
The first thing to do is grind the shoulder seams. You will get a blank on which you will simulate everything else:
- Sew sleeves, sew them.
- Sew both side seams while sewing together the seams of the sleeves.
- Try on what you got.
- Bend the neck to make it convenient - you can stab the allowances with tailor pins.
- The neck should smoothly move to the bar.
- Fold the bar twice, also chop it on one and the other field, leaving open the areas adjacent to the neck.
- Look what happens, align all the folds.
- Cut the neckline along the cleavage line.
- Cut a trim part from the same fabric or another - thin, but well-kept shape.
- Fold the trim neck and the main one with the front sides to each other - all sections must match.
- Stitch along the contour of the neck.
- Unscrew the trim part on the wrong side, iron.
- Bend it, stitch it - or, if it is possible to overcast, you can also not bend it so that the seam is not too thick.
- Stitch the trims.
After this, it remains only to sew the buttons and make loops, as well as hem the bottom. Sleeves can be bent up, bend the edge, sew in decorative stitching.
to contents ↑Important! In exactly the same way you can sew a coat, it will be even easier. There are several options for processing the edge - for example, if the fabric is very dense and does not fall off at all, you can not hem or stitch the details, but cut them with curly scissors.
Stock footage
In a word, even a seamstress who has just taken up a needle can try herself as an interesting model. At the same time, the result is obtained immediately, and at the beginning of training for any craft it is very important to feel that you can do something interesting and beautiful.
- How to choose a vacuum cleaner taking into account the characteristics of the house and coatings?
- What to look for when choosing a water delivery
- How to quickly create comfort at home - tips for housewives
- How to choose the perfect TV - useful tips
- What to look for when choosing blinds
- What should be running shoes?
- What useful things can you buy in a hardware store
- Iphone 11 pro max review
- Than iPhone is better than Android smartphones
 (No ratings yet)