

DIY embroidery on clothes 🥝 how to embroider a name, patterns
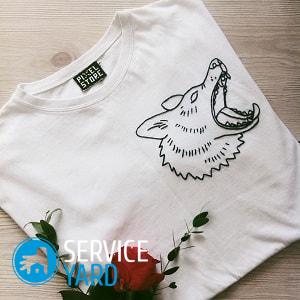
Embroidery is one of the most beautiful jewelry for clothes. T-shirts are no exception. Probably there is not a single person in whose wardrobe there would not be this beautiful and practical piece of clothing. Do-it-yourself embroidery on a T-shirt or shirt is one of the most original, beautiful and practical types of decor, you can embroider inscriptions, a name or just letters .. Doubt that you will master such a decor technique? - Very vain! Now you will see that everything is much simpler than you imagined.
to contents ↑Stitch decoration
Especially beautiful looks embroidery technique "surface". To make clothes truly unique, you need such a set of tools, materials and devices:
- The scheme for embroidery.
- Mouline thread for embroidery.
- Needles.
- Hoop.
- For drawing a fading marker.
You can invent a drawing yourself, purchase it in a store, or download from the Internet. The procedure is as follows:
- Lay out the pattern for embroidery in front of you.
- Put the t-shirt on top of the picture. Select a fabric so that the image is well-illuminated.
- Using the marker, transfer the pattern to the fabric. Try to repeat the pattern with maximum accuracy.
- Finished with a redraw? Now fasten a piece of fabric in the hoop and start embroidering. Embroider the outline of the pattern with a stitch seam, fill the inside using the “double-sided surface” technique.
to contents ↑Important! Pick up the threads for such embroidery on a T-shirt with your own hands so that the pattern looks convex and bright. You can go by the method of “reverse”, when the shade of fabric and thread completely coincides.
Machine embroidery features
An embroidered pattern on a blouse is a way to make it more interesting, elegant and original. In order to perform an impeccably beautiful pattern in a machine way, you will need:
- T-shirt made of knitwear.
- Black threads.
- Paper for applying the image template.
- Scissors.
Important! Make sure that the item has been previously washed and well ironed. The slightest fold, falling under the foot of the sewing machine, will lead to the fact that the clothes will be spoiled hopelessly.
It is advisable for a novice embroiderer to make a pattern of several paper elements:
- Prepare some paper patterns with patterns cut out in the form of squares.
- Lay out the motifs on top of the product.
- Place small pieces of non-woven fabric under the fabric at the embroidery site.
- Stitch the picture first along the contour, then along the inside of the images.
Of course, machine-made embroidery on a T-shirt by a machine requires a certain skill, but having trained, you will quickly succeed.
to contents ↑Cross
For cross stitching, first of all, you need a good quality knitwear. In addition to this, you will need:
- Canvas invoice. It is convenient in that at the end of the thread, you can simply pull it out.
- VHI thread.
- Scheme.
- Marker for fabric.
- A needle with a small eye.
- Spray with starch.
Important! Pay special attention to the quality of the canvas - starch to give it sufficient rigidity.

Here are some tips to keep in mind when doing embroidery on a T-shirt with your own hands in this technique:
- Choose the color of the threads for work so that it matches your taste. Select a pattern in advance.
- Treat the product with a starchy composition of the can to make it more convenient to work.
- Cut the canvas to the size of the embroidery, gently sweep it to the fabric. Treat the fabric and the edges of the canvas from a can of starch so that they stick together. Mark the middle of the shirt. The starting point is here. The direction of embroidery is from right to left.
Important! When embroidering with a cross, do not tighten the thread. Make sure stitches are laid down very easily.
- Embroider the outline first, and then fill the interior of the pattern. Just as when performing the contour, fill the inner area so that the stitches lie evenly and easily. Embroider dark patches first, then lighter patches. So it's easier not to make a mistake with the ornament.
- After the job is done, carefully remove the canvas threads.
DIY beadwork on a t-shirt
First mark the product with tailor's chalk. Select the area where your beadwork will be located. Consider the simplest technique for creating a bead pattern, which the craftswomen call a “lazy squaw."
To create a masterpiece in this technique, you will need:
- Beads (it can be replaced with sequins).
- Threads.
- Needle.
Pull the thread from the inside of the fabric to the front. Thread 3-4 beads or sequins. Now go back to the wrong side. Now transfer the thread back to the front, one bead or spangle below. This “lazy” pattern looks very beautiful and runs quickly.
to contents ↑Stock footage
A little fiction, hard work, and you will become the owner of a beautiful and unique clothing.
- How to choose a vacuum cleaner taking into account the characteristics of the house and coatings?
- What to look for when choosing a water delivery
- How to quickly create comfort at home - tips for housewives
- How to choose the perfect TV - useful tips
- What to look for when choosing blinds
- What should be running shoes?
- What useful things can you buy in a hardware store
- Iphone 11 pro max review
- Than iPhone is better than Android smartphones
 (No ratings yet)