

DIY embroidery on clothes 🥝 how to beautifully embroider flowers or interesting elements of patterns
Clothing decorated with embroidery acquires a completely different elegance, significance, and high class. You can create such a decor not only with your own hands, but also with the help of modern sewing equipment with special programs. This unique technique allows you to transform the pattern you have chosen and adapt it for application to the fabric. But our article is more devoted to manual work, so you will learn how embroidery appears on clothing, how to embroider a cross or stitch. With your own hands, diagrams and drawings for this are also easy to prepare.
to contents ↑Stitch embroidery
Now we will tell in more detail how to embroider embroidery on clothes with our own hands.
Important! It is better to use a knitted sweater as an example. For this purpose, the application method is ideally suited, well combined with this method of embroidery.
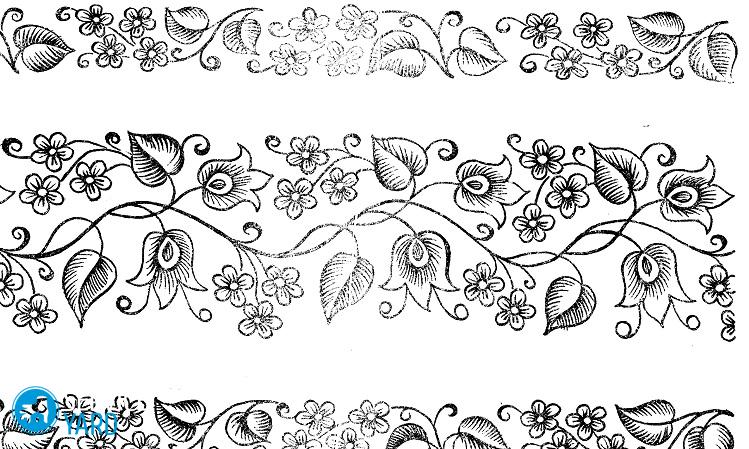
First of all, find a suitable circuit or make it yourself.
To work, you will need the following:
- Fabric for embroidery applique.
- Pencil for creating a pattern on the fabric.
- Mouline thread, the color of which should match the specified shades in the pattern.
- Scissors.
- Hoop.
Embroider according to this instruction:
- First print a picture of your outline.
- Now transfer this fabric to the fabric. It is best to use the lower backlight for this. Lay the circuit on the glass, place the fabric on top. Install the lamp under the glass, transfer the circuit to the material using a marker.
- Pull the finished pattern with a hoop, then fasten.
- Depending on the desired volume of the pattern, insert the required number of threads into the needle.
- Embroider the stitch pattern, observing each line, all the outlines of the prepared scheme.
- Perform one-sided smoothness so that the volume is on the front side, and only the stitches are visible from the inside.
- After completing the work, remove the hoop, cut off the excess fabric. Be sure to leave a strip so that it is more convenient to connect the appliqué to the clothes along the edge with wide stitches.
Important! It is better to embroider applications with thread floss, because they perfectly tolerate multiple washings due to pre-treatment.
This embroidery method is ideal directly for voluminous knitted items, because it will be inconvenient to carry out such work on knitwear. The applique sewn to the sweater will really decorate and transform it. Summer things do not require the use of applications, since they are made from thin fabrics, so it’s enough to take an already finished object or fabric, embroider the picture you like using a pattern, threads, hoop.
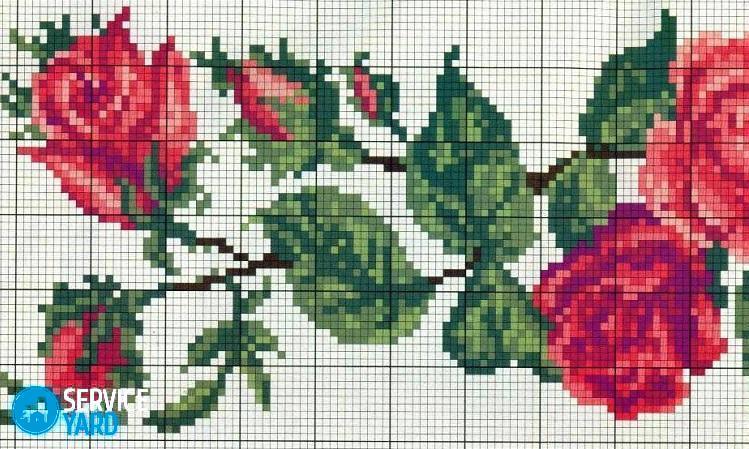
to contents ↑Cross stitch on clothes
If you are interested in how to make cross-stitch embroidery on clothes, then keep in mind that its implementation requires compliance with certain rules and nuances. It is customary to embroider a cross on summer clothes, in particular on sleeves, pockets, and a collar. Light ornaments are chosen for this, parts of which are repeated from time to time.
Important! Before you open the fabric, be sure to wash it to prevent its warping and shrinkage. It is better to start embroidering on clothes at a time when there are already patterns and cut lines on it.
You will need to follow these steps to get the original cross-stitch on your favorite jeans:
- Prepare a pattern for embroidering the dragon, all the necessary materials and tools. The threads we will use are white and canvas.
- Sew the canvas to the jeans, embroider with white thread according to the pattern.
- Place the embroidered pattern for a while in the water, leave it in it for 10 minutes so that the canvas dissolves and only the threads remain.
Important! There is another option for canvas - invoice. It is made of thick threads, it is distinguished by more rigid and large cells arranged in a strict order. It is also bounded to the fabric, then the pattern is embroidered, and it is removed with tweezers.
Clothing with cross-stitch looks very stylish, elegant, fashionable, is in great demand.
to contents ↑Ribbon embroidery with ribbons
Now you will learn how to do ribbon embroidery on clothes with your own hands. The workshop in this section is devoted to the use of silk ribbons for decorating the necks in knitted clothes.
But before you get started, read a few helpful tips:
- Ribbon embroidery should be neat on both sides.
- You cannot make transitions with ribbons. That is, if you embroidered one flower, then immediately fasten the ribbon and only then fix the ribbon separately for the new flower.
- When finished, be sure to cover the inside with the lining fabric.
Important! Do not forget that products with such a decor can only be washed inverted on the wrong side.
Also, before embroidering on clothes, prepare the necessary tools and materials for work:
- Scheme. If desired, they can be increased and even divided, this is especially true in cases where embroidery will be done on clothes with a round neckline.
- Beautiful silk ribbons of green, olive, pink, sand, peach, blue, light blue.
- Sharp scissors.
- A regular needle and a needle with a wide eye.
- Beads in several shades of pink.
- Monofilament.
Follow all the steps, strictly following the scheme:
- Schemes increase to the required size, cut them, transfer to clothes.
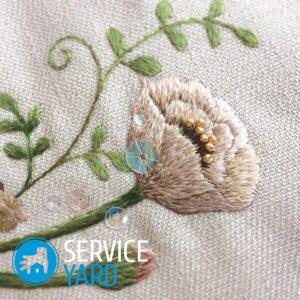
- First, embroider large flowers, which will consist of 6 petals. Use pink ribbon for this, sew looped stitches. Using beads, additionally fix the petals.
- Embroider the flowers in light blue. Take a blue ribbon, make a mark on it with a thread floss. As soon as the assembled tape reaches the desired length, draw it to the wrong side, on the front side, fix the necessary arrangement of the petals with a thread.
- Make a peach ribbon core using French knots.
- Next, perform small inflorescences with a sand-colored ribbon. Make three loops, then decorate them with French knots in one winding.
- Take a white ribbon, do not tight French knots of different sizes, that is, with two and three coils.
- Decorate the core of large flowers with small pink knots.
- Make stems from the green ribbon with straight stitches, and leaves from ribbon stitches. Make a few stitches to create a charming lace twig.
- Now make small flowers and buds from the blue ribbon. Use a seam called “lazy daisy” for this. The flower will consist of five stitches, the bud - of one, two or three.
- Do not forget to make cups for the buds using the same seam and ribbon of olive color. Use the twisted stitches to sew the stems.
- Decorate your clothes with twigs of roses. Flowers are made from French knots of pink and peach ribbons, stems from twisted green stitches.
Stock footage
We can say that the embroidery on the shirt with our own hands is completed, it remains only with a thin thread from the wrong side to hem all the sticking-out ponytails so that then they do not come out on the front side of the product. You can decorate any of your things with a variety of patterns, giving it a new design. It can be both New Year's patterns, and other drawings. Even old things can significantly change and become wearable after application and embroidery of such decor.
- How to choose a vacuum cleaner taking into account the characteristics of the house and coatings?
- What to look for when choosing a water delivery
- How to quickly create comfort at home - tips for housewives
- How to choose the perfect TV - useful tips
- What to look for when choosing blinds
- What should be running shoes?
- What useful things can you buy in a hardware store
- Iphone 11 pro max review
- Than iPhone is better than Android smartphones
 (No ratings yet)