

Making a cabinet on a balcony with your own hands
In small apartments, lack of space is a standard problem. This is especially evident when it is necessary to store things that are not often used, so many people make a wardrobe on the balcony with their own hands. Such a solution is only suitable if the loggia is protected from rain and wind. Otherwise, the furniture will quickly become unusable.
Features and Benefits
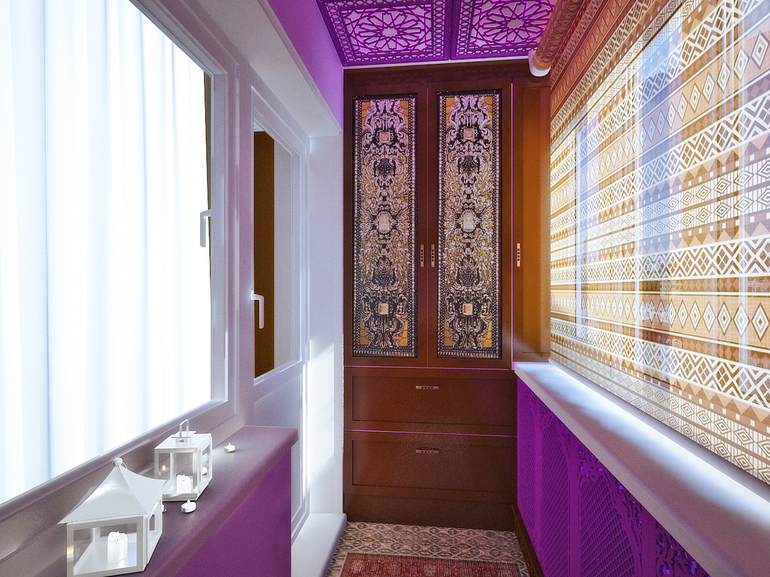
Wardrobe on the balcony - the idea is quite relevant today. The free space in this case is used to the maximum and with all amenities, and does not stand idle. The peculiarity of a balcony cabinet is that it can be made in any design without being tied to the interior and style of the apartment. That is, a home-made product can have any shape, material of manufacture and configuration (corner, coupe, pencil case, wooden, plastic, narrow, wide, and so on). Many make the simplest option, which has several shelves and resembles a bookcase. It is commonly used to store cans.
Among the advantages of self-assembly, one can single out that a person has the opportunity to produce exactly the product that will fully meet the needs. You do not have to adapt the space to the finished thing. Also this option allows you to significantly save money. Installing a cabinet on the loggia with your own hands greatly unloads the living space from rarely used things. This product does not bother anyone and is always nearby.
It is also possible to make a door in the form of a curtain in the door, and on the balcony itself place a booth and a plate of food for the dog. This is also true for small apartments.
The disadvantage is that the arrangement of the pantry with furniture requires additional insulation. This is especially true of the window and the space under the windowsill.
Design choice
Before you build an interesting, beautiful and functional cabinet, you need to decide on the future design. It may differ in size, device, type and other characteristics. The most popular types are:

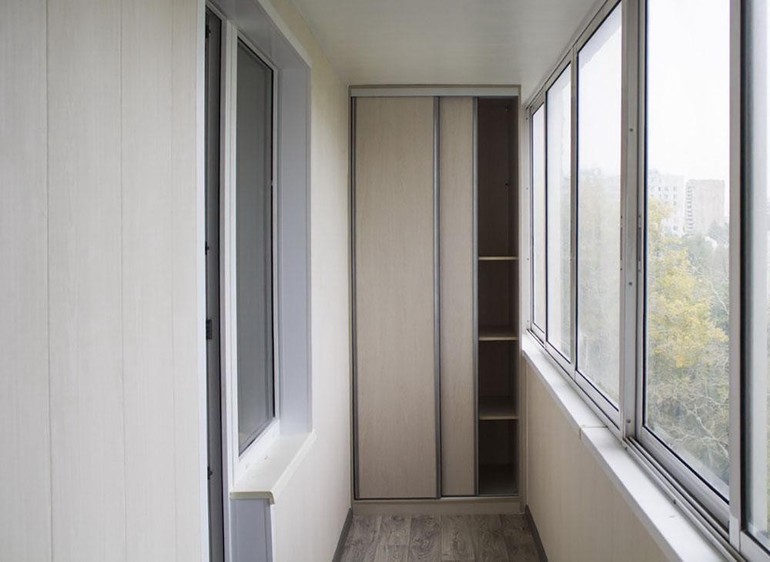
- Standard with three compartments. Doors of this design can be sliding (compartment), louvres (accordion), swing. The latter option is the most inexpensive in execution. It is better to create such a design for large rooms, as it takes up a lot of space. If the loggia is small, then it is better to make two separate small cabinets. For production, wood and a standard set of tools are usually used. These products are quite roomy and have a good appearance. The budget option involves gluing with self-adhesive with various pictures.
- Angular. Suitable for small balconies. Can be mounted on the floor or mounted. It takes up little space, and a home master can assemble such a cabinet in just a few hours. Thanks to the use of the angle, the construction is spacious. This product looks great when the frame of the beam is sheathed with lining. In this case, the cabinet is assembled like a designer.
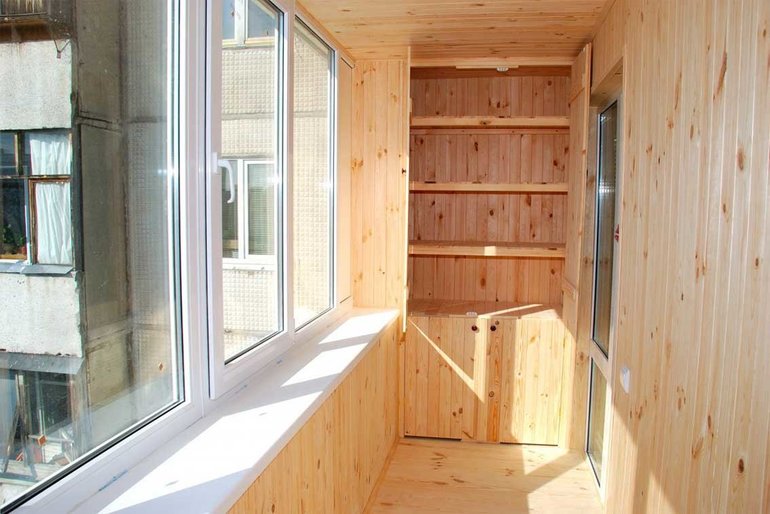
- Pencil case. It is usually made of bars and chipboard or PVC panels. A large number of shelves and departments are installed in it. Doors are often made oar. A small balcony for this design is best suited. It can be either low or the entire height of the loggia.
- Built in.Making a niche for a balcony pantry is an excellent solution, which allows you to create a place for storing things that has a neat appearance. Assembling this design is more difficult, but still you do not need a master for this. If necessary, the built-in cabinet can be insulated and waterproofed if the assembly is carried out on a cold balcony.
Several separate small cabinets should be combined into one system. This is done using the same finishing materials. So the appearance will be much better.
Creating a drawing and diagram
A wardrobe on a balcony is a rather simple design, but it is still better to use a prefabricated drawing. You can make an order for a finished project or make a diagram yourself. In the first case, the wizard will have a description of each required element, which simplifies assembly. Which option to use, decide the owner.
To create a drawing yourself, you will need to use special programs. So it will be possible to foresee all the design features and calculate even the smallest details.
It is advisable to immediately develop a detail where all the elements will be separately highlighted. After that, it will be enough to connect all the details. With this drawing, assembling a cabinet is very simple.
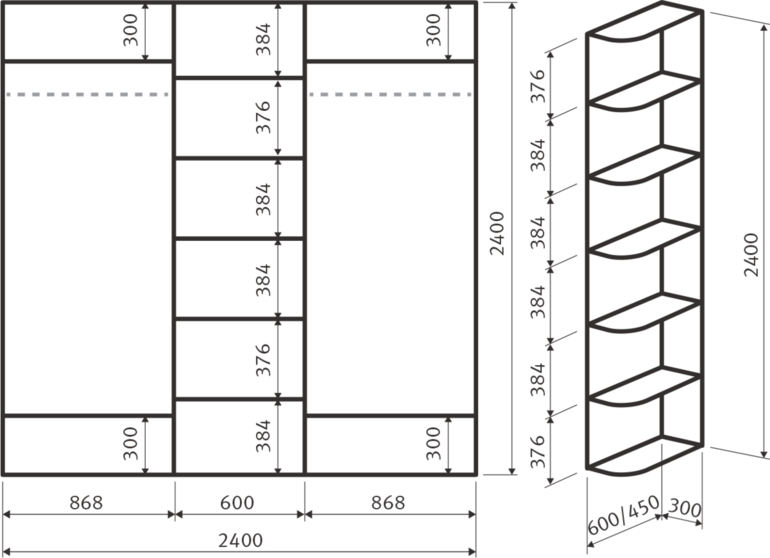
On average, these sizes are taken for any product:
- Height - up to 2.5 m.
- Width - 1.2 m.
- Depth - 0.4-0.6 m.
- The distance between the shelves is 0.35 cm.
These sizes are considered universal, but they can be changed based on needs. It is necessary to take into account the purpose of the cabinet and the dimensions of the allocated space.
Materials, tools and part preparation
Before starting construction, you need to do some preparatory work. It is necessary to create a drawing, select materials for manufacturing and the corresponding tool, decide on the design, select the fittings and fasteners. After that, you can proceed to the next steps.
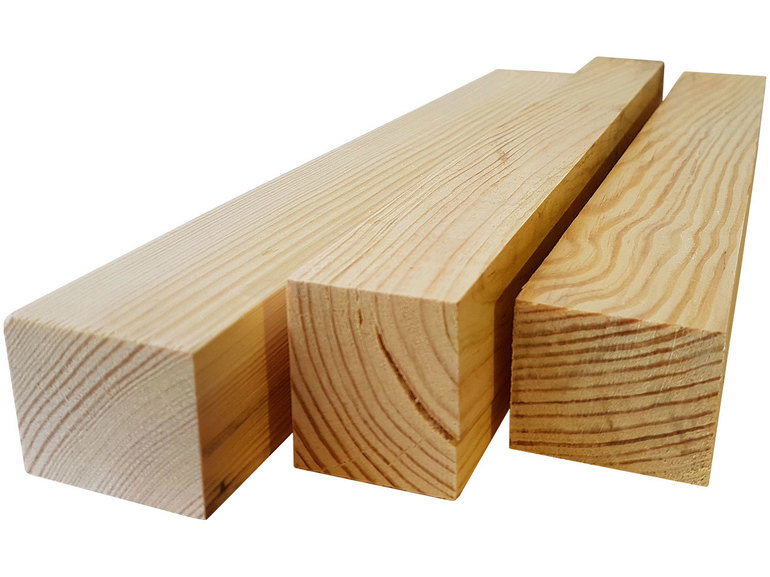
Now you need to choose the material from which the product will be made. For this, wood or plastic is often used. Wooden structures are strong and beautiful. You can get an inexpensive product from plastic, but it is better not to make a frame from this material, since it does not have sufficient strength. The advantage of plastic is that it has a large number of different colors. This allows you to choose the most suitable cabinet design.
Now the following elements are prepared:
- Bar for the frame. It is advisable to use a cross section of 40 by 40 mm. It is better to use wood, but the use of a profile designed for drywall is allowed.
- Panels for cladding. You can use any material, but experts recommend lining it with plastic or wooden lining. The thickness should be about 8 mm. Particleboard or plywood is also often used, but they must be moisture resistant. This makes the design more expensive and less reliable.
- Metal corners for reinforcing the frame.
- Fasteners.
- Awnings or other elements for installing doors.
- Electric jigsaw or grinder with wood drive.
- Drill with a set of drills.
- Screwdriver.
- Hammer, level, chisel.
The manufacturing process is performed step by step. This does not allow much to be mistaken at work. It is advisable to do everything after finishing the balcony or loggia.
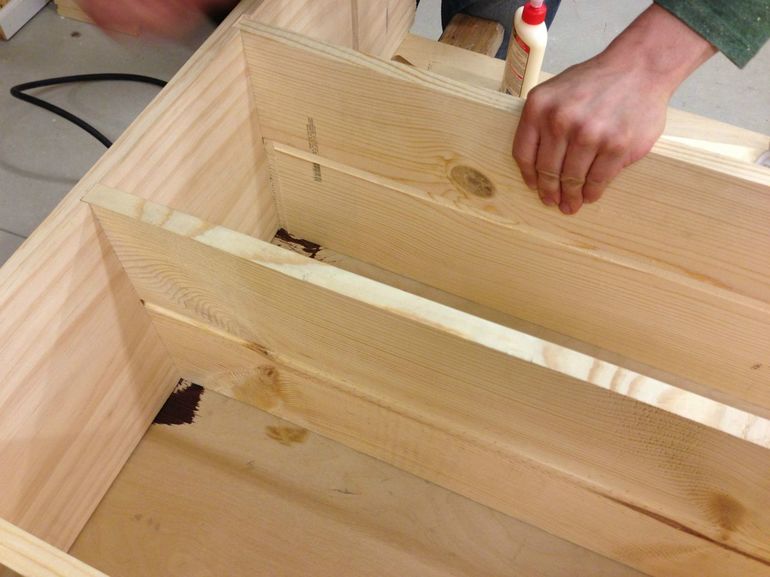
The next step involves the preparation of parts:
- Separate frame elements are made of metal or wood in accordance with the drawing.
- Lining or plates are cut out.
- Fasteners are prepared that are necessary to fix the skin to the frame.
If all the preliminary work is done correctly, the assembly itself will be simple and quick. This stage is one of the most important.
Cabinet assembly
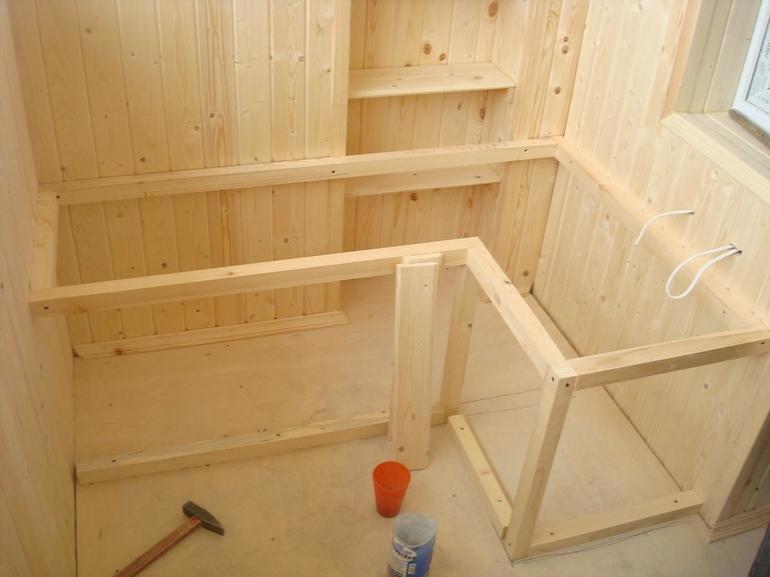
Assembly of the structure is not particularly difficult, but you need to do everything step by step. You always need to start with the layout of the balcony. The main stages of assembly:
- With the help of the construction level, all the mounting points of the cabinet are marked. It is necessary to try to avoid even slight distortions.
- The floor and ceiling frame elements are fixed.
- Everything is connected by uprights. At this stage, it is also necessary to use the construction level. Fixation is performed using self-tapping screws.
- The intermediate crossbars are fixed. They are installed in horizontal position. This part of the frame is needed to fix the shelves. To create a more durable structure, you need to fix the metal corners on top.
- Shelves are installed.
- Doors are made in accordance with the selected dimensions. They had to be calculated at the time of creating the drawing.
- The whole structure is sheathed.
Most often, the same material is used for cladding as for the walls of the balcony, if possible. With proper manufacture, the cabinet will turn out to be strong and beautiful.
Production and installation of doors
Doors are made for the cabinet, which will be suitable in size and appearance. Design should be chosen so that it fits the style of the balcony and the product itself.
For balcony cabinets, the following types are often selected:
- Swing. They are a standard option. For ease of use, a lot of space is needed.
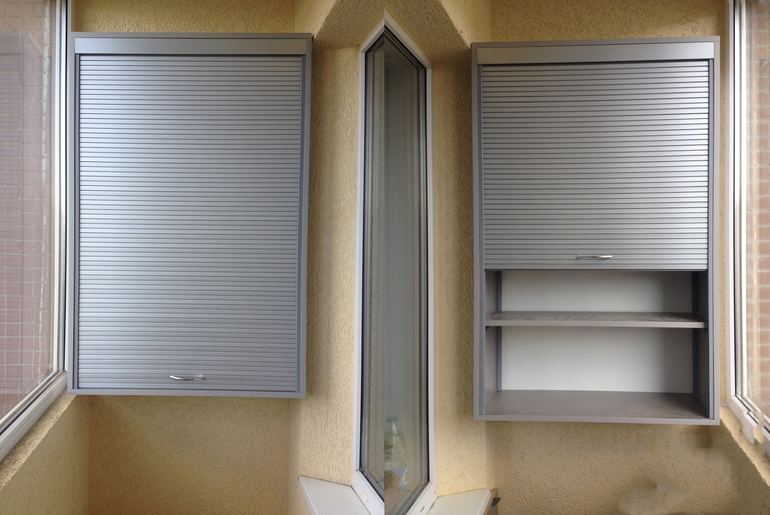
- Shutters. Opening and closing occurs on the principle of blinds.
- Sliding. They allow you to create a wardrobe.
When choosing the design of the doors and their manufacture, the dimensions of the furniture should be taken into account so that later there are no problems with opening and closing the cabinet. The cheapest and easiest to manufacture are swing. They are made of wood or plastic, and then processed. Then they sit on the hinges and screwed to the cabinet.
A sliding type of door is considered expensive, because you need to install guides around the perimeter. Additionally, installation of a roller system is required. This look is very convenient when using furniture, and it also adds appeal.
Roller shutters are the most expensive type of door. But they look great. It is advisable to buy ready-made roller shutters made at the factory. Self-production will take quite a lot of time from an inexperienced person.
- How to choose a vacuum cleaner taking into account the characteristics of the house and coatings?
- What to look for when choosing a water delivery
- How to quickly create comfort at home - tips for housewives
- How to choose the perfect TV - useful tips
- What to look for when choosing blinds
- What should be running shoes?
- What useful things can you buy in a hardware store
- Iphone 11 pro max review
- Than iPhone is better than Android smartphones
 (No ratings yet)