

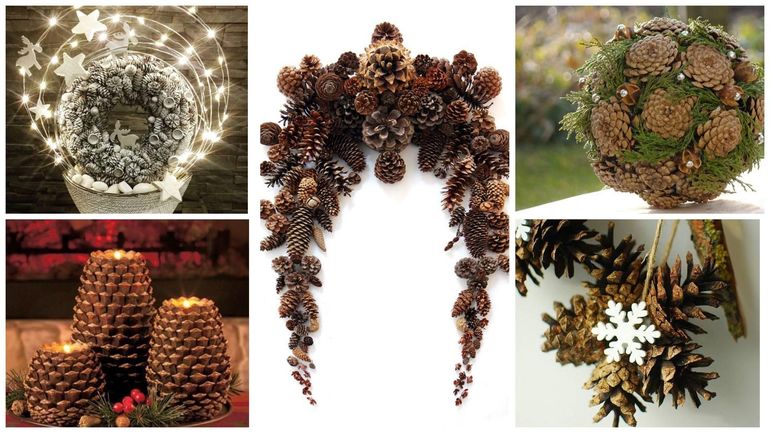
DIY crafts from cones: the most interesting options
From the cones, a lot of various crafts are obtained. This natural material has an interesting shape, pleasant texture and smell. It is also very easy to process. It’s not difficult to make even the most interesting crafts from cones with your own hands, and many lovers of needlework use this natural material in their work.
The crafts presented in the article are capable of making for both primary school students and kindergarten pupils. And, of course, parents can do them at home with their children.
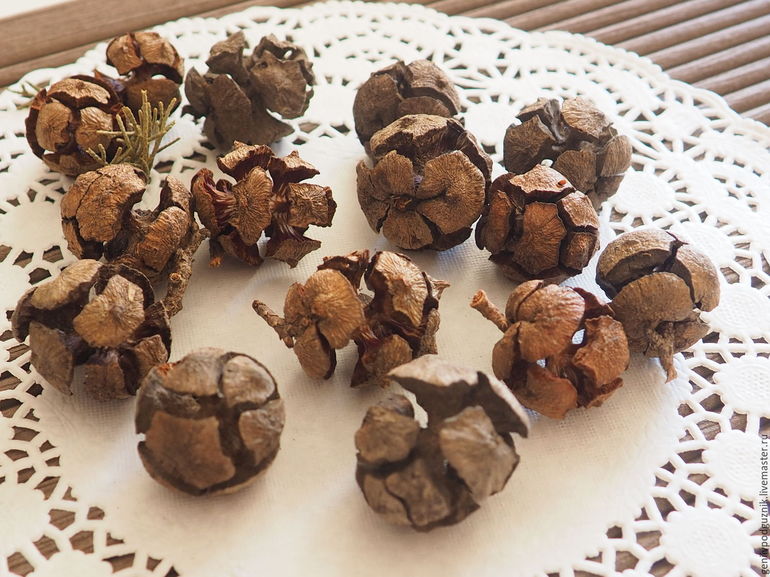
Selection and pre-processing
Most often, pine and fir cones are used for crafts, sometimes cedar, larch and alder. Natural materials brought from the forest should be carefully sorted. Selecting the most beautiful, their need to prepare, first of all - wash. This process will also help get rid of small insects.
Dense cones can be dried in the oven over low heat, this will help them to open.
If they need to be kept intact, they are moistened in carpentry glue and dried naturally.
After washing, you can dye the material in any color. (which is more suitable, depends on the plan) or cover with artificial snow, according to the plan. It is better to hang painted cones on threads until they dry completely.
After drying, not only material for further work is obtained, but also practically finished products - Christmas tree decorations. You can decorate them with sequins of your own volition.
Small alder cones have a high decorative effect. They are often used together with branches, adding to bouquets.
Thuja and cypress also have beautiful cones that perfectly complement any bouquet or composition.
Some masters advise bleaching bumps. To do this, they need to be treated with chlorine. But the result is far from always ideal: they are bleached unevenly, even if you keep them in the liquid for several days.
Many of those who have tried to do this claim that the pictures posted on the Web of perfectly bleached cones are fake.
Therefore, it is better to make them white with the help of painting. In addition, this method will help to save such scarce minutes and hours.
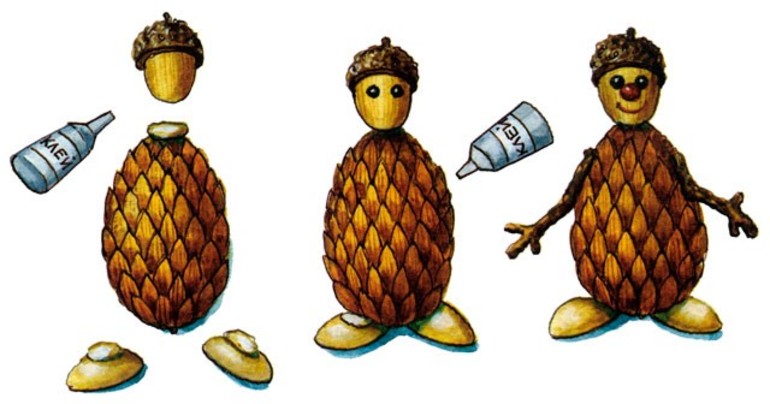
Making people figures
Figures of people to make quite simple. Not only an adult, but also a child will cope with this task. You need to take one large cone for the body, one small, chestnut or acorn - for the head and connect them using plasticine or wire. Legs can be made of twigs, wire or caps of acorns with ponytails. You can see what the finished craft looks like in the picture below.
The figure of a skier is done on the same principle. It will, of course, be very arbitrary, and it can only be distinguished by its attributes. But then such an idea can be implemented by both a schoolboy and a baby.
Skis are made from sticks of ice cream or counting sticks. Toothpicks are suitable for sticks. These skiers are ready to move off the steepest hill!
From a cone covered with white paint, you will get a snowman doll.
For the body crafts girls take a long fir cone. If you wish, you can dress up the crafts in a dress, make her a house of colored paper.
DIY cone technique
The technique has no anthropomorphic outlines, so it is better to assemble a car, ship or plane according to the design principle.

For such a machine you will need:
- Four chestnuts (for wheels).
- Sticks (for roof) and skeleton.
- Halved acorns or nutshells (for headlights).
- Thuja sprig (disguise).
- About 30 small long bumps.
The parts are fastened together with wood glue.
The tank can be assembled from round blooming cones. They cling well to each other and the desired shape "sculpt" based on the plan. Coupling places are pre-lubricated with glue. For the barrel, take an even stick or fold it from cardboard. The finished craft can be painted with a spray green or varnished, so it lasts longer.
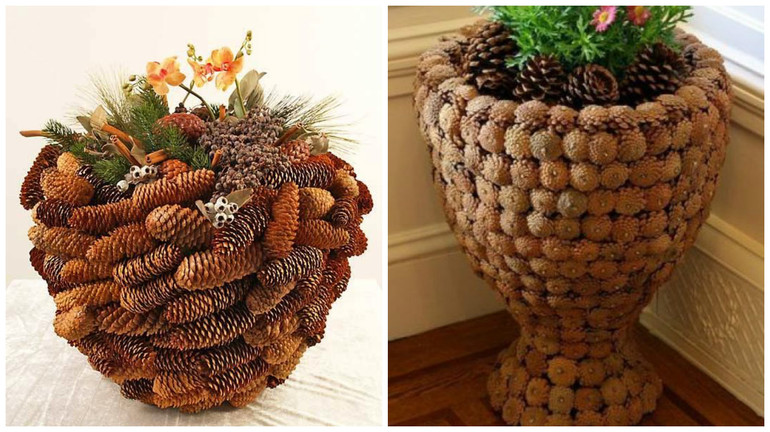
DIY basket and vase
They are quite popular crafts.
A step-by-step instruction for making a basket is as follows:
- Select cones of the same size, maximally opened (about 50 pieces).
- Spread them in a circle, forming the bottom of the basket. Fasten with glue and allow to dry. Glue the bottom out of thick cardboard.
- Spread the walls of the basket, collecting row after row, planting cones on glue.
- Make a handle separately and attach it to the basket with wire.
For greater reliability, some masters advise to fasten the cones together with a wire. Where and how to connect them can be seen in the photo below.
The vase for storing little things (elastic bands and hairpins, jewelry) is made on the same principle. It can also be used as a flower pot.
Domestic and wild birds
Children create such crafts with pleasure. These birds are very beautiful, especially if you cover them with gold or silver paint.
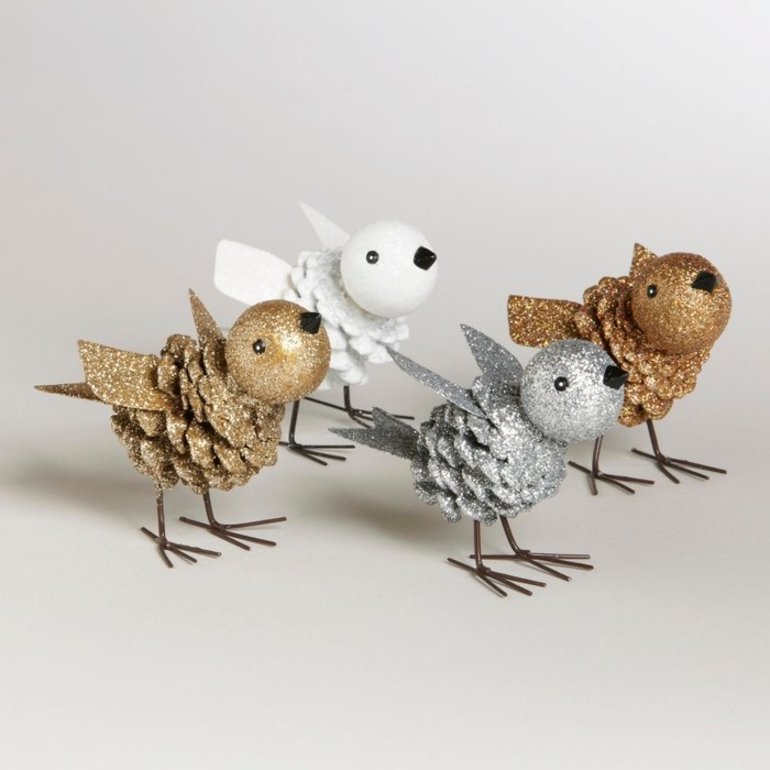
You can also paint the birds in natural colors. It can be, for example, a sparrow, bullfinch or titmouse. The paws of the bird are made of steel or copper wire, the wings and tail are made of paper or flat fragments of shells.
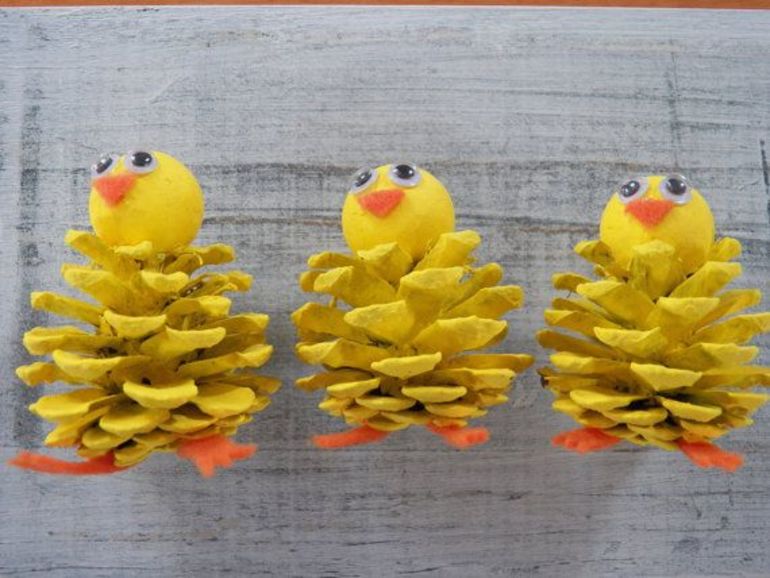
To make a chicken, take one big bump. The head is molded from plasticine. And you can not select it separately, just make a beak and eyes from plasticine directly on the body. But in that, and in another case, the material should first be painted in yellow. If gouache is used for this, painted cones should be varnished.
The paws can also be made of plasticine, as well as cut out of velvet paper, colored cardboard or foamiran and glued to the body.
For a penguin you need to take a long bump. The head, wings and paws can be made of plasticine, and snow - from cotton wool or cotton circles.
Almost any bird from this natural material, be it an eagle, a stork, a heron, a turkey, a woodpecker or even a swan, is created according to one plan. For the trunk take a large cone (for poultry - round pine, for wild - oblong spruce). The remaining parts, including the head, are most easily made from plasticine.
Feathers of an ostrich or other birds complement the craft. You can also diversify the composition by making a bird's nest from flexible sticks.
Insects and spiders
To make a spider, you need a big bump. It is intercepted by fluffy wire in four places, forming paws on both sides (or just stick 8 pieces of wire if the cone is dense enough).
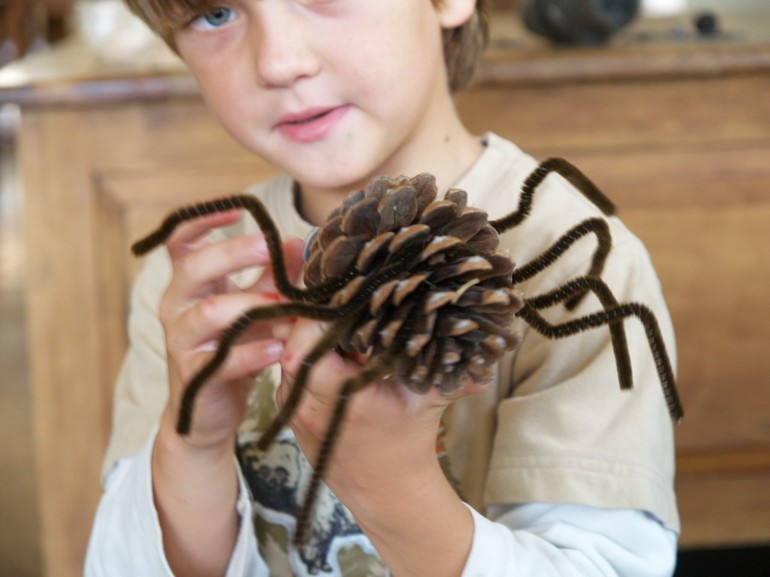
Eyes are made from plasticine or paper.
When making butterflies or bees, a long fir cone is needed for the body. Wings can be made of colored paper, leaves or plasticine. In the latter case, a cardboard or paper base is needed for crafts.
For wings, bees take winged seeds of maple or ash.
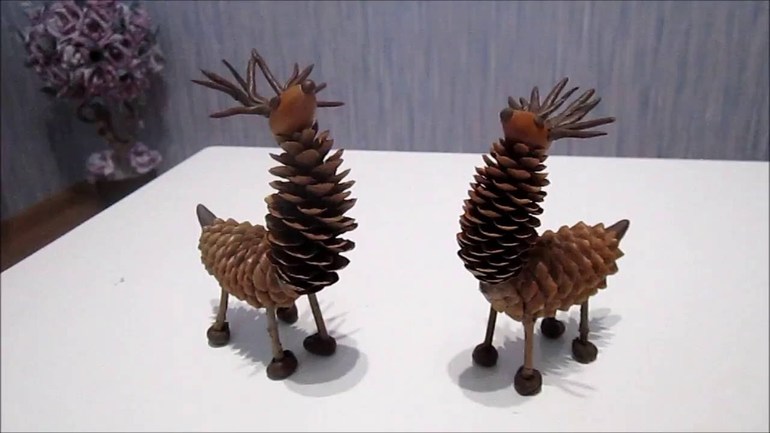
DIY animals
Modern children, even technically literate and “advanced,” love not only computer games with robots and terminators. They gladly agree to draw animals or make crafts from cones with their own hands. Quickly and beautifully animals can be made by first reading the brief instructions.
For the manufacture of llama, camel, deer, moose, horses, giraffe or other similar animals will need two long fir cones. They need to be interconnected using plasticine. From it they make horns for a deer, tail, hooves, eyes.Plasticine hooves will give the toy stability. Horns can also be made of wire or twigs. Acorns without hats are used for the head.
A horse’s volumetric mane can be made of threads, and a flat mane of colored paper.
To make a funny squirrel, as in most cases, you will need clay. It will help to fasten together the main details - the head, trunk and tail. In addition, a muzzle, ears, paws are made of it. In the paws of the protein, you can put an acorn or a fungus made of plasticine.
Such a familiar forest beast as a bear is made of six cones:
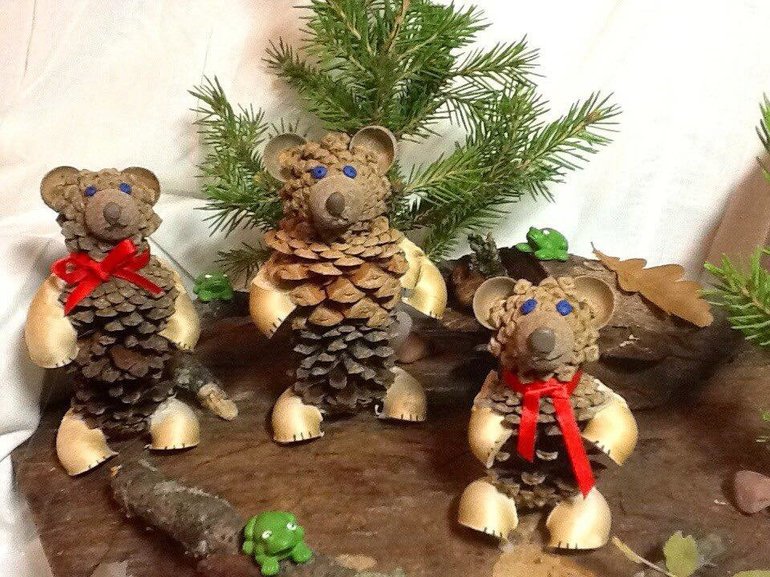
- One spruce, long (trunk).
- One round, open (head).
- Four smaller, half-open (paws).
In addition, you will need acorns (ears, nose) and peas (peas).
Cones are connected by scales, first they need to be applied glue. This will ensure a reliable connection. The finished bear figure can be glued to a flat base (wood cut).
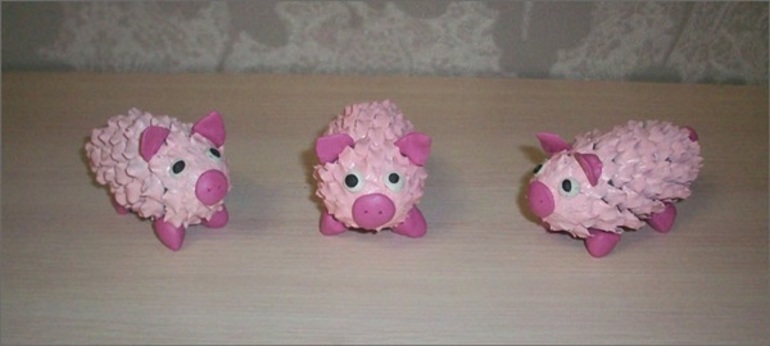
To make a pig or a piglet, the material will need to be painted pink first (in the first photo). Cones of small size, oval or round shape are suitable. The pig needs to make legs, ears and a tail of plasticine, mold a piglet, make eyes of black and white paper.
This funny little animal turns out to be quite stable. Such a quick craftsmanship from cones is possible even for a three-year-old child.
The cat is made of pine and spruce cones. For the body they take a large spruce, for the tail and paws - five smaller ones. The head is made of an opened pine cone. The ears of the cat are made of nutshell, the nose is made of velvet paper or felt. Eyes can be molded from plasticine or bought ready-made in a specialized store.
The lion is made by the same principle. The mane is made of chopped fringed orange paper.
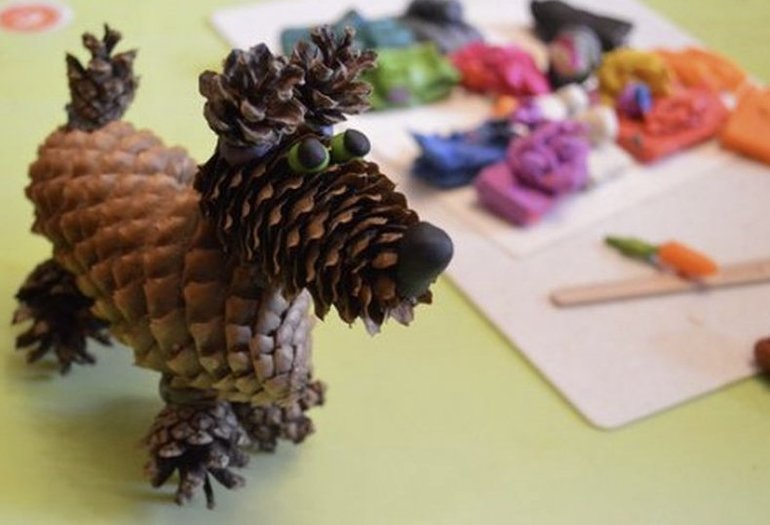
A dog or wolf can be assembled from undisclosed cones. Additional materials - glue, plasticine, nutshell.
And for a crocodile, a long fresh green cone is best suited. Of this, you can make a fish, equipping it with a tail and fins of paper, leaves or feathers.
Most modern babies adore dinosaurs. They sculpt them from plasticine, paint coloring with these characters, and probably will not mind making such a craft with their mother.
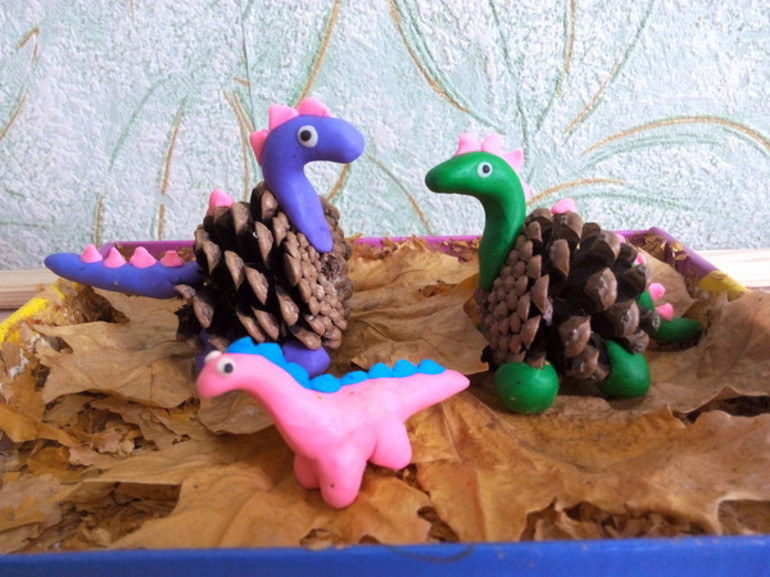
This is an unusual dinosaur, handmade. He smiles affably, and a preschooler or elementary school student will certainly want to make such a beast.
A long fir cone is an almost ready palm trunk that perfectly complements the composition. You only need to cut out the leaves from the corrugated colored paper and attach them to the top. If there is time and desire, you can weave leaves of green beads. So the dinosaur will have its own little garden.
Fairy tale characters
To make a three-headed dragon or Gorynych's Serpent, you need to take three large cones for the fused body and three smaller ones for the heads. The body can be wrapped several times with fluffy wire so as not to fall apart. Wings are made from leaves or colored paper. From the bottom, two chestnuts - paws are attached to the cones with plasticine.
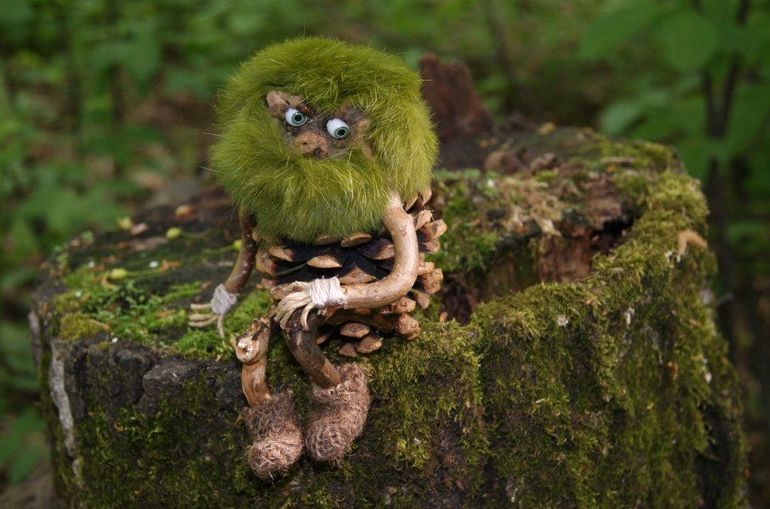
A funny little house or funny goblin, the inhabitants of a fairy-tale country are made according to the same principle as the figures of people. You need to take one large cone for the body, leaves, twigs, acorns and peel of chestnuts, glue and plasticine.
Forest dwellers can stand in the clearing. For it, you can take a cardboard box cut in half or a plastic cover and stick dry leaves, grass, moss to it with PVA or an adhesive pencil.
How to gradually produce an original craft - a brownie from cones and other natural materials, is shown in the diagram below.
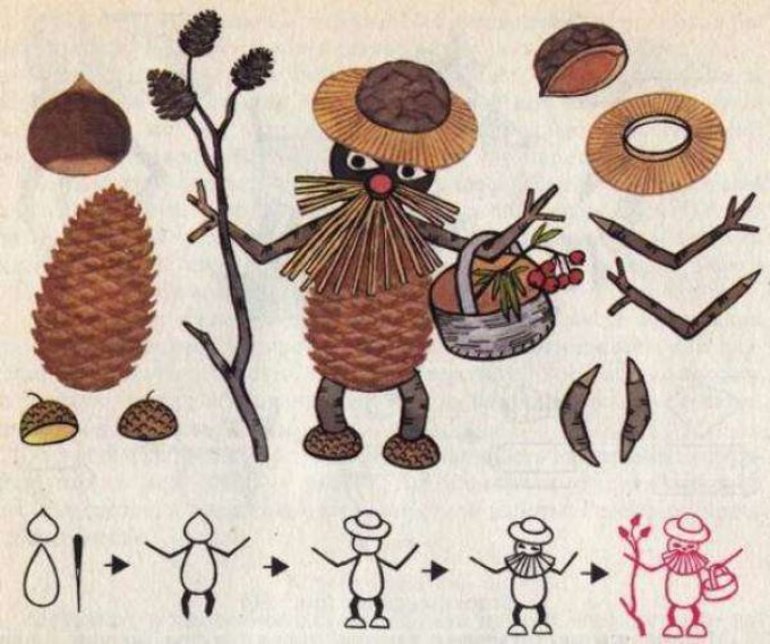
The gnome will differ from the little man, as well as the goblin with the house, only attributes - a cap, possibly a bag, which he holds in his hands.
Funny homemade Cheburashka is very easy to manufacture. You will need:
- Two round large bumps for the trunk and head, almost the same size.
- Two smaller ones are for ears.
- Two unblown pine (or two acorns) for the legs.
- Plasticine.
The parts are fastened together using plasticine and wire. The mouth, eyes and nose are made of plasticine or cut out of paper.
Christmas tree
The material for this craft can be pre-painted in green, gold, silver or made from white cones.
In addition to them, you will need such materials:
- Thick cardboard.
- Stand (wooden cross, wide tin can or just a flower pot).
- Sequins and other decorations.
- Superglue or thin decorative wire (depending on the method of attachment).
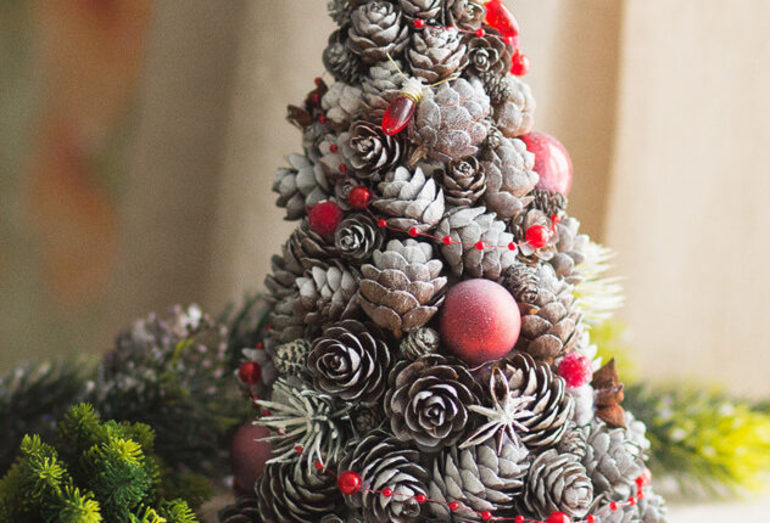
From a thick cardboard, you need to cut a cone and stick cones to it (wrap it with wire) next to each other on the entire surface. The finished Christmas tree is installed on a stand. The manufacturing steps are shown in the figure below.
On top of the tree you can hang beads. Small figures of Santa Claus and Snow Maiden, candlesticks with candles will complement the festive composition.
Such a tree will be a good gift for a New Year's holiday or Christmas. If cones of pine or spruce have already lost their smell, you can drip a few drops of fir oil on a tree.
Christmas wreath, bouquet
As additional materials in wreaths and bouquets on New Year and Christmas themes, you can use acorns, chestnuts, moss, nuts and nutshells, needles.
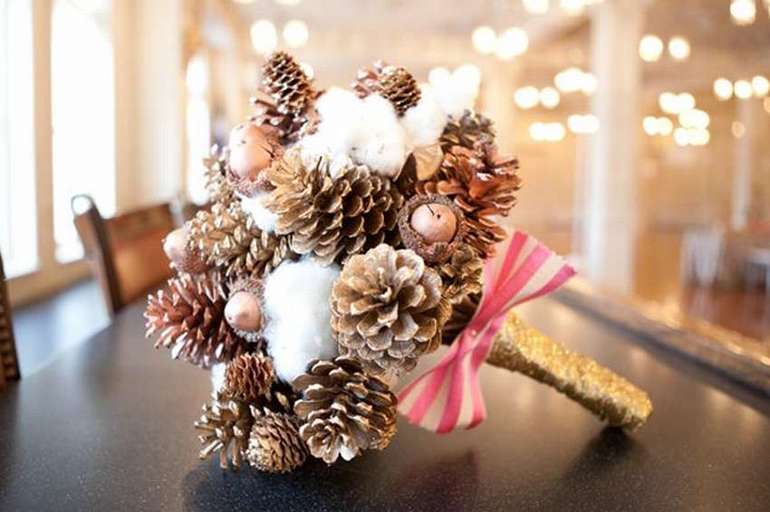
To make a wreath, it is advisable to first create a sketch. Natural materials are glued to a cardboard ring or attached to a wire circle. For reliability, the wreath is rewound with a decorative rope or ribbon.
This souvenir is really chic, and it can be presented to relatives or friends. It is not a shame to present such a wreath at the school exhibition of crafts, where it will attract everyone's attention.
Collected bouquets with cones can be supplemented, based on the season, with autumn leaves, clusters of mountain ash, green spruce branches. This jewelry is quite durable, especially if you spray it with varnish from a spray can. That's how crafts from bumps are made quickly and easily.
Children willingly give names to compositions, assembled by their own hands. So, we can call them "Breath of Autumn", "New Year's Motives", "Winter's Tale". Let your child’s imagination run wild, let him choose a name to his own liking! You can also, for example, make a picture-application with a simple plot or an abstract panel from cuts of cones. Decorated in a frame, it will become a real highlight of the interior.
Natural materials can be found and prepared completely free of charge, in any quantity, and online description (step by step) of many crafts. This opens up great opportunities for creativity for all ages: from children attending a middle or preparatory group of preschool educational institutions, or first graders to adults who are happy to spend time with their babies.
Crafts made from pine cones, made together with the children with their own hands, will become a successful addition to the home collection of souvenirs, decorate the exhibition in a kindergarten or school.
Creating eco-friendly home-made products, children feel unity with the environment, learn to appreciate nature and take care of it.
- How to choose a vacuum cleaner taking into account the characteristics of the house and coatings?
- What to look for when choosing a water delivery
- How to quickly create comfort at home - tips for housewives
- How to choose the perfect TV - useful tips
- What to look for when choosing blinds
- What should be running shoes?
- What useful things can you buy in a hardware store
- Iphone 11 pro max review
- Than iPhone is better than Android smartphones
 (No ratings yet)