

DIY manufacturing technology of tandoor from brick
The oldest kiln on earth is a brick tandoor. With your own hands, assembling such a design on a personal plot is not difficult, if you follow the step-by-step instructions. But even at the preparation stage, it is worth understanding the device and the principle of operation of the furnace. Also need drawings and diagrams. You can make them yourself or download the finished picture on the Internet.
The device and principle of operation
Traditionally, the Armenian or Uzbek tandoor was made on the basis of clay. A large vessel was molded from it in the form of a jug with rounded edges at the neck. Today, such stoves are presented in two forms:
- stationary;
- portable.
In their manufacture, brickwork with clay mortar is used today. Stationary structures can be pit (earthen) or above ground. Some craftsmen make roasting stoves on wheels. They are easy to move around the yard.
The device of the furnace structure is as follows:
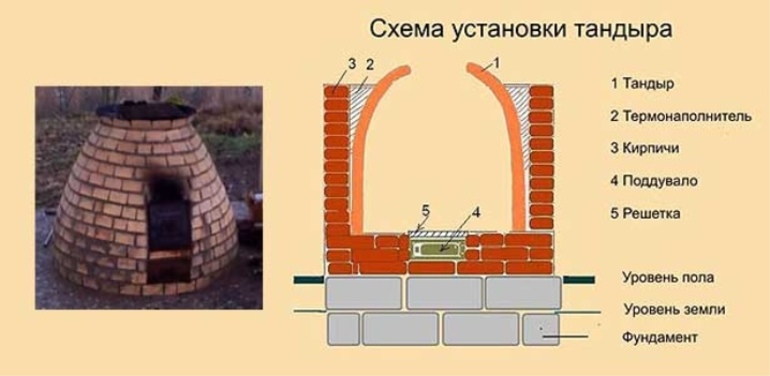
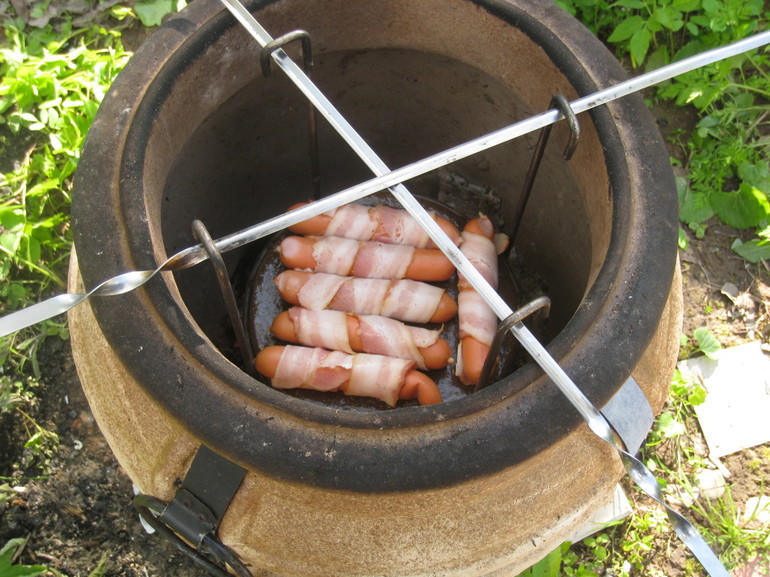
- At the very bottom of the stove is a blower that provides traction. As for fuel, you can use any wood, coal. If desired, you can connect a gas cylinder. In the upper part there is a hole in which fuel is laid, and also products for cooking are laid.
- The clay container is bricked, and heat-insulating material is laid between them. It is best to use sand, clay or salt for this. They retain heat much longer.
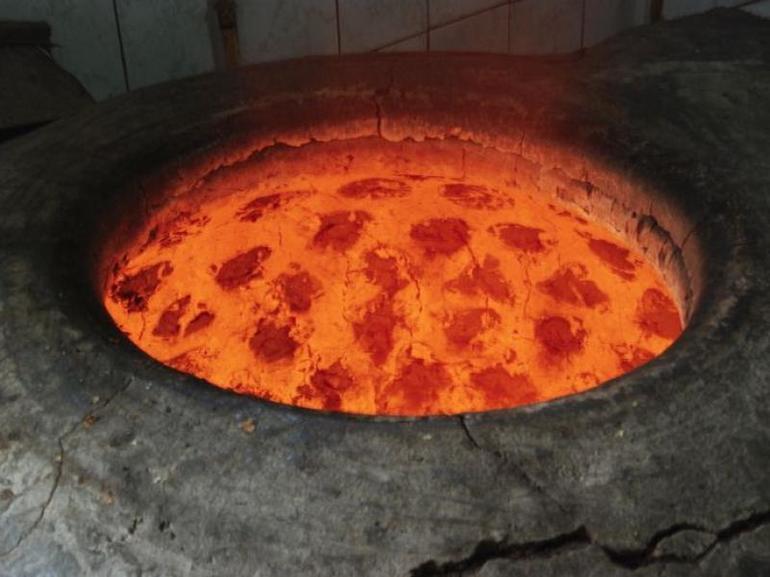
The principle of operation is also simple. The heat that is released during combustion begins to accumulate and heat the walls of the vessel to a temperature of 250-400 degrees. This makes it possible to cook dishes directly on the walls. Such a stove device can work up to four hours without additional laying firewood. In this case, the temperature conditions do not change.
Design features do not allow heat to go out. All the heat is distributed evenly over the container, so the cooked dishes are very tasty. For example, a barbecue will be more aromatic and juicier than on a standard barbecue. For convenience, the stove can be equipped with a special grill, on which products will be stacked in the future.
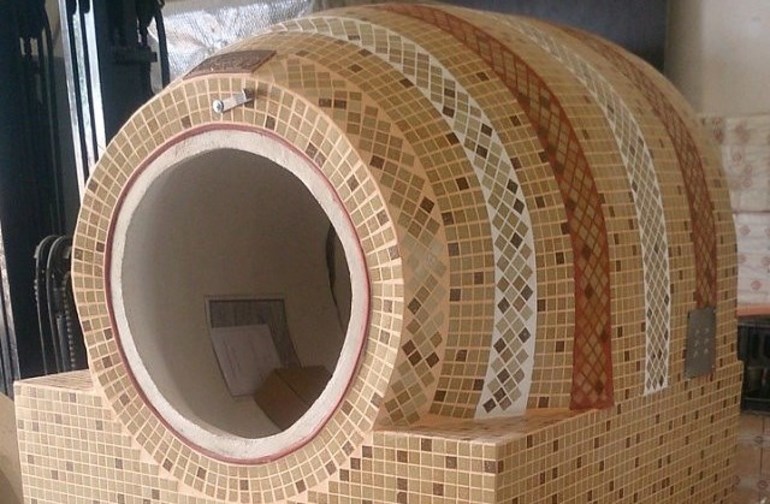
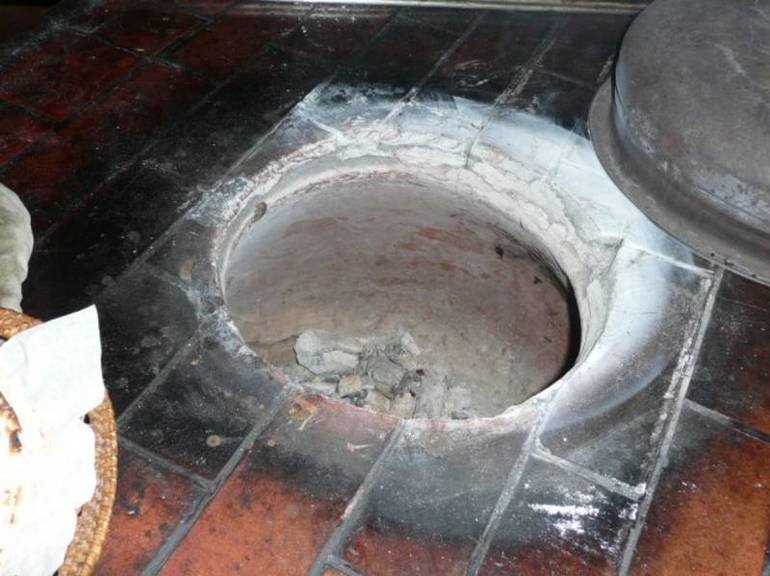
Among the shortcomings, it can be distinguished that all the processed material in the form of ash and coal is obtained through the upper hole, therefore, the stove often has to be cleaned. This is how a home-made brick tandoor looks and works in the East.
In the modern market, different models are presented. There are mini-stoves, electric tundra, but installing them in the country is not entirely rational. Therefore, many try to make such a roasting pan on their own.
Preparatory stage
The work is carried out in several stages. It is best to make a stove in the warm season. This is due to the fact that the solution loses its functions and structure at sub-zero temperatures.
Design and drawings
The first stage begins with the creation of a project and the manufacture of a brick tandoor drawing. For starters, it’s worth choosing the perfect place. It must meet the following requirements:
- the land should not be very waterlogged;
- the focus should be at a decent distance from a residential building and other buildings;
- the oven should not be elevated.
Once a suitable place has been selected, it should be cleaned and then carefully leveled. Also, at the preparation stage, it is necessary to determine the type of design.There are vertical and horizontal stoves.
It is important to prepare a drawing in which all sizes and parameters will be indicated. Then, according to these data, the necessary tools and materials should be procured. According to them, you can determine the approximate cost that will have to be spent on construction.
At the next stage, the necessary material is collected. To build a tandoor from brick, you will need the following:
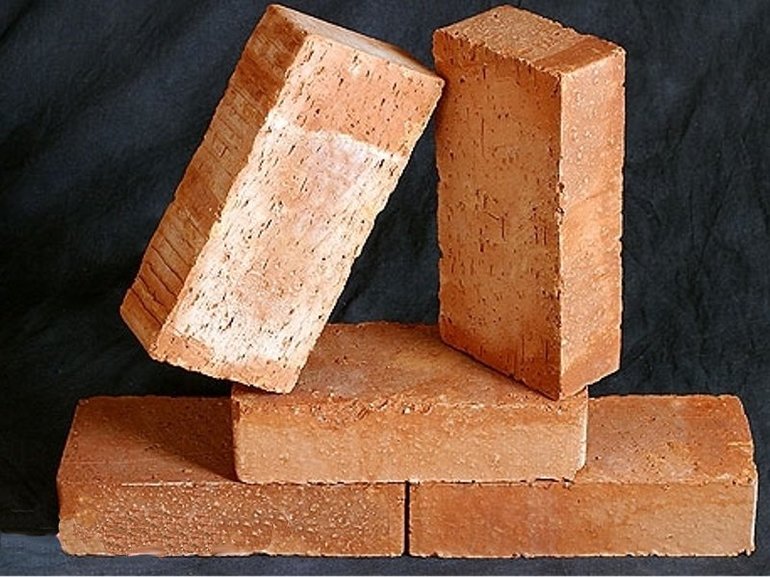
- refractory brick, better chamotte: its amount depends on the size of the structure;
- fireclay clay, crushed stone, cement;
- metal rods or a special grill;
- asbestos pipe: it will play the role of a blower;
- billets of wood: on them in the future will be laid brick;
- building level;
- Master OK.
All tools should always be at hand, so it’s best to set up a table nearby and put everything on it. Otherwise, you have to constantly run around the site in search of the necessary, and this takes a lot of time and effort.
Foundation pouring
To give the structure stability, you need to fill the foundation. If the earth is too clay, it is better to strengthen it and make a columnar version. A monolithic slab is enough for sandy soil.
Casting technology is carried out step by step:
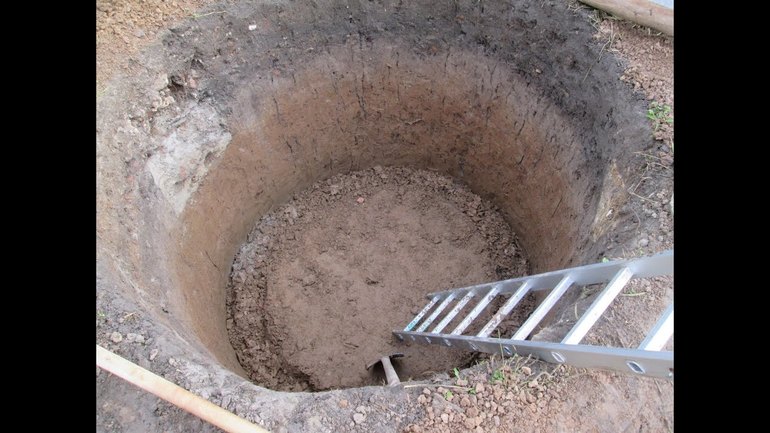
- First you need to dig a hole. Its diameter should be 10-15 cm larger than the stove itself. As for the depth, it needs to be done taking into account the thickness of the sand and mortar cushions. Usually it is 10-15 cm.
- After that, you need to carefully level the bottom, pour sand with a layer of 10 cm, and then carefully compact it. It is necessary to lay the reinforcing grill on it, and pour the concrete mortar on top of the structure. For greater reliability, it is possible to lay a layer of gravel in front of the grate, but it will also need to be tamped.
- Further, in order to slightly raise the foundation above the soil surface, it is necessary to make the formwork. It should be 10 cm above the ground. In this case, the brickwork will not suffer from washing.
At the very end, you should level the surface, check with a building level. There should be no discrepancies.
The solution can be prepared independently. To do this, you need:

- sand - 3 parts;
- fine gravel - 1/3 part (fractions should not be more than 1 cm);
- cement - 1/3 part;
- barrel or basin for kneading.
The result should be a mixture that in consistency resembles thick sour cream. The solution will be enough after three days. But in order for the foundation to dry completely, you will have to wait from 7 to 10 days.
If work is carried out in the summer at high temperature, it is necessary to periodically moisten the surface. You can water it with water from a hose. This is done so that it does not form cracks and chips.
Foundation tab
Now you can proceed directly to the construction of the tandoor stove itself. Start the process with making the base. For him, it is necessary to prepare fireclay bricks. The main features of this material are:
- withstands high temperature conditions;
- does not absorb moisture;
- due to the dense structure is not afraid of high loads.
Thanks to these qualities, it is considered the best material for the construction of outdoor and home stoves. Before proceeding with the laying, a waterproofing layer should be laid on the foundation surface. For this, you can use a simple ruberoid.
Next, you need to make a base, which should be made in the form of a circle. To do this, in advance, using the pattern, draw the boundaries of this circle. The material itself should be laid out in the usual order, and already at the very end cut the brick in the right places. This can be done using the cutting wheel. As a result, from the square masonry, an absolutely even and round base for the stove should be obtained.
Construction works
The most responsible and complex process in the manufacture of a furnace device is the erection of walls. When working, you must adhere to the following technology:
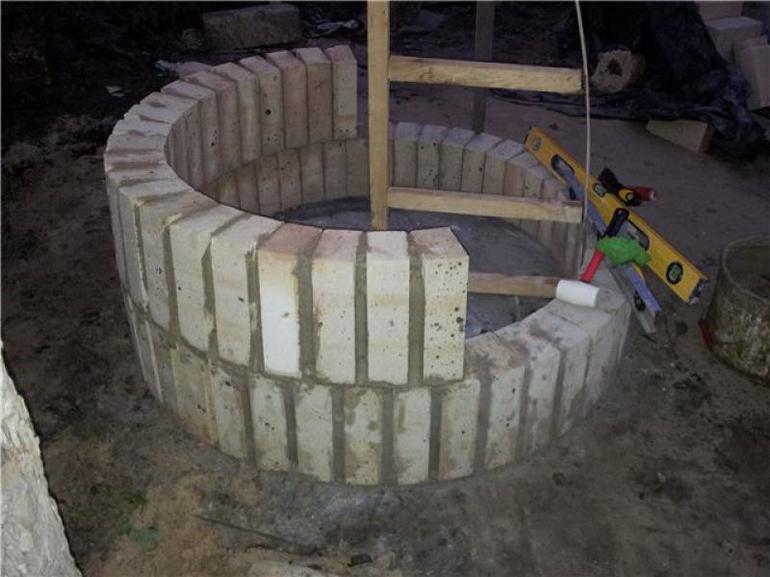
- First, make a template from prepared wooden blanks. With it, it will be possible to correctly adjust the circumference of the structure. Masonry begins at the base. The brick itself lies on the end in an upright position.
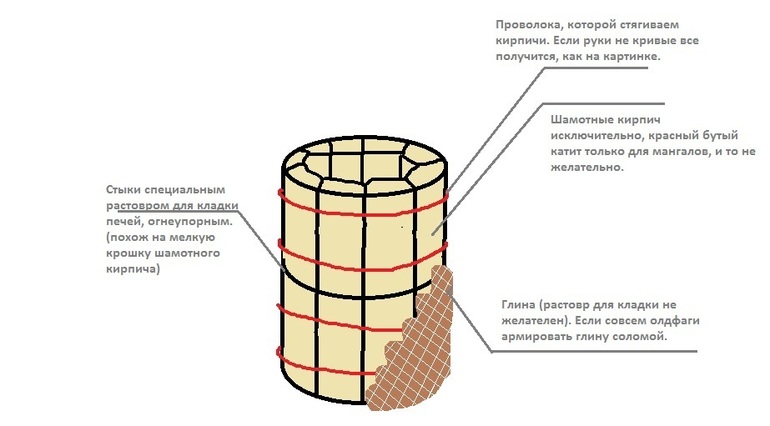
- The masonry is fastened with a solution that consists of chamotte clay, a plasticizer, as well as quartz sand. The fastening composition must be laid in sufficient quantity, the only way to ensure a normal connection.
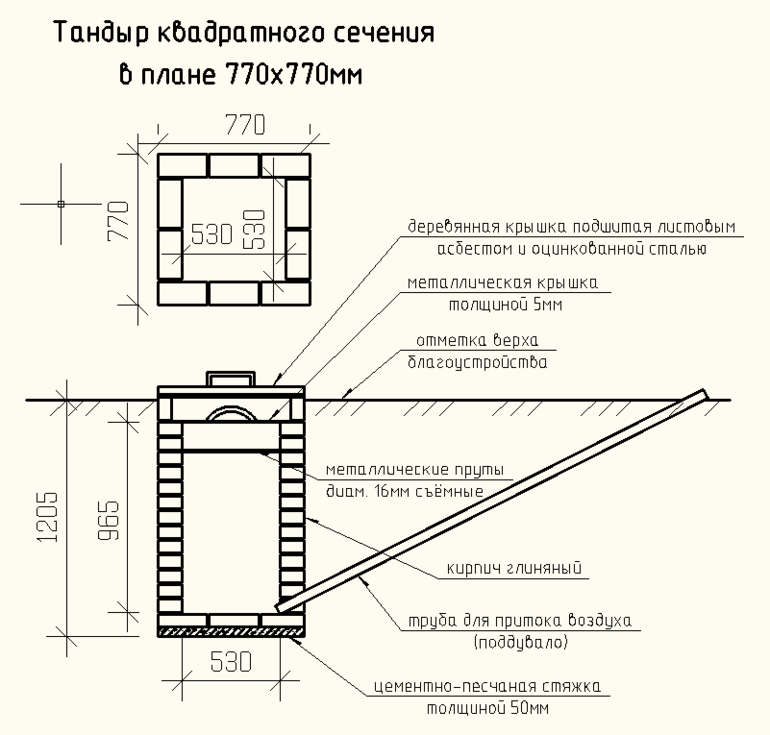
- After the first row a small space should be left. There will be a blower. Therefore, it is necessary to insert a segment of asbestos pipe into this gap. A special valve is inserted into it, with the help of which it will be possible to adjust the draft.
- Four rows are enough to fold a stove 1.2 m high, if the brick is laid in vertical masonry. After each new lift, it is necessary to tighten the structure into a ring. This is most conveniently done with a metal wire. The tips in this case are hidden in the seams.
- When laying the last row, they work a little differently. Brick must be laid under a slight slope to the hole. Thus the neck is formed. It is best to slightly trim the brick with a grinder before this.
Now it remains to wait until the roasting oven is completely dry. As a rule, this takes a little less than a week. After that, it will be possible to proceed to the next stage.
Exterior and interior decoration
Finishing work involves coating the brick structure with clay mortar from the inside. Outside, the stove is laid out with natural stone. Clay must be laid out with a layer of 10 cm. Then everything should be leveled so that the surface is even. The upper edges must be made in the form of a roller.
After you need to leave it for a while, so that the composition is completely dry. To avoid getting wet or drying out, it is worth covering the tandoor first with plastic wrap, and then with dark material.
As for the exterior finishing work, here you can use many variations. Most often, a square box of red brick is built around the stove. It will additionally retain heat. The space between them is filled with clay mortar.
The roof of the stove is missing. This is due to the fact that when the fuel is burned, the fire can rise above the neck. In this regard, it is worth thinking about the lid in advance. It can also be made with your own hands from any means at hand. The main condition is that it be made of metal. The lid will not only contribute to the proper distribution of heat inside, but also protect the dish from various debris getting into it.
Kiln firing
Before starting the baking process, it is necessary to prepare the tandoor for work, namely, to carry out the firing. The first procedure is carried out with a little brushwood. This is done to finally dry the solution.
For the following two procedures, it is worth taking a better fuel and increasing the operating time and temperature. After that, the stove can be fully operated. Do-it-yourself tandoor production is completed.
Checking that the walls are ready for cooking is very simple.. You just need to draw a stick over them. If the soot disappears, then you can start cooking. This procedure cannot be carried out with an electric stove. In addition, it is forbidden to pour hot water over the frypot with cold water. This will cause cracks to appear on the structure.
- How to choose a vacuum cleaner taking into account the characteristics of the house and coatings?
- What to look for when choosing a water delivery
- How to quickly create comfort at home - tips for housewives
- How to choose the perfect TV - useful tips
- What to look for when choosing blinds
- What should be running shoes?
- What useful things can you buy in a hardware store
- Iphone 11 pro max review
- Than iPhone is better than Android smartphones
 (No ratings yet)