

Do-it-yourself windmills for generating electricity in a summer house
All summer residents and homeowners dream of alternative sources of electricity, especially if the site is located away from the central network. Therefore, sooner or later they begin to think about buying wind generators. The cost of the finished device is quite high, so many try to make windmills to generate electricity with their own hands.

Principle of operation
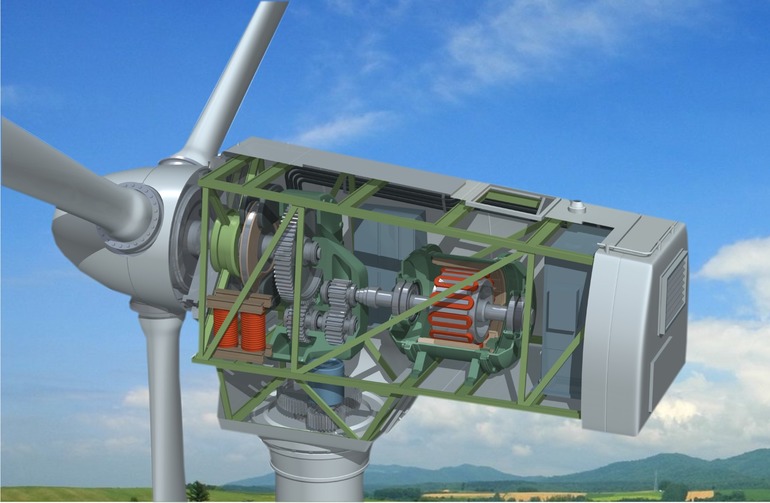
A wind turbine (wind turbine) is a structure that converts kinetic energy into mechanical energy. The latter begins to rotate the rotor, due to which electricity begins to be generated.
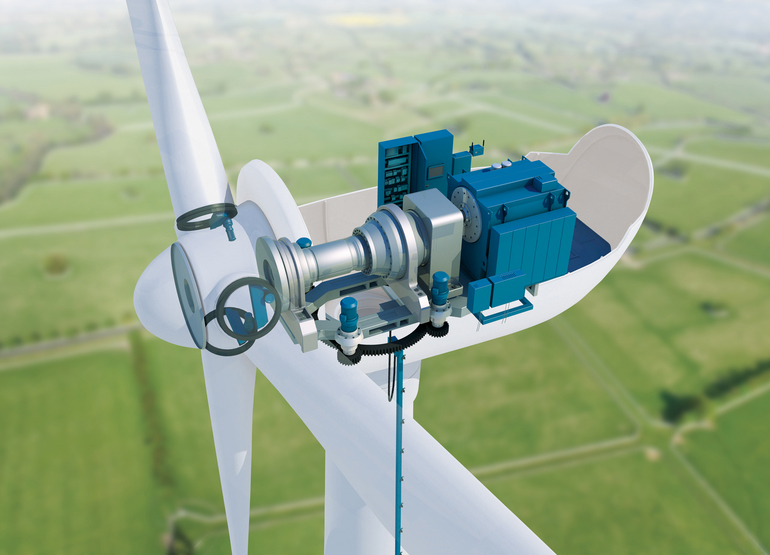
The device consists of the following parts:
- the blades that create the propeller;
- turbine rotor;
- generator and its axis;
- inverter for charging batteries;
- battery.
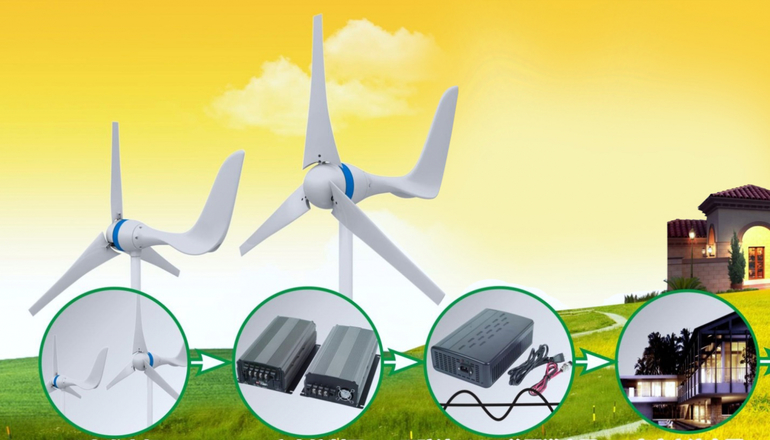
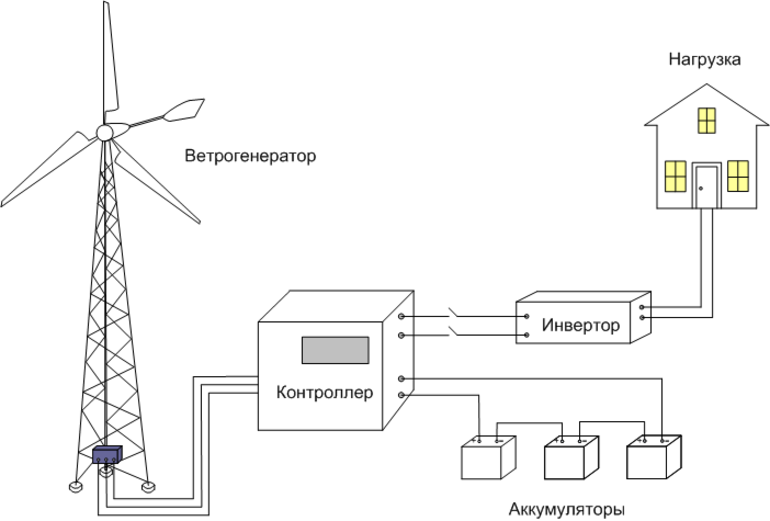
In fact, the wind generator is designed very simply. When the rotor rotates, a three-phase alternating current begins to form, and it, in turn, enters the controller, which makes the battery recharge. After that, the inverter starts to work and converts electricity, which ensures the operation of the TV, refrigerator and other necessary household appliances.
Wind farms may differ in the following ways:
- the number of blades;
- material of manufacture;
- the location of the axis of rotation;
- step difference screw.
In addition, a do-it-yourself wind farm for the home can be made with one or more blades. The presence of a large number of elements ensures operation even with a slight wind blow.
As for the material of the mill itself, its blades can be made sailing or rigid. The first option is considered more budgetary, since they are assembled from metal or fiberglass. But they are of less quality, so they will often break.

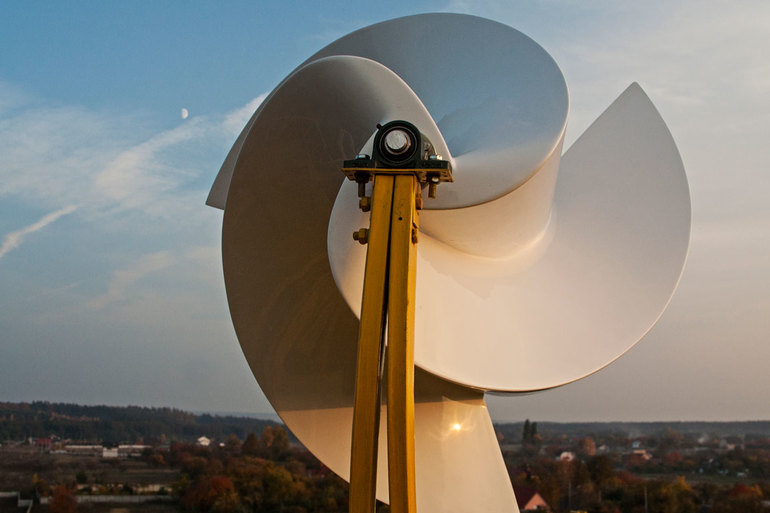
The axis of rotation can also be different; there are vertical and horizontal models. The latter are considered slow-moving, so if you need a powerful installation, then you should give preference to vertical windmills.
Also, designs differ by step sign. They may be:
- fixed;
- mutable.
Variable models can increase the speed of rotation, but they are bulky and complicated in the device. But fixed samples are considered simpler and more reliable.
Rotor type wind turbine
The easiest way to make a 4 kW wind turbine at home. Such a installation will be able to provide electric energy to a small country house and outbuildings on the site, and also, if necessary, highlight the area around them.
Before proceeding with the installation, it is worth preparing the necessary construction equipment and materials:
- 12V car generator;
- 12V battery;
- switch-button on 12V;
- wires with a cross section of 2.5 square meters. mm and 4 sq. mm;
- clamps, bolts and washers;
- voltmeter;
- converter 700W -1500W, as well as 12V-220V;
- warning lamp relay;
- aluminum barrel or other stainless steel tank.
It is also worth pre-stocking with a drill, grinder, tape measure and wire cutters. If everything is prepared, then you can start assembling a homemade wind turbine.
Assembly assembly
Start the assembly process of a homemade fan with the manufacture of the base. To do this, follow the step-by-step instructions:
- Take the prepared aluminum container, then use a tape measure and a construction marker to mark out, and already cut the barrel into four parts.This can be done with a grinder or scissors for metal, but the cuts need not be done to the end. The result should be blades. Drawings can be created independently or downloaded on sites dedicated to these devices.
- Now you need to make holes at the bottom of the tank and the pulley of the generator. They must be symmetrical so that there is no imbalance during rotation.
- After this, you need to slightly bend the blades so that they lie neatly and do not stick out in different directions, while bending should be done taking into account the direction of rotation of the generator. As a rule, everyone is guided by the hour hand. In addition, it is worth paying attention to the fact that not only the capture area of the air flow, but also the rotation speed of the propeller itself depends on the bending angle.
- Now you should fix the container with the blades on the pulley. After that, install the engine (generator) on the mast, and then fix it with the help of prepared clamps. At the same stage, you need to connect the wires and assemble the circuit.
But in the process of connecting it is worth recording the circuit, marking the colors of the wires, as well as marking the contacts made. Subsequently, this may be needed. At the very end, you should fix the wires on the mast of the generator. To connect the battery, wires with a cross section of 4 square meters are taken. mm (for this, a length of 1 meter is quite enough).
To connect household appliances to the network, a wire with a cross section of 2.5 square meters is used. mm, and an inverter is also installed.
Pros and cons of the device
If the technology is followed, then the electric wind generator will work for many years, respectively, in a private house there will be light, electricity and even heating. In this case, the owners will not face frequent breakdowns.
The device can be improved and achieve a power of 10 kW. To do this, connect a 1000 volt converter and a 75A battery. In this case, the generator is crafting faster, which means that the electricity can be enough even for an alarm system and a surveillance camera.
There are several advantages of such a visor:
- profitability;
- providing full acoustic comfort;
- no special operating conditions are required;
- all parts in case of breakage can be replaced, since they can be made from any means at hand.
It is worth noting the disadvantages of a homemade device. These designs, unlike purchased devices, have a lower rate of performance. In addition, they are highly dependent on gusts of wind. Powerful airflow often disrupts the propeller.
Windmill from a washing machine
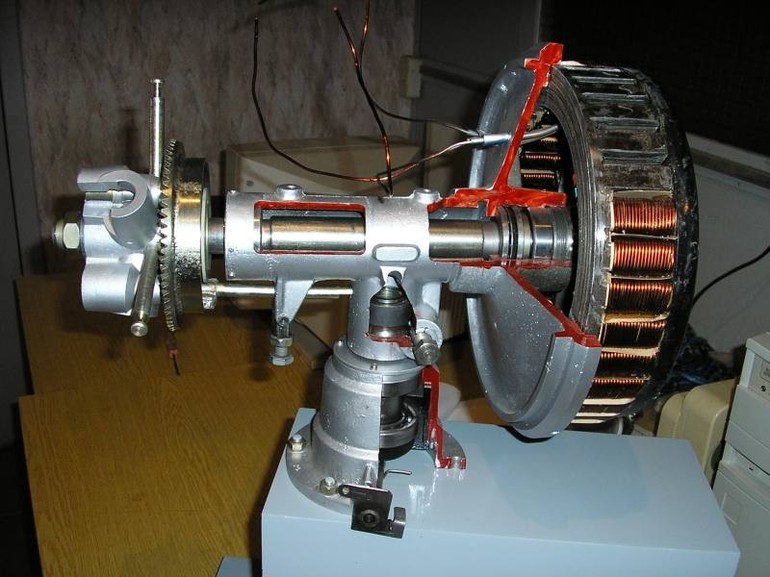
You can also assemble a wind turbine from a washing machine, or rather, an electric motor from it will be needed for manufacturing. This device will not be costly, unlike axial, helicoid wind turbines or gas generators.
It is not difficult to make it, so even a beginner who does not have experience can cope with the task. But for this you need to prepare in advance all the necessary details, and then assemble them in the right order. At the very end, it is necessary to install a wind turbine in a suitable place. As soon as the wind blows, the installation will work, and the desired energy will appear in the house.
Procurement of material
For installation, you will need some accessories. They do not have to be purchased on purpose, since many of the parts are likely to be found on the site.
To build the installation, you need to prepare:
- rotor with blades (you can take Daria);
- starter, with which the speed of rotation is regulated;
- a casing that protects structural parts from precipitation, dust and dirt;
- the battery necessary for the accumulation of electricity to provide power to household appliances when the windmill itself is not working
- an inverter with which the current is transformed;
- tail for turning;
- mast (the whole installation rests on this device).
It is also worthwhile to disassemble the old washing machine in advance, remove the 1.5 kW engine from it.Separately, you will have to purchase neodymium magnets of 0.5, 1 and 2 cm (32 pieces of each type). In addition, you will need glue, sandpaper and cold welding.
Frame manufacturing
At this stage, it is necessary to remove the cores from the rotor and partially cut off the upper part (about 2 mm). This can be done with a lathe. Then it is necessary to cut grooves with a depth of 5 mm on each.
After that, you can install magnets, but they should be located at the same distance from each other. More secure hold provides super glue. The main thing is that the distance is correct, otherwise the elements will simply stick together, and the operation of the windmill itself will not be so effective. You also need to make a tin coating for the cores.
Now you should lay the finished template with attached magnets on the rotor, fill in all the gaps with epoxy resin and leave for a while, so that everything solidifies properly. After that, it is necessary to polish the rotor with sandpaper. This is more convenient to do if it is clamped in a vise.

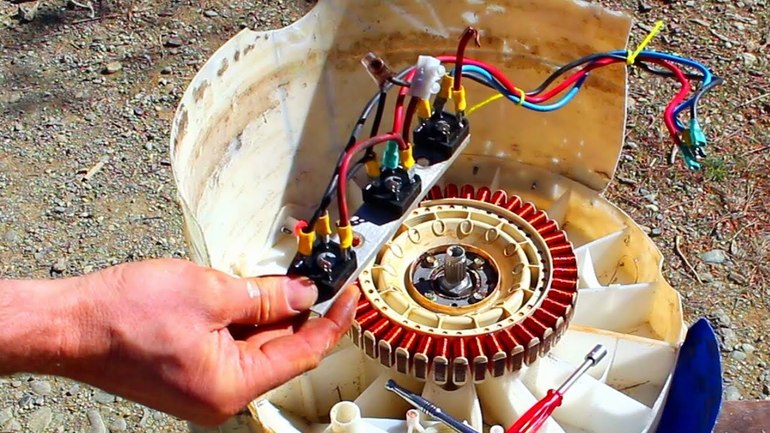
After that, you need to check the bolts on the housing, bearings, and if they are worn out, it is better to replace them with new ones. Actually, the 220 V wind farm is ready to do this, it remains to test it in practice.
To do this, prepare the following:
- battery;
- controller;
- tester;
- rectifier.
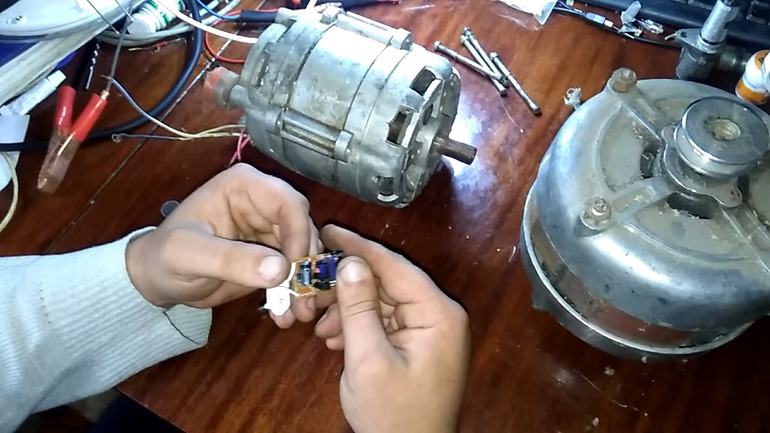
Next, you need to determine exactly which wires lead to the working winding (there should be two of them). All that is superfluous is simply deleted. The necessary elements should be connected to the rectifier, and it should be connected to the controller, which is already connected to the battery. On this wind generator for private homes is assembled.
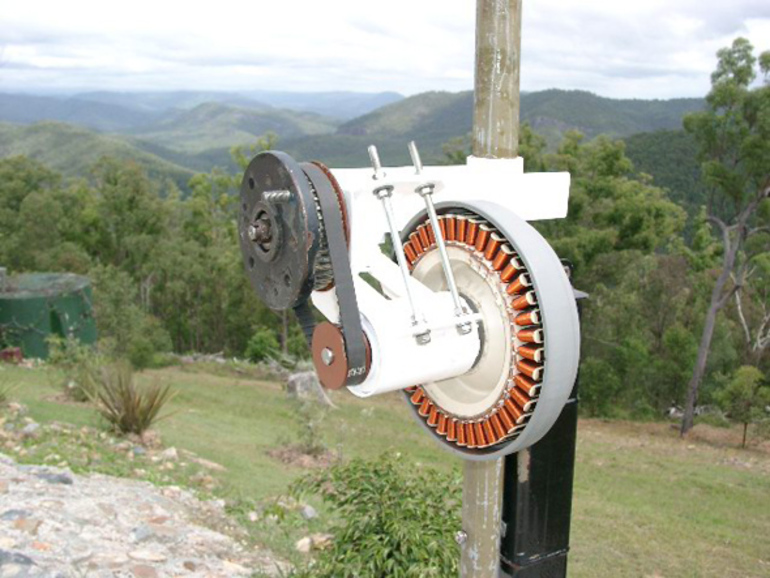
Determining the power of the windmill is quite simple: you need to bring the voltmeter probes to the battery, and wind the windmill with a simple drill (you can use a screwdriver for this). The speed of promotion should be at least 800 revolutions per minute. If the voltmeter readings vary within 200-300 V, then everything is done perfectly.
Impellers for windmills are best made from durable but lightweight material. Experienced craftsmen recommend using fiberglass for this.. Its positive aspects:
- wear resistance;
- strength;
- little weight.
For the manufacture of the mast, you can take any steel pipe. They need to fix the manufactured device and install it in a permanent place.
- How to choose a vacuum cleaner taking into account the characteristics of the house and coatings?
- What to look for when choosing a water delivery
- How to quickly create comfort at home - tips for housewives
- How to choose the perfect TV - useful tips
- What to look for when choosing blinds
- What should be running shoes?
- What useful things can you buy in a hardware store
- Iphone 11 pro max review
- Than iPhone is better than Android smartphones
 (No ratings yet)