

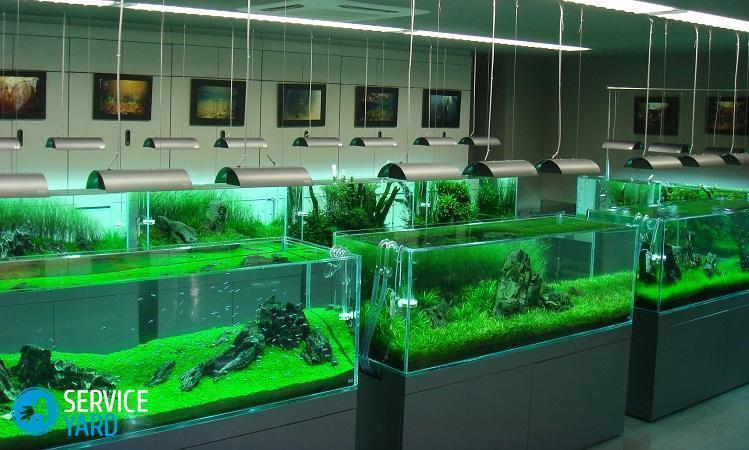
DIY aquarium made of glass

Domestic fish in an aquarium is the dream of almost every child and at least half of adults, but not everyone can afford to buy expensive aquariums in stores. In this article, we will talk about how to make an aquarium with your own hands out of glass. After all, it has long been a known fact that making it with your own hands will cost less than buying a finished one. And if you deal with everything in detail, it turns out that, in principle, there is nothing particularly complicated in this process.
to contents ↑Choose glass
When choosing materials for the future aquarium, do not be too lazy to do this with special care, because the right material is a direct path to success. Glass for a house of fishes should correspond to esthetic and functional qualities. And this means that before you buy material for work, you should know the following.
Glass type:
- For your purposes, only silicate glass is suitable, organic in this case is not suitable due to a number of reasons. First, plexiglass can release chemicals that are not known to affect the inhabitants of your aquarium. Secondly, the appearance of such a material also leaves much to be desired.
- In turn, our chosen silicate glass is also divided into 2 types: window and window. The first for our purposes is absolutely unsuitable, as it is very fragile, it distorts the image, and also has irregularities and roughness. Therefore, do not throw money away! It is better to immediately buy a glass case, the processing quality of which meets our requirements. It costs a little more than a window, but will pay off more than once during the operation of your product.
- Each glass has such a measure as its grade. In total there are 8 types: from M1 to M8. The higher the number, the less quality the glass. So, M1 represents the highest quality. In order to make the aquarium with their own hands made of glass, experts recommend choosing the highest grade. If for some reason it is not available to you, take the quality a little lower, but not lower than the M3 mark - it is used in extreme cases. All glasses with a mark above M3 simply can not withstand the pressure of water and burst.
Important! When choosing glass for an aquarium, carefully examine it from all sides. The surface of the product should be smooth, transparent and without any defects, because even the smallest crack can lead to disastrous results.
Determine the thickness of the glass
If everything is clear with the length, height and width, then the thickness of the glass must be determined by recalling school physics. First you need to determine the volume of the future tank, and then look at the table, which is designed just for such purposes. You can easily find it on the Internet by driving a query into the search engine: a table for determining the thickness of glass for an aquarium.
Also, stiffening ribs are used for large aquariums, and they are also with screeds for even larger aquarium sizes. This is done to increase the strength of the product.
Important! If you do not have experience in cutting glass, it is better to entrust this process to a professional - take the glass to the workshop.
Now that you know how to choose the perfect material for the aquarium, let's talk about how to choose the glue for the aquarium glass.
to contents ↑Choose glue
A wide range of all kinds of adhesive solutions is provided in construction stores. Before choosing one of them, you should know a few specific points:
- The selected product should fully ensure the tightness and water tightness of the structure, because no one needs a leaking aquarium.
- The second point assumes a well-designed aquarium design. Adhesive compositions are of 2 types: black and transparent. For beginners, it is recommended to use it transparent, since an inexperienced hand can lubricate an even seam, and this will be noticeable with black glue. From this, the aesthetic appearance of the product will deteriorate.
Important! The only right option for sticking aquariums is silicone sealant. There are a number of reasons why it is best to take this particular glue for aquarium glass. Among them:
- excellent isolation;
- lack of antibacterial impurities.
The second is especially true, since the representatives of flora and fauna in your product will not be happy with such chemistry in their environment.
List of the most common adhesives
Answering the question of how to glue an aquarium out of glass, many experts allocate the following funds:
- Dow Corning 911 has been a market leader in adhesive adhesives for many years.
- Tytan - is in no way inferior to the first place, except for one nuance: it has an unpleasant odor that will disappear for several days.
- Soudal Silirub AQ is also a commonly recommended sealant for gluing materials such as glass.
- Chemlux 9013 is a German brand of glue, which is also in demand among specialists.
to contents ↑Important! When choosing glue, keep in mind that a suitable silicone will provide quality and reliability, and you will have to spend money on cheap and low-quality glue to repair the same aquarium.
Gluing process
Now that we have chosen the right material and glue for the glass of the aquarium, be patient and get to work.
Instruments
This will require the following tools:
- Soft whetstone.
- Syringe with a volume of 20 cubes for applying glue to the surface.
- Clerical knife or other sharp blade.
- Wipes to remove excess glue.
- Means for degreasing.
Gluing methods
There are a couple of ways to glue the bottom and walls of the product together:
- Directly attaching the walls to the bottom.
- Fixing the walls around the bottom.
Both methods are good in their own way, and practically do not differ in the reliability of the structure, its appearance. Also, both methods do not differ in gluing technology.
In order to make an aquarium with your own hands made of glass in the first way, you need to do the following:
- In order to secure the work with glass, it is necessary to sharpen the edges of the walls and bottom. This will help to avoid careless cuts. To do this, put a terry towel on the bottom of the bathroom - this will save you from scratches on the bathroom, put glass on it. Pick up water. With the moistened stone that we prepared before starting work, process the edges of the glasses. Try not to touch the slice, as this may affect the adhesion of the sealant.
- After this procedure, dry and degrease the glass. Do this procedure with extreme care.
- Now we proceed to the most important and difficult stage - the fastening of the structure. Choose a place where your product can stand for a day. Put a newspaper on the surface. The front wall is glued first. To do this, sealant is applied to its end with a neat even layer, the part is pressed to the bottom of the aquarium.
- Now the side wall is similarly fastened, not only the end of the glass, but also its side edge is lubricated. In the following scenario, the remaining faces are glued.
- Now leave the structure to dry for 24 hours, unless otherwise indicated in the instructions for the adhesive.
- If necessary, stiffeners are installed after time, and the aquarium dries for another 24 hours.
- After complete drying, the adhesive is removed from the product with a blade along the glass surface.
- Next, the aquarium is checked for strength. To do this, they collect the necessary amount of water into it and check if there are leaks.If such were formed, then it can be eliminated without “disassembling” the structure. To do this, a little sealant needs to be pressed into the leak on the inside of the product.
- If it did not succeed, the walls peel off, clean and the process starts again.
to contents ↑Important! Gluing in the second way occurs according to the same principle.
Making an aquarium from a can
If you are not sure that you can make an aquarium with your own hands out of glass, try to make it from an ordinary three-liter jar.
You will need:
- Bank or bottle. The product should not be less than 3 liters, but in fact - the more the better. You can also adapt a large glass pot.
- Priming. You can buy a beautiful multi-colored soil for the aquarium in the store. You can also use small pebbles, pebbles and other materials as soil. Before placing them in our aquarium, you should boil all the elements.
- Compressor. A necessary thing to provide fish with oxygen.
- For decor, you can use a seashell.
- Fish and plants.
Process of creation
Making an aquarium out of a can is very simple. For this:
- Wash the can thoroughly. No detergents except soda. Pour boiling water over it.
- Fill the prepared soil, install decorative elements.
- Pour water and plant the plants.
- Connect the compressor.
- Run the fish.
A few nuances
When you are going to make an aquarium from a can, consider some of the nuances that a novice aquarist needs to know:
- The larger the capacity, the better for you and the fish.
- Do not use plastic products as an aquarium.
- If the can is small, the filter does not fit into it. So - you should perform its functions by adding fresh water, siphon bottom, wiping the jar from the inside.
- For pouring and replacing, use only settled water.
to contents ↑Important! There are a couple of points regarding care, so that the fish feel comfortable, and the aquarium always looks beautiful:
- Do not place the aquarium in direct sunlight, this will cause the aquarium to bloom and your pets will die.
- Maintain the correct temperature in the aquarium.
Stock footage
This article told you how to make a glass aquarium with your own hands. At the same time, we examined all the subtleties of creating this product, as well as a specific example of creating the first aquarium from a simple can. Now you can confidently start fish, because with the help of our useful tips you will not have any difficulties.
- How to choose a vacuum cleaner taking into account the characteristics of the house and coatings?
- What to look for when choosing a water delivery
- How to quickly create comfort at home - tips for housewives
- How to choose the perfect TV - useful tips
- What to look for when choosing blinds
- What should be running shoes?
- What useful things can you buy in a hardware store
- Iphone 11 pro max review
- Than iPhone is better than Android smartphones
 (No ratings yet)