

DIY ballet shoes
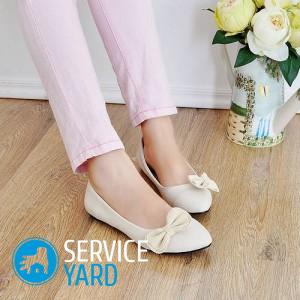
An ideal option for any glamorous female is a lot of pairs of shoes of a certain shade for the color scheme of each dress. But you can not always afford to have a large number of shoes for the most unforeseen event. This is very expensive, and in addition, it is sometimes difficult to choose the right shoes from the offered range, which is available on store shelves. In this article, we will look at how to make ballet shoes with your own hands, because these shoes are very comfortable, suitable for a variety of outfits, and it may look like real “tsaritsynye cherevichki”. The main thing is to choose the right design and do the work carefully.
to contents ↑Why are ballet shoes interesting?
If you apply small needlework skills that any fashionista can master and use when sewing a pair of ballet shoes, it is quite possible to save money and get a lot of pleasure from the process itself and the final result. And if the needlewoman perfectly knows the basics of cutting and sewing, and she herself can master and sew several pairs of wonderful ballet shoes, then the presence of a large number of shoes for her is not a problem at all.
Important! This process turns into a popular form of handmade art, which is very expensive. Such a model is individual and exclusive in comparison with ordinary shoe products from the store.
There are other nuances:
- You can choose the right base material yourself.
- Wearing such comfortable shoes gives you incomparable pleasure, because they are perfectly combined with the wardrobe of clothes.
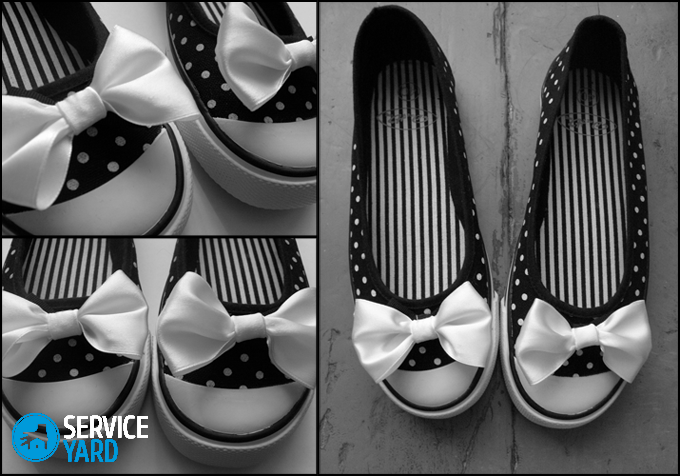
- You can also come up with jewelry made of beads, embroidery or leather. Design imagination can be varied.
How to sew ballet shoes from a finished pair of shoes?
In order to independently master the manufacturing process, you must first get acquainted with the design of the shoe itself. You can take an old pair of ballet shoes and try to disassemble it into its component parts. If there is no suitable option or it is a pity to disassemble your favorite thing, you can buy slippers or ballet shoes in a cheap boutique, which are suitable for visual aids.
Necessary materials
Consider the list of necessary materials and items that may be needed in the process of separation of visual aids:
- In order to learn how to sew ballet shoes, you need to have a shoe sample that can be disassembled into component parts. An illustrative sample of shoes makes it possible to make your own adjustments and come up with a lot of individual, convenient models that will be unique and inimitable.
- Parsing a visual sample of shoes, you will need an ordinary pen. On the details of the shoes that will be cut out, you need to make notes with a pen. You may also need a simple pencil or a bright marker.
- Also, the process involves the presence of sharp objects. The use of knives, screwdrivers, spatulas allows you to disassemble a visual sample of shoes into composite parts with minimal damage to their structure.
- Must be present first aid kit. When engaging in a not quite familiar procedure, you always need to have the necessary medications at hand, such as cotton wool, bandage, iodine, or a similar antiseptic. The presence of a first-aid kit helps to provide the necessary assistance for an unexpected cut.
- Protective gloves are also required.When working with sharp objects, it is advisable to work with special gloves for reliable protection against possible scratches and cuts.
- Personal protective equipment also includes safety glasses. Sometimes, performing the decomposition of the ballet flats into its constituent parts, it is necessary to spend a lot of effort in which a situation arises where some small fragment can accidentally get into the eyes. In such cases, goggles are needed to protect the eyes from unwanted damage.
- Large sheets of paper. If it is necessary to design large sizes of ballet shoes, then paper is used to build the pattern. If the paper size is not enough to create a pattern, then apply the gluing of several small leaves. As a result, the necessary patterns should fit well on the selected sheet of paper.
- Be sure to prepare several types of scissors. Small sharp scissors are very convenient for cutting parts at the seams. Large - used for cutting parts.
- It is very convenient to use a camera that would help point-by-point to compile a photo report of the process of disassembling a visual sample of shoes, since this will further simplify the process of reassembling. You can also always see how the finished ballet flats should look, and you don’t have to remember how it was at the beginning. You can take pictures of shoes from different sides.
Important! The disassembly process must be carried out with one ballet shoe, the second - should remain unchanged. In this case, a complete picture of the entire base of the shoe sample is visible. You can also compare the location of the fabric pattern on a visual aid. Thus, you can control all the work and be sure to avoid mistakes when building patterns.
Tags
You need to choose the brightest marker, and you can start drawing on ballet shoes.
How to apply tags to stitch ballet shoes with your own hands:
- First you need to mark the points of the joined parts.
- Then draw the edge of the sole on the outside of the selected fabric.
- Remove the sole from the fabric.
- Draw a line on the inside of the heel of the shoe that runs along the seam.
- Extend the line on the sole of the shoe.
Important! If the sole is removed, the back seam and border marking should be visible along the upper edge. It is necessary to try to apply as much lines as possible at the turns and at the junction points. This procedure will be very useful when you have to independently produce the first ballet shoes.
Try not to lose sight of the line that visually shows the junction of the inside with the sole. If you use a camera, then this line is not always traced in the image, but in any case it is there. You can try to arrange your own labels yourself, so that in the future it will be much easier and more convenient to understand them.
Disassembly slipper
It is best to do the procedure of disassembling the shoe into its components after a good rest, so that you can focus on such a responsible process. After completing this work, you will be incredibly glad that for a visual aid it is enough to disassemble only one slipper.
In the process of disassembling ballet shoes for composite parts, you must adhere to such tips:
- To separate the sole, you need to use something thin and sharp - a spatula, a scraper or a screwdriver.
- Having started the disassembly process, you need to thoroughly feel the slippers and find the weakest point from which you can start.
- We need to work very carefully so as not to damage the fabric of the product, since we still need intact material to build the required pattern.
How to disassemble slippers in order to make ballet shoes with your own hands:
- Using a spatula, we begin slowly, slowly to separate the upper part from the sole. This procedure must be completed at a time.
Important! If necessary, you need to use different types of scissors, so that it is more convenient to tear open the seams of the shoe, which is used as a visual aid.
- Separate the details of the sole, insole and side of the slipper. If necessary, it is necessary to cut the deformed fabric in order to straighten the cut and carry out the procedure of transferring it to the paper.
Work on the pattern
The algorithm of actions when working on a pattern:
- We lay out the upper part of the ballet flats on the prepared sheet of paper.
- We circle the slippers with a simple pencil, if possible - we fix all the marks that were previously marked.
- Having folded the sheet in half, we find and mark the center line on the pattern.
- Add 1 cm of allowance in the places where the sole is attached. On the heel, you need to add 0.5 cm to make a seam. In the inner perimeter of the insole, add 1 cm.
- You can mark labels for alignment.
- All parts of the pattern must be inscribed and designate the right or left section, the inner part or the outer. In addition, the middle of the toe and heel should be noted.
Thus, a personal pattern is built.
Important! If there are a lot of clumsy working moments on it, then you can copy it to the final version and correct it.
It remains to determine the choice of fabric, which is necessary for the manufacture of the very first pair of handmade ballet shoes. This is the process of birth of a new pair of shoes, and if you come up with an original design, then such a model can largely surpass the store version.
to contents ↑DIY ballet shoes from scratch
In order to make ballet shoes with our own hands, we may need materials such as:
- cotton;
- fabric for sealing;
- some leather, which is made on a natural or artificial basis, for the sole.
The following is an action plan to make ballet shoes with your own hands:
- First we cut out the details. Two insoles made of cotton material, two outsole positions made of artificial leather, one insole made of sealant, one upper part for the outside and another part for the lining, and they are made of different materials.
Important! All this is necessary for one ballet shoe, so you need to cut everything in two copies.
- We fold the part of the upper outer side with the seal so that they ideally coincide on all edges.
- Fold the sides of the heel facing each other and gently grind.
- We cut off the excess seal under the seam.
- We process the resulting seam with a zigzag.
Important! This procedure must be performed for all seams, as it helps to seal the ballet flats.
- We turn the received part up, carefully weave it with a sealant, using pins.
- We take a leather sole and fold it with a fabric seal.
- We carry out the procedure of sweeping the details of the top and sole, and we perform this process as smoothly and accurately as possible, as a result of which we obtain a beautiful product.
- We carry out stitching along the line of sweeping.
- Remove the sweeping stitches.
- Around the perimeter, we cut the filler.
- We overcast all the edges of our product.
- Similarly, we produce the process of collecting the inner part of the ballet flats.
- You can trim the fabric slightly in the lift area so that the cut is deeper.
- We turn the lining part of the product outward, insert it into the finished outer part.
- We make the sweeping of the upper seam around the entire perimeter.
- We sew the finished product, leaving a special hole through which we will turn the ballet out.
- We remove the sweeping stitches, we carve out the filler.
- We process all the edges of the product.
- We turn the finished product, gently straighten and steam.
- Along the last seam, lay a decorative stitch to close the eversion hole.
The product is ready! Now you can try it on.
to contents ↑How to sew ballet shoes for dancing?
In order to sew ballet shoes for dancing yourself, you need to remember a few simple rules:
- To make ballet shoes for dancing, first of all, you need to choose the right fabrics from which the ballet shoes will be sewn:
- Structural fabrics that have a beautiful pattern in the desired color scheme can be suitable as the material for the upper part of ballet shoes. In this case, when choosing, there are restrictions under which the selected fabrics should not slip, but must withstand friction and not form puffs.
- Cotton fabrics are ideal for lining, which, due to their natural qualities, are quite hygienic.
- The outer insole can be selected from rough genuine leather.
- Any textile fabric is suitable for the insole.
- Before proceeding with the manufacture of ballet shoes with your own hands, you need to perform a procedure for cutting dance shoes, and the patterns for the right and left sides of the ballet shoes are identical. We need to carve out two top positions, two lining details, two inside and two outside insoles.
Important! When cutting the upper part and the lining, you need to add allowances for seams of about 1 cm to all sections.
- With a seam width of 1 cm, grind the rear sections of all four parts of the upper positions and linings.
- After that, you need to iron all the allowances.
- The upper position of the ballet shoes is paired with the lining, with the front sides being inside.
- We level the upper sections and grind the seams 1 cm wide.
- Grinding seam allowances are cut with scissors to a size of 5 mm, while we do a notch on the rounding at a distance of 1.5 mm from the stitch.
- We turn our parts face out.
- After that, we straighten and make the ironing of the seam.
- From the fabric from which we sew the top of the ballet shoes, we make a 1.5 mm edging.
- Cut the cooked elastic braid measuring 9-10 cm.
- Using a zigzag, we adjust the elastic tape to the lining of our ballet shoes in the area of the grind seam in the heel area. In this case, slightly stretch the braid. This procedure helps fit the shoe to the back of the foot.
- With the finishing stitch, we sew along the turned top edge of the dancing ballet shoes, while the seam should be about 5 mm. The elastic tape with this procedure must be stretched again.
- Then we sew a line that connects the upper position of the ballet shoes and the lining of our manufactured shoes with a distance of 5 mm from the lower sections of the product.
Sole manufacturing
Engaged in the process of making dance ballet shoes with your own hands, special attention should be paid to durable and high-quality mounting of the sole:
- The inner part of the sole must be placed inside the blank of the dancing ballet shoes.
- We stick the ballet blank on the sole over the entire contour of the lower section of the product on a 1 cm section. For this procedure, you need to use rubber or nairite glue, which perfectly connects the parts without undue stiffness.
- We place the shoes under the press to allow it to dry completely.
- The outer bottom insole made of leather material is completely lubricated with glue and glued to our sole. At the same time, it is necessary to block the allowances of dancing ballet shoes by 1 cm.
- After that, you need to put the ballet shoes under the press until completely dry.
Important! To strengthen the sole, you can additionally along the insole contour lay a line with a distance of 5 mm from the lower sections of the product. Not every household sewing machine is able to carry out this operation and flash such a thickness of the ballet flats. It is necessary to apply an awl and thick kapron threads, and in the manual version, sew our dance ballet flats along the contour.
Our dance ballet shoes are ready! It remains to sew and decorate them with ribbons and other decorative elements.
to contents ↑Stock footage
We hope that the information received was enough for you to start the process of developing the design of new “little animals”, because in fact, making ballet shoes with your own hands is not so difficult.
- How to choose a vacuum cleaner taking into account the characteristics of the house and coatings?
- What to look for when choosing a water delivery
- How to quickly create comfort at home - tips for housewives
- How to choose the perfect TV - useful tips
- What to look for when choosing blinds
- What should be running shoes?
- What useful things can you buy in a hardware store
- Iphone 11 pro max review
- Than iPhone is better than Android smartphones
 (No ratings yet)