

DIY concrete rings
Is it possible to make concrete rings with your own hands so that they meet all the requirements of strength and reliability, or is it better to buy these products in a store? Any task can be solved if the right approach is found to it. If it becomes necessary to construct a well, septic tank or cesspool on the site, reinforced concrete rings cannot be dispensed with. To do everything right, you need to carefully study this topic. In the article you will find detailed information on how concrete rings are made.
to contents ↑Do it yourself or buy ready-made?
A lot of people, believing that it is more profitable and more reliable to buy a finished product in a store, do not even think about the benefits of self-manufacturing a reinforced concrete ring:
- Firstly, it is more profitable financially. For the manufacture of a ring with a diameter of 1.5 m, 0.3 cubic meters of concrete will be needed. The price of concrete depends on its brand, but even so the cost of a home-made product comes out half as much as buying a finished one.
- Secondly, after analyzing labor costs, the purchase of finished rings also comes first. In this case, all efforts will be directed to the search for a trusted manufacturer who produces a quality product. It is also important to organize the delivery of the purchase to the site, and this is additional trouble and financial costs.
to contents ↑Important! In the case of independent work, it is necessary to purchase high-quality materials and tools for the manufacture of molds for pouring reinforced concrete products.
Equipment and materials
In order to make concrete rings with your own hands at home, you will need the following:
- Sand;
- High-quality cement for the manufacture of concrete mix M400-M500;
- Rubble;
- Concrete mixer;
- Large containers;
- Garden car;
- Form for pouring concrete mixture.
DIY Concrete Ring Mold
For the manufacture of molds, the following technological conditions must be observed:
- The formwork should have a uniform annular shape and include two collapsible rings that are installed in each other.
Important! The inner cylinder should be ten centimeters higher than the outer.
- The optimal material for the manufacture of formwork is wood or metal.
to contents ↑Important! For the manufacture of molds as a material, the best option would be an old metal barrel. From it, you can quickly cut the finished cylinders of the right size.
DIY mold for concrete rings. Manufacturing technology:
- It is necessary to draw two longitudinal vertical lines in the large cylinder from the outside, which will divide it into two identical parts.
- At least two door or window awnings must be installed on the marking line on each side. Their flaps should be at the edges of the line, and the hinge should be located strictly on the line.
Important! Sashes can be attached using welding or rivets.
- On the one hand, it is necessary to cut off the lower spindle retainer caps. This will make it easy to disassemble the awnings.
- Project vertical lines on the outside of the cylinder.
- Cut the cylinder with a grinder along the marked lines with a thin disc.
Important! In order not to spoil the awnings, this procedure must be performed very carefully.
- After this, the manufacturing process of the outer wall of the formwork is considered completed. Pull out the canopy spindles and open the cylinder.
Important! If necessary, grease the awnings so that the mold opens easily.
- The inner ring is made in a similar way. Only vertical lines should be drawn in such a way that they do not divide the cylinder into equal parts, as is the case with the outer ring, but are located at a distance from each other in ⅔ of the entire circumference. In addition, the lines should be located on the inside.
- In exactly the same way, you need to install the canopies and cut off the heads of the spindles, only they should be on the inside of the structure.
- Project the lines on the outside of the cylinder and cut carefully with a grinder.
So both forms are ready.
to contents ↑Important! The inner ring should open easily inward and the outer ring outward.
DIY concrete rings. Production stages
After the mold for the manufacture of concrete rings is ready, you can proceed directly to the production of products.
This process consists of several stages:
- Preparation of formwork and reinforcement;
- Solution preparation;
- Mold filling;
- Removing the finished ring.
Let us consider each stage in more detail so that the concrete rings with their own hands are of the highest quality.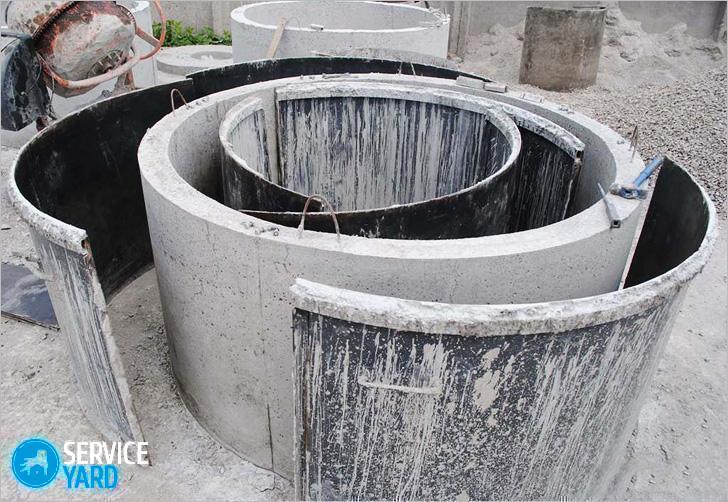
Formwork and reinforcement preparation:
- Finished rings must be installed on a flat platform. The inner cylinder should be located exactly in the middle of the outer.
Important! If the operation will be carried out in the summertime, it is better to put the molds in a shady place so that the mixture does not dry prematurely, as this will significantly reduce the strength of concrete.
- Reinforcement can be performed using a special metal mesh, which is installed between the cylinders in the middle. If such a mesh is absent, then for these purposes, you can use the wire, laying it in the process of pouring concrete in a spiral.
Important! Without reinforcing, the manufacture of rings is also allowed, but in this case the wall thickness should be at least 15 cm.
- To prevent displacement of the cylinders during pouring, it is necessary to install several spacer wedges between them.
Solution preparation
The strength and durability of the finished product depend on the correctness of the implementation of this stage of work.
At the enterprises for the manufacture of concrete rings use special vibration forms. However, at home, all kinds of electric vibrators are absent, so a plasticizer is used to improve the properties of concrete. This tool is especially relevant if the ring will come into contact with water.
Important! How to use the plasticizer, and in what doses, is indicated in detail on the package.
The process of preparing the mixture:
- Mix 1 part cement and 2-2.5 parts sand.
- Add 0.5-0.7 parts of water and a plasticizer to the dry mixture.
- The next step is the addition of 3-4 parts of gravel or gravel. It must first be moistened with water.
- The resulting mixture must be mixed well in a concrete mixer.
Mold fill
You can proceed to this stage of work only if the air temperature is not lower than +8 degrees Celsius.
Procedure:
- Carefully pour concrete mortar around the entire circumference to a height of 15-25 centimeters.
- After that, ram the mixture with a thick metal rod.
Important! For these purposes, a wooden stick or shovel handle is also suitable.
- Pour the solution another 20 cm and seal in the same way.
- When the level of the solution reaches visually above average, you will need to pull out the wooden struts.
- Next, the solution is poured to the very top of the mold and rammed. If necessary, add concrete.
- Carefully level the top. It is advisable that the end face of the ring be flawless, as it will be docked.
Important! If the pouring occurred in hot weather, then the form must be covered with a moist burlap and periodically moistened.
Removing the finished ring:
- With optimal parameters of air temperature and humidity, after 3-4 days it will be possible to disassemble the formwork, first opening the inner cylinder, and then the outer one. However, concrete cannot be moved or rolled yet, as it has not yet gained the necessary strength to withstand even the smallest load.
- For another 7 days, the concrete also needs to be moistened periodically.
- After 10 days, the finished product can be moved.
to contents ↑Important! It is advisable to use the concrete ring with its own hands for its intended purpose only after a complete set of strength solution, which usually occurs not earlier than after 28 days.
Useful tips for making concrete rings with your own hands:
- Pouring mortar for a concrete ring with your own hands should be done in layers no more than 20 cm thick.
- The higher the ambient temperature during pouring, the stronger the concrete will be as a result. However, it should be borne in mind that the temperature should not be higher than 22 degrees Celsius.
- To increase the water resistance and ductility of the reinforced concrete ring, potassium glass can be added to the mixture.
- It is possible to increase the fluidity of the concrete mixture by adding liquid detergent to the solution in a ratio of 2% of the total volume.
- To increase the strength of the reinforced concrete product, PVA glue is added to the mixture.
Stock footage
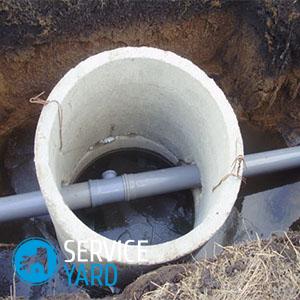
Making sewer rings with your own hands is quite possible. Perhaps this process will take you longer than it will take to buy the finished product, but in this way you can significantly save money, and at the same time control the quality of the reinforced concrete ring. Following the instructions in the article, you can do it yourself without any problems and get closer to the moment you finish installing the water supply, sewage or drainage system.
- How to choose a vacuum cleaner taking into account the characteristics of the house and coatings?
- What to look for when choosing a water delivery
- How to quickly create comfort at home - tips for housewives
- How to choose the perfect TV - useful tips
- What to look for when choosing blinds
- What should be running shoes?
- What useful things can you buy in a hardware store
- Iphone 11 pro max review
- Than iPhone is better than Android smartphones
 (No ratings yet)