

Do-it-yourself sideboard for a bed from falls
A crib is the first private space in a person’s life. On what it is, this space, in many respects depends on the attitude of its inhabitant to the world and to people. And this means that the baby, even if it seems to you that he still does not understand anything, should feel comfortable and completely safe. Bumpers will help you and him. Do-it-yourself sideboard for a bed from falls - what is needed for this? Let's talk about this.
to contents ↑Do I need a bumper?
Not all young mothers believe that something else needs to be put in the crib, if it is with a grate. When they grew up, of course, there were no special bumpers. Yes, but there were extra pillows and folded blankets, which were put in a crib to protect the baby from possible unpleasant surprises. So why not buy or make an item that replaces the tools at hand?
The side for the bed is needed because:
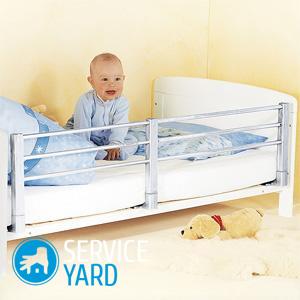
- the baby will not fall out of bed;
- arm, leg, or even head are not stuck between the rods;
- the child will fall asleep faster if nothing distracts him;
- if you make removable pictures - the owner of the crib will find what to do with himself, and in minutes of wakefulness.
to contents ↑Important! For a newborn, additional protection is not really needed, but for a child who has already begun to sit, crawl or get up, it is simply necessary. In addition, you can make bumpers that will become a real decoration for children. As for the need to approach the child, such an addition will not hinder this at all.
What should be the side?
Everything a young child deals with must be safe. Last but not least, this also applies to bedding. The bumper for the bed from falls should be:
- hygienic;
- hypoallergenic;
- environmentally friendly;
- beautiful;
- painted in soothing colors.
Base material
Like any baby thing, the side will have to be washed periodically. That is, it should be made of materials that are easily washed, do not lose their appearance from water and detergents and dry quickly.
Important! Cotton is usually used for coating - for example, calico, teak or satin.
Environmentally friendly filler
A synthetic winterizer is most suitable as a filler for a sideboard for a bed from falls with its own hands. As for other materials:
- Sometimes foam rubber is used, but this is not the best option, because after a while it begins to disintegrate and release harmful substances.
- Cotton wool or batting is not suitable, because it does not dry well, practically does not disinfect, and in such a filler a fungus very often starts.
Sintepon also has a drawback. It tends to fall off and form lumps. But it is not difficult to cope with this scourge - just quilting the product is enough. He has much more advantages:
- synthetic winterizer is absolutely neutral in relation to the environment;
- does not cause allergies;
- easily erased;
- easily disinfected;
- odorless.
So, deciding to make a barrier for the bed from falls with your own hands, use it. It is not difficult to buy a synthetic winterizer - this can be done at any fabric store.
Important! You don’t need to rip open the old blanket or sleeping bag - most likely, the filler in them has already fallen off, and there will be a lot of fuss with it.
Aesthetics for children
From the very first days, the child must learn to appreciate beauty. What he sees around him will leave an indelible mark on his memory, even if he himself is not aware of it. A perfectly clean side for a bed, on which bright pictures are fastened, fits perfectly ideally. Well, you should like this item - like everything that surrounds your baby.
As for the color, it is preferable to calm pastel tones of the warm segment of the spectrum:
- cream;
- pink;
- beige.
to contents ↑Important! A few more words about design:
- Bright colors excite, the baby will calm down longer.
- Cold tones give the impression that the temperature in the room is slightly lower than it is, so they can only be used in very warm rooms.
- As for the picture, it is better to take a plain fabric or with a small soft pattern. Large pictures that the baby will watch while awake can be taken separately.
Buy or sew?
In children's goods stores you will find a lot of additional devices for cribs. For example, for a three-year-old baby you can easily find modular furniture for sale, when additional protective devices, such as the same sides or soft coasters, are simply included.
It is better to buy a new thing from a good manufacturer. True, it can cost a little more than in a thrift store, at a random seller, or from hand. But then you can check all the certificates.
If you buy a bumper in the commission or with hands, carefully examine it:
- it must be clean;
- not have visible mechanical damage;
- the filler should be free of lumps;
- The bumper must not emit odors.
to contents ↑Important! By the way, all these requirements apply to children's products purchased in a regular store. In any case, the item should be without visible flaws and smell like a new children's thing. If there are doubts about the quality of the goods offered or you are limited in means, it is better to sew a side yourself.
Do-it-yourself barrier for a baby bed - what is better?
Of course, you will have to work hard and spend some time making a side for the bed from falls with your own hands. But as a result, you get a product that you will know about literally everything:
- what material the top is made of;
- what is used as a filler;
- how reliable are the mounts.
A caring mother will certainly make every effort to make her baby's bed the safest, most comfortable and most beautiful. And, of course, creativity will bring you considerable pleasure, which means that you will treat the product with care.
to contents ↑Getting ready to sew
Any case is debated if one is properly prepared for it. Of course, the collar for the bed from falling with your own hands can be sewn manually, but it will be a long time. So in any case, you need a sewing machine, even the simplest one.
Instruments
You also need:
- large sharp scissors;
- tailor's meter;
- tailor pins;
- tape measure;
- iron;
- chalk or soap.
Important! To work more conveniently and the process went faster:
- It is better to take tailor's scissors - with long blades, but in principle they will also suit medium sizes, if only they are well sharpened.
- The tailor's meter is a long wooden or metal ruler. You can use a flat rail without nicks.
- Tailor pins are sold at a sewing store. They are needles with heads in the form of a loop or ball.
- In the same department you can buy a centimeter, but it does not matter if it will be one-sided or two-sided.
- Chalk is needed so that the trace is clearly visible on the fabric. The same applies to soap.
Materials
Do-it-yourself railing for a bed can be of several types.
Decide which side you will be sewing - with or without a removable cover. In the first case, two types of fabric will be needed, in the second one.Well, the amount of material, respectively, will be different.
Important! A removable cover is more convenient, because it can be washed separately from the rest, and this, you see, is much faster and easier.
In addition, do not forget to buy:
- sheet sintepon;
- non-woven;
- ready slanting inlay or material to make it;
- long zipper (45-50 cm), if the side is with a cover;
- cord;
- decoration elements - bows, satin trim, edging and other decor as you wish.
Important! Before cutting, a new cotton fabric, it is necessary to wash or wet it and dry it with a hot iron, otherwise it will sit down after the first wash.
Fabric calculation
The amount of material directly depends on which side you are going to sew:
- around the perimeter of the crib;
- one long wall and two short ones;
- one long wall and one short;
- only long;
- separate bumpers for each wall.
to contents ↑Important! The side, which will be applied to the long side, may also not be solid, but consist of two or three sections.
We sew a side
Let's try to make a long bumper - the rest can be sewn on the same principle.
Take measurements
Any cutting starts with taking measurements. You need to know:
- product length;
- its approximate height.
Important! Factory-made bumpers have the following standards:
- full wall height:
- at ⅔ height;
- at ½ height.
Recommendations for cutting material:
- The bumper is sewn from two identical rectangles, the length of each is equal to the length of the product, the width is approximately the height.
- Add 2.5 cm of allowance on each side - that is, a half of the bumper will need a piece of fabric with a length of DI (product length) + 5 cm and a width of SHI (product width) + 5 cm.
- With a fabric width of 140 cm, a cut equal to one product length is required, if 70 cm or 90 cm - 2 lengths.
Important! In the same way, calculate the amount of material for the remaining fragments, and then add it all up. The calculation of the amount of fabric for the cover is done in the same way.
Edge for cover - an important detail
As for the edging for the cover, it should be enough to cover all segments except the zipper 1 time. You can buy a ready-made edging, but it does not cost anything to do it yourself, cutting it out obliquely:
- Cut a strip at an angle of 45 ° to the transverse thread, the width is 2 times more than desired, plus 0.5 cm of allowances on each side.
- Fold the strip in half with the front facing out.
- Iron the fold.
- Bend allowances inward.
- Iron the folds.
- If the edging consists of several parts - sew them in one ribbon.
When stitching, the ends of the workpieces must be folded with their faces at an angle of 90 ° to each other, combine the edges of the allowances and stitch. Then allowances should be ironed. Insert a cord inside the ribbon and sew along the entire length (you can use a decorative stitch if your machine can do this).
Important! The line should be laid near the cord itself, but it should not be touched - it is very good if you have a special zipper foot.
Making inner covers
The inner case is the simplest part that even a beginner needlewoman can handle:
- Cut 2 rectangles according to the taken measurements.
- Fold them with their faces facing each other.
- You can reinforce the details with a sheet padding polyester, cutting out 2 of the same rectangles and attaching them to the main parts, but this is not necessary.
- Sweep parts on three sides, leaving a 10 cm gap on one of the short sides.
- Stitch the details.
- Cut the allowances close to the stitch (just leave 2 mm).
- In the corners, cut the allowances obliquely.
- Turn out a product.
- Spread the corners with scissors.
- Fill the bumper with a padding polyester.
- Quilt it with long stitches obliquely, laying lines of stitches at a distance of 3-4 cm from each other.
- Quilting again with a different slope - the lines of stitches should form rhombuses.
- Close the hole.
Preparing the ties
How will the sideboard from falls with your own hands be attached to the bed? The most convenient option is the ties.They can be made from a wide braid or the same material as the edging.
In the second case:
- Cut an oblique strip 4 cm wide.
- Fold it in half lengthwise.
- Iron the fold.
- Put allowances in.
- Iron and stitch again.
Important! The length of the strip should be such that it would be possible to easily attach the side to the grill rod, but at the same time too long ends would not remain.
As for the quantity, three are enough for the bumper covering the long side of the bed - two are sewn in at a distance of about 2 cm from the corners, one in the middle. Each tie consists of two identical ribbons - so it will be more convenient to sew them.
We sew a cover
It is also made of two rectangles, but there is one subtlety. Need to sew edging and zipper. For this:
- As in the first case, fold the parts with their faces facing each other.
- Lay an edging between them so that the allowance coincides with the sections of the parts along the long side, and the line appears on the line along which the rectangles will be sewn.
- Sweep all three parts together or chop them with safety pins.
- Fold the ties in pairs and also insert between the parts so that the ends coincide with the cuts of the latter and notice.
- Stitch it all down, leaving a section of the seam under the zipper.
- Remove the cover by cutting the allowances at the corners obliquely.
Sew a zipper
The zipper can also be sewn before stitching the cover around the perimeter. But usually beginner seamstresses forget about it and catch it only when the rest is done. It's okay, you can.
So, we continue to work:
- Iron the zipper allowances inside the cover.
- Place a zipper on the inside, while the fold of the fabric should lie close to the teeth, but not cover them.
- Lay the stitch on one side as close to the edge as possible.
- Do the same on the other side.
- Fasten the zipper with double stitching on the short sides.
The cover is ready!
to contents ↑Stock footage
It remains to put it on the side and tie it to the crib. And decorative pictures can be made in the form of squares with appliqué and simply put on bumpers when the child is not sleeping. Are you convinced that the side for the bed from falls with your own hands is a perfectly feasible task for you? Go ahead, go for it! Let your baby have the safest, most comfortable and cozy bed!
- How to choose a vacuum cleaner taking into account the characteristics of the house and coatings?
- What to look for when choosing a water delivery
- How to quickly create comfort at home - tips for housewives
- How to choose the perfect TV - useful tips
- What to look for when choosing blinds
- What should be running shoes?
- What useful things can you buy in a hardware store
- Iphone 11 pro max review
- Than iPhone is better than Android smartphones
 (No ratings yet)