

What can be done from a hair clipper?
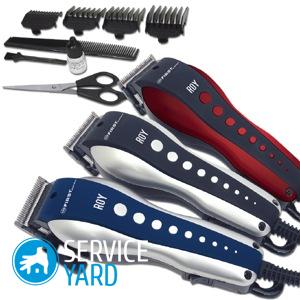
Today, it is very popular to do products with your own hands, and what folk craftsmen just do - overhaul from improvised means, furniture, toys, jewelry, clothes, shoes, interior decoration items and even a landscape house territory. It would seem that what can be done from a hair clipper? Meanwhile, there are many useful items in the household that can be done in just half an hour. Which - we will tell below. But first, let's talk about how the device works, what difficulties may arise when remaking it.
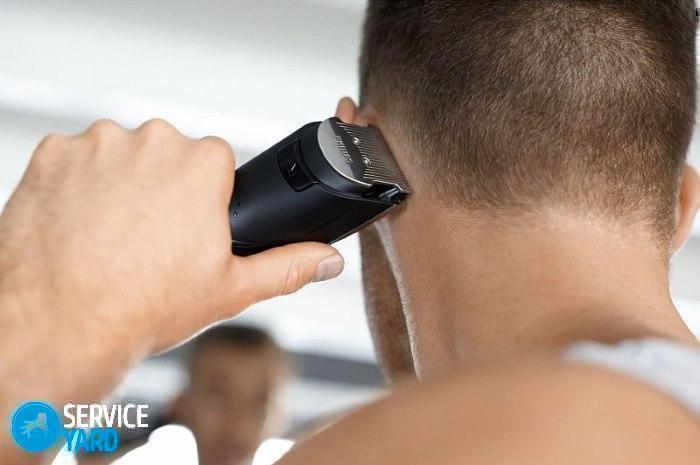
to contents ↑Principle of operation
Of course, the device of different models may vary, but in general terms it can be represented as follows:
- plastic case;
- motionless iron core;
- coil with wire;
- power button;
- the mechanism that drives the knives;
- the actual knife blades.
Important! When applying alternating current to the coil, an alternating magnetic field arises in it, which sets in motion a movable mechanism - an armature. He, in turn, makes the knives of the electric machine move.
In principle, that’s all. Devices may differ in configuration and functions, but the main work does not change from this.
So what can we do from the old trimmer? Let's take a closer look.
to contents ↑Sander
In order to independently create a vibration sander, we need very little.
Tools and materials:
- an old but working trimmer for a haircut;
- screwdriver;
- 5 mm bolt and nut, and two hexagon head bolts;
- a small piece of plywood, a little more than 8x8 cm, and one more for checking the finished device;
- jigsaw;
- double-sided adhesive tape;
- sandpaper small and medium;
- Ruler and pencil;
- chisel;
- drill;
- hex wrench.
When all the necessary materials tools are prepared, you can begin work.
Steps
First, we need to remove the blades from our old clipper. This can be done by unscrewing the two fasteners with a screwdriver. Next, you must follow a certain sequence of steps:
- Knives are removed, and laid aside. For this device we do not need them.
- Next, you need to disassemble the device by unscrewing the screws on its body with a screwdriver.
- When the case is open, we can see in it a wide metal plate, which also needs to be removed by unscrewing all the fasteners.
- Inside the device is a motor.
Important! Note that not all motors are the same. There are models with an engine, but there are mechanisms with an eccentric, but in any case they are responsible for the operation of our device.
- Next, take a bolt and nut by five, fasten them to the nose of the anchor, so that the vibration is more powerful. After that, the mechanism can be actuated and the vibration level checked.
- When the test is completed, the lid is screwed back and the workpiece is put aside for a short while.
- Next, you need to take a small piece of plywood, draw an isosceles triangle on it.
Important! The dimensions of the triangle should be such that when it is fixed in the center of the machine, the edges of the nozzle protrude one and a half two centimeters. Usually they use a side of eight centimeters, but you can choose the best option for yourself empirically.
- When the triangle is drawn, you can use an electric jigsaw: carefully cut out the workpiece and clean out all the sections of the cuts with sandpaper.
- Next, take our machine again, unscrew the fasteners of the adjustable plate at the top of the device, and remove it.
- We attach the plate in the center of the triangle, circle it on all sides with a pencil, not forgetting about the two holes in the middle.
- Then it will be necessary to make a recess for the adjustable plate in the triangle, but first drill two holes in the middle and install the hexagon bolts in them. If their hat sticks out strongly, it will interfere with the work, therefore, with a larger diameter drill, recesses are made according to the size of the hat.
- The burrs on the ground should be well cleaned with sandpaper.
- Next, we chisel out a rectangular recess under the plate.
At the final stage, we fasten the plate to the device, we attach the plywood triangle to it with bolts. To keep the whole structure firmly, use a hex wrench. The assembly is completed, and our device must be checked.
Verification:
- To check, prepare sandpaper with fine grain, glue double-sided tape on it from the back and cut out a triangle from the sandpaper with tape, the size of our homemade nozzle.
- Next, the sandpaper is glued to the device and its operation is checked on a small part of the plywood.
Important! Such a device is well suited for very delicate grinding of various surfaces, as well as for fine cleaning. In principle, the device can cope with general finishing work on various materials, such as wood or metal products.
 Despite the fact that the surface treatment in this type of machine occurs only due to vibration, it can easily help to cope with small finishing works.
Of course, it happens that one vibration is not enough for high-quality grinding, but it is thanks to it that the device glides well on the surface.
But this is not all that craftsmen are capable of. You can also make a vibro massager from an old hair clipper.
to contents ↑We make a massager
When the masters are looking for the answer to the question of what can be made from an old hair clipper, they come up with very unusual ideas. For example, make a home massager with your own hands.
Work order:
- To begin, we will analyze the machine. To do this, unscrew all the upper fasteners and remove the plastic cover protecting the motor.
- Then, using fastening rivets, we attach a small metal plate to the movable mechanism, which will serve as a holder for massage rollers.
- Actually, then we install the holder and the rollers themselves on the plate, which will perform massage functions.
- Screw the protective cover into place, turn on the device in the network for testing.
As a result, we get a wonderful home-made massager that will help relax muscles after a hard day's work.
But there is another good option for remaking the old trimmer - a demonizer.
to contents ↑Making a demonizer
We start work, as usual - with the fact that we disassemble the device. Inside we find a pendulum that moves the blades, spool and core in the form of the letter “T”:
- To achieve a powerful effect, a powerful motor is initially required from the demonizer. We leave the part with the motor, and saw off the case along the bottom of the pendulum, and disconnect the pendulum from the coil. We take it aside, for further work we do not need it.
- We saw the top cover in the same way, and set its long part back, twisting all the fasteners.
Important! The upper part of the sawn device is not fixed firmly, because after cutting there are no screws left in it. Therefore, use electrical tape, solder or glue to fix the parts together.
- Next, we connect the device to the network without pressing the power button.
- Then we check the work: take a few iron bolts and, for example, a screwdriver.We leave the bolts on the table, and turn on the car using the button.
- We attach the iron part of the screwdriver to the open core. In this case, the screwdriver should immediately catch on, and the device may emit a small crack. Thus, the screwdriver is magnetized.
- Turn off the device and check whether the bolts are magnetized to the screwdriver.
The magnetizer is ready for this. But how now to demagnetize a screwdriver? Everything is simple:
- Turn on the machine, apply it to the desired item.
- Next, in a slow circular motion we take the machine back.
- At a distance of about 50 cm from the subject, you can turn off the device.
to contents ↑Important! At this stage, our magnet should be demagnetized. You can check it on the same bolts.
Stock footage
If you have an old hair clipper - do not rush to throw it away, with a little alteration it can still serve you in a completely different quality. You can make a drill, an electric comb, the options offered above or come up with your own application. The main thing is to show a little imagination and make a share of work. Creative victories!
- How to choose a vacuum cleaner taking into account the characteristics of the house and coatings?
- What to look for when choosing a water delivery
- How to quickly create comfort at home - tips for housewives
- How to choose the perfect TV - useful tips
- What to look for when choosing blinds
- What should be running shoes?
- What useful things can you buy in a hardware store
- Iphone 11 pro max review
- Than iPhone is better than Android smartphones
 (No ratings yet)