

DIY decoupage bottles with napkins

If you love needlework and are constantly in search of some new ideas and techniques, then you will definitely like such a simple and exciting creative direction as decoupage of bottles. You can use any container made from cognac, wine, champagne, or even not yet opened containers with drinks, the main thing is that the form is suitable. You will be able to create real works of art with your own hands that can pleasantly surprise and please your relatives and friends. The most common way to do this is to decoupage the bottles with do-it-yourself napkins. Agree, what could be better than a self-made presentation in which you put your love and warmth?
to contents ↑What is decoupage technique?
Decoupage is a word of French origin, which literally translates as “carving”. This is a modern decorative technique, a bit closer to the application and collage, consisting in cutting pictures from wood, paper, leather and various materials, which are then glued or glued to dishes, furniture, textiles and other surfaces.
More often, the pictures are first printed out by printing, and then they are used to decorate vases, flower pots, kitchen boards, bottles, books, cups and even candles. Even the most ordinary plate can be turned into a real panel that will decorate the wall of your kitchen.
It’s not difficult to decorate the bottle with napkins with your own hands, the main thing is to choose the right material: it is better if these are three-layer table napkins with the original color. The most important advantage of this unique technique is that any person who does not have special skills and special materials can master it. The most important thing is the desire to create, unlimited creativity and very little free time.
to contents ↑What is needed for napkin decoupage of bottles?
So, so that there are no problems during the execution of the work and you don’t have to buy anything, you should prepare the following set of tools and parts in advance:
- A clean glass bottle that will be suitable for decoupage. Therefore, you need to carefully consider it so that its surface is perfectly smooth, without any bulges and dents.
- Several three-layer napkins with the right pattern. By the way, if this is your first encounter with decoupage, it is better to stock up with a large number of napkins so as not to worry again if they are damaged.
- Decoupage cards, printed images, or magazine clippings.
- Any product to degrease the surface of the bottle, such as acetone, alcohol, nail polish remover or thinner.
- Acrylic paint for priming the glass surface.
- PVA glue or special decoupage glue.
- Brushes of different thicknesses are better if there are flat and thick ones among them. But most importantly - they must be synthetic, because natural products leave hairs on the surface.
- Acrylic paints in several shades.
- Acrylic varnish, which has a milky white color, but after completely drying, becomes completely transparent.
- Decorative elements such as bows, sparkles, ribbons, beads or rhinestones.
- If you plan to artificially age the product, then you still need to purchase a one-step or two-step craquelure varnish.
- Scissors for cutting the necessary fragments.
- Masking tape, which is useful for gluing those places that you do not plan to paint.
- A small piece of foam or a whole roller.
- Trays for breeding varnishes and paints, or disposable plates.
- Clean rags.
- Sandpaper.
Step-by-step instructions for decoupage bottles with napkins
And now we will learn in more detail how to decorate the bottle with do-it-yourself napkins. The whole process is divided into five main stages.
The first step is surface preparation
First, remove everything superfluous from the bottle, any labels or badges, and this can be done easily if:
- soak it briefly in soapy water;
- Then rub lightly with sandpaper.
Important! This method allows you to completely clean the glass from traces of glue and paper residue.
Then with a solvent, alcohol, acetone or nail polish remover, degrease the surface.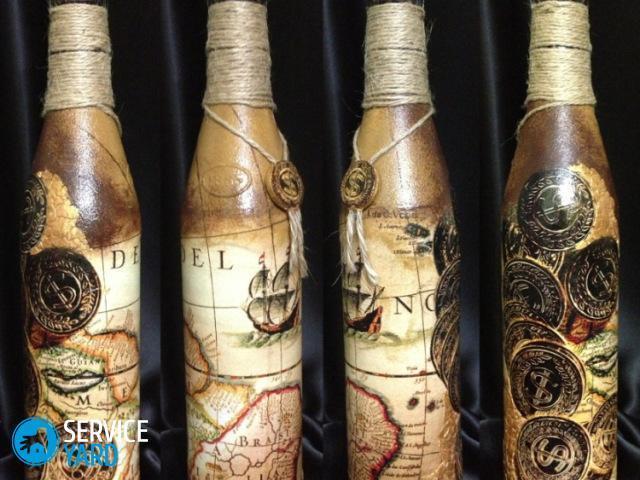
Second stage - surface priming
In principle, this procedure is not necessary, but if you decide to do it, the background of the composition will turn out to be more complete and holistic, and fragments of pictures will look sharper and brighter.
Important! We do the background either on the entire surface, or partially, specifically in those places where you want to place your favorite motifs. The tone of the background should be selected taking into account the shade prevailing in the selected picture. The base should be slightly lighter than the color of the wipes.
How to do this job:
- Pour a little acrylic paint of the desired color into a bowl or plate.
- If necessary, dilute with water to obtain a consistency of an average liquid level.
- Using a foam disk or roller, it primers on a glass surface, preferably in several layers, to obtain a saturated color.
The third stage - cutting pictures or motifs for decoration
This is one of the most interesting moments of decoupage of bottles with do-it-yourself napkins. But it requires accuracy and attentiveness, and also a rush of your imagination:
- We take a napkin and scissors and carefully cut out the attractive motif.
- In principle, you can not cut out the picture, but simply tear it out, but you need to do this carefully - due to this, the picture will go into the background better, since it will not have clear boundaries.
- For bonding, you need a top layer of wipes, so you need to separate it.
- You can use not only napkins, but also magazine clippings.
Important! To attach too thick paper, you must first apply an acrylic varnish in several layers on the picture. If everything is done correctly, the picture will look as if drawn.
The fourth stage - pasting bottles with decorations
And now we will learn how to stick a napkin on a bottle:
- For this we take PVA glue diluted with water or a special glue for decoupage.
- It is necessary to soak the picture in warm water and then dry thoroughly.
- On a completely dry surface, apply a dry cloth and, starting from the middle to the edges, smear with a brush dipped in glue. In this case, you need to remove all wrinkles and bubbles.
Important! If desired, several motives can be used simultaneously, if the width of the bottle allows it.
The fifth stage - we fix the result with the help of varnish:
- We wait for all the pictures to dry out and cover them on top with several layers of acrylic varnish, thereby protecting the surface.
- Before applying the second and third coat of varnish, wait until the previous coat is completely dry.
- If you plan to use this bottle at home, you will need at least three layers of varnish.
On this work is over.
to contents ↑Stock footage
As you can see, there is nothing complicated and impossible here. And if you learn the basics well, you can create more complex works in the future by fantasizing and experimenting with different materials and decoration techniques.
- How to choose a vacuum cleaner taking into account the characteristics of the house and coatings?
- What to look for when choosing a water delivery
- How to quickly create comfort at home - tips for housewives
- How to choose the perfect TV - useful tips
- What to look for when choosing blinds
- What should be running shoes?
- What useful things can you buy in a hardware store
- Iphone 11 pro max review
- Than iPhone is better than Android smartphones
 (No ratings yet)