

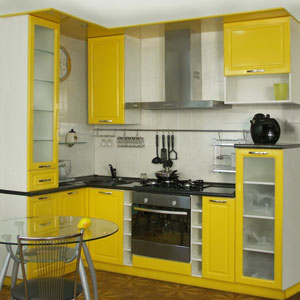
DIY decoupage of a kitchen set - photo
Every housewife wants all invited guests to talk about the uniqueness and beauty of her kitchen. Decoupage will help you to make the interior unique. In this article, we will introduce you to how to make decoupage with your own hands in the kitchen, photos will help you quickly figure out this procedure. To learn the basics of this art is not difficult, and you will need very few funds at the same time, but the kitchen and furniture of your entire apartment can become a piece of art.
to contents ↑When does a kitchen set need decoupage?
 Decoupage is a way of decorating furniture, any household items using paper, fabric, leather, wood, glass, etc. Of course, you don’t want to immediately change the design of new furniture, since it corresponded to all your wishes and dreams when buying. It is better to use the art of decoupage of a kitchen set with your own hands on aged furniture.
The kitchen is located in a zone of high humidity and constant temperature fluctuations. During the operation of the kitchen, fat settles on work surfaces; mechanical damage is also likely. Therefore, there are plenty of reasons for the restoration of your kitchen.
Here are the main ones:
- Moral aging. After several years of operation, the kitchen needs not only modernization, but also a change in the aesthetic appearance.
- "Disaster. Very often, the kitchen is flooded not only through your fault, but also through the fault of neighbors, and the consequences can be disastrous.
- Repairs. This is a great reason to change the look of the kitchen and use the decoupage of a kitchen set with your own hands for this purpose.
- Built-in appliances. Over time, there is a need to replace the sink or mount new modern equipment.
- Configuration change. Over the years, the design of your kitchen ceases to suit you. For example, from straightforward you want to make the kitchen a corner.
- Hardware problems. During operation, drawers and facades may start to get stuck, some fittings may become loose.
- Surface wear. The working surface, when used, takes on an unsightly appearance, scratches appear.
to contents ↑Important! The list of reasons for restoration can be continued, but the main thing is that decoupage is simply necessary for the old kitchen set.
What material to use for decoupage kitchen?
The choice of technology for the restoration of the kitchen is determined by the degree of wear and tear, and most importantly, by your presentation of the final result. An important role is played by the material from which the kitchen set is made. Before decoupage of the kitchen, you need to prepare the following materials:
- a filler in case cracks appear on the furniture;
- you will need fine sandpaper to prepare the surface;
- special glue for decoupage, PVA can also be used;
- medium hard brush;
- a can of acrylic varnish for woodwork or plastic;
- scissors;
- DIY decoupage material for a kitchen set - it can be newspaper or magazine clippings, as well as photos or pictures printed on the printer, beautiful napkins will do, self-adhesive film or photo wallpaper can be used.
to contents ↑Important! In order to disassemble cabinets, unscrew the doors and perform other work in the kitchen, stock up on special tools. All the necessary materials and tools can be found in every home, so you don’t even have to buy anything. If this is your first decoupage, it’s best to start experimenting with simple geometric shapes that have right angles and smooth walls.
General principles of kitchen decoupage
Whatever part of the headset you decide to restore: a kitchen cabinet, a stool or all furniture, adhere to the following sequence of work.
Step 1: surface preparation
This is done very simply:
- Fill existing cracks with a filler. If the cracks are large, use putty.
- After the product has dried, sand the surface with sandpaper.
- In order to level the surface, apply a primer so that the drawing fits perfectly.
Important! If you want to make decoupage on the glass doors of a kitchen unit, then degrease the glass first using special detergents.
Step 2: preparing the drawing
When preparing the picture, you need to cut out the text or picture you like from the magazine, the top layer of napkins for decoupage. If you decide to use a three-dimensional image, then print it on a large-format printer so that there are no joints.
Important! The figures should not be too small, but not too large in relation to the surface area that you are going to update.
Step 3: applying glue
You need to work in stages:
- Apply glue to the drawing itself. The paper or tissue should be well saturated.
- Gently glue the surface, taking into account the size of the cut fragment.
- Put the pattern on the place to be decorated.
- Align small folds and air bubbles with a roller or brush.
Important! PVA glue is perfect for using napkins. Thick paper will require special glue.
Step 4: varnishing
Restore the product to be varnished in 3-4 layers. Apply each coat with an interval of 1 hour. Lacquering is a must. This will protect the image from all kinds of damage.
Upon completion of the listed works, the decoupage of the kitchen set with your own hands will be completed, and your kitchen will appear updated and unique. It remains only to take photos and boast them to friends who are not in a hurry to visit you.
to contents ↑Application of a film for kitchen decoupage
 You can update the kitchen set using self-adhesive tape. This material perfectly transforms furniture. There is only one difficulty - quite capricious in the process of gluing. At a minimum, patience, perseverance, accuracy will be required.
There are positive advantages of the material:
- cheapness;
- moisture resistance;
- resistance to temperature influences.
You can choose a film for every taste. It can be of different colors, it can imitate both wood and stone. Each finish will be exclusive. The set decorated with a film is sometimes enough to wipe with a damp cloth.
Before you start decorating with foil:
- Measure all parts of the kitchen to be decoupage.
- Use a sharp clerical knife to cut the film.
- The gluing of kitchen elements is best done on the floor.
- If necessary, remove the necessary hardware from the hinges.
Continue to follow these steps:
- Prepare the surface - clean it from dust and debris, wait until it dries, if wiped with a damp cloth.
- Peel off the backing paper. Gradually remove the protective paper, and not all at once, to prevent the ends of the web from sticking together. Work in this case will also be performed much more conveniently.
- Attach the prepared material to the furniture.
- Glue the tape.
- Gently smooth the surface, while using a rag or a special scraper.
Important! If small bubbles remain after sticking, pierce them with a thin needle.
The film sets in a matter of hours. So, if some section does not suit you, then you can peel off the film and try again.
to contents ↑Important! For creative people, we recommend decorating the kitchen not with film, but with photo wallpaper. Use laminated photo wallpaper on a self-adhesive basis. The sticking algorithm is no different from decorating with a film.
Decoupage style tips
The selection of pictures for changing the look of the kitchen depends only on your imagination and mood. If you want a kitchen in the style of ethno, provence or country, select the following drawings:
- butterflies;
- cats
- vegetables;
- fruits;
- wildflowers;
- compositions on rustic motifs;
- various patterns.
For a classic style kitchen:
- drawings with bouquets of garden flowers;
- drawings with luxurious painting;
- grapevine image;
- images of angels.
For design in a modern style, harmoniously fit:
- bright clippings from magazines;
- geometric figures;
- various inscriptions;
- black and white photo;
- coloring zebra and leopard.
There is another simple and original way to change the kitchen, making it “tasty” - use coffee-soaked paper. Follow this pattern:
- Sprinkle the prepared sheets of paper with water.
- Sprinkle instant coffee on them.
- Lightly rub the stains on the paper.
- Let the paper dry.
- Paste the furniture over with paper to make a fragrant coffee kitchen.
Stock footage
Decoupage is world-wide popular - this is one of the ways to easily and inexpensively update old things. We hope that the information presented will help you to make the kitchen interior unique, and creative work with your own hands will bring satisfaction.
- How to choose a vacuum cleaner taking into account the characteristics of the house and coatings?
- What to look for when choosing a water delivery
- How to quickly create comfort at home - tips for housewives
- How to choose the perfect TV - useful tips
- What to look for when choosing blinds
- What should be running shoes?
- What useful things can you buy in a hardware store
- Iphone 11 pro max review
- Than iPhone is better than Android smartphones
 (No ratings yet)