

DIY furniture decoupage
Most people think that furniture is something so permanent that it doesn’t need to be changed. Often, such purchases are quite rare, since furniture is expensive. That is why consumers are counting on the long term of its operation. Well, if the soul requires change, or is a new renovation made in which the old environment does not fit at all, and there is not enough money for the new environment? With skillful hands, nothing is scary. You can make a decoupage of furniture with your own hands. How exactly to do this - read this article.
to contents ↑What does decoupage mean?
This task is quite simple:
- Cut the image you like.
- We fix it on the surface.
- Apply varnish on top.
Important! Thanks to this technique, it is possible to transform any object to an almost unrecognizable state. Most often, the object of transformation is a chest of drawers, a wardrobe, a coffee table, chairs or a kitchen set.
To get a new image, use napkins, magazines and newspapers, special paper.
This technique is used to design different surfaces:
- Pottery;
- Glass;
- Metal;
- Plastic;
- Cardboard;
- The cloth;
- Skin;
- Soap.
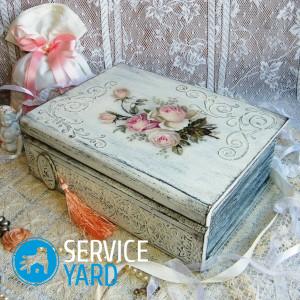
Alteration of wood furniture is very popular, which over time becomes unattractive. Decoupage of polished furniture with your own hands leads to the fact that it is fully consistent with the Provence style.
to contents ↑Important! Napkins can be used not only to decorate interior elements, but also to decorate utensils.
Types of decoupage techniques
Decoupage is represented by five main types:
- Direct. The image is glued on the outside.
- The reverse. It is used to decorate transparent glass surfaces. In this case, the front side of the picture is glued to the back of the glass object.
- Voluminous. Some decorative elements are specially made higher than others. In this case, use a large number of layers of fragments for decoupage or special modeling masses.
- Smoky. In such a case, art painting is imitated. The border separating the image and the surface is almost impossible to notice, the picture is surrounded by a smoky halo.
- Dekopatchem. To paste over the entire surface of the subject, paper pieces are used. The material should be mixed. Use napkins, sheet and corrugated paper.
You need to choose a technique based on the intended style in which the entire room will be decorated.
to contents ↑Necessary materials
Updating old furniture with do-it-yourself decoupage technique does not require a lot of materials. If there is paper with suitable glue, it is possible to obtain a wonderful decorative element. But there is a small nuance: in order for the products to look truly individual, the use of additional materials will be required.
Paper
A similar technique involves the use of pictures that can be cut from a postcard, a colorful magazine, or wallpaper. If the decorator has skillful hands, decoupage old furniture with his own hands, he can use calendars, wrapping paper, newspaper notes. Thus, a second chance will appear not only in furniture, but also in all these, it seems, unnecessary, trifles.
Napkins
Such material has an affordable price and quality. In addition, they are very diverse. You can use the usual three-layer napkins and small four-layer paper scarves. This material can be purchased at a regular supermarket or in a specialized store.
To make a decoupage of furniture with do-it-yourself napkins, you can purchase only one package, exactly the one you need to realize your creative idea.
Decoupage cards
They are presented in the form of special glossy cards with drawings, grouped on paper of different sizes. They are bilateral - in order to perform reverse decoupage, as well as the same in one set in order to give volume.
Such material has many advantages. The main ones are:
- It does not break when it gets wet;
- After gluing, there is no change in its size;
- The material is very flexible and resistant to abrasion.
Important! Napkins are mainly used for gluing onto light surfaces, and decoupage cards can also be used for dark coatings.
Textured paper
Rice paper is used to decorate large and glass surfaces. It is easy to handle with it, even a novice master can paste such material.
Important! When working with such paper, there is one condition: fragments are not cut out, but pulled out.
Fibrous raw materials manage to bond well to the surface. It is made from rice straw. The product will ultimately look original and unusual, as the material completely repeats its shape.
Important! You can use mulberry and banana paper. Its rough and loose texture with various impregnations is used for background and relief coatings.
Glue
For a neat and high-quality appearance of the final product, you will need to purchase glue, the base of which is water. Of course, do-it-yourself decoupage of a table in the Provence style is best done with a specially designed glue, but if it is not, you can use the usual PVA.
to contents ↑What does the surface cover?
To paint or age surfaces, use:
- Acrylic and oil paints;
- Pigments;
- Bitumen;
- Metallized pastes.
Important! For the similarity of the item with a gilt, use potali, metallized foil.
In reality, needlewomen use much more materials.
to contents ↑Cooking surfaces
If you know the basic rules of decoupage technique, you can resurrect old furniture without spending extra money. Different surfaces are prepared differently for processing:
- Remove grease and dirt from the glass;
- To clean the metal, a mixture of vinegar and water is used;
- For wood processing, sandpaper is used, and putty is applied on top.
How to complete the design?
And decoupage of furniture with a do-it-yourself cloth, and decoration with napkins - all are based on the same principles:
- The surface is treated with sandpaper to remove roughness. After sanding is completed, it must be wiped.
Important! If the surface is heterogeneous, it is better to paint it in a neutral tone.
- If there are large scratches or peeling paint, you may need to use putty to level it.
- We cut the paper. In the case of a designer debut, it is better to stay on the same squares. Choose a medium size, not small, and not large.
- The selected area is treated with special glue or PVA.
Important! The work needs to be done in stages, pasting site after site. For example, first, the countertop, then one leg, then the second.
- When gluing the material for decoration, make sure that its edge is snug against the surface. They are glued with an overlap or butt, to whom it is more convenient to whom.
- On the edge of the subject, the edges of the flaps are wrapped around an angle.
- To remove air bubbles remaining under the material, smooth it with your fingers.
- After the glue dries, varnish is applied to the entire treated surface. You need to do this procedure several times, but only after the previous layer has completely dried.
Work with different materials
Different materials use different glue. In addition, there are features of the application technique. Let's consider them a little more in detail.
Napkins
From a napkin, a favorite pattern is cut out, which is then glued with PVA glue. A roller or brush is used to remove air bubbles. To make the effect more beautiful, you can use acrylic paints.
Wallpaper
Do-it-yourself wallpaper decoupage is a very economical option. In this case, you can easily use the materials remaining after the repair. You need to act with them the same way as with the other decor options, but there is one difference: you should use special glue.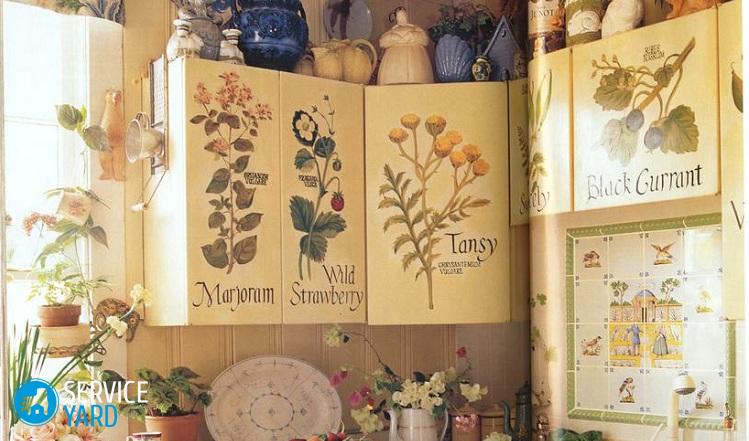
Important! PVA should not be used, since the paper in this case is more dense.
the cloth
Pieces of fabric are a very common option. In the case of such a choice, you need to know about the correct application of glue, since the material will not hold well. For gluing, PVA glue is used in this way:
- First, apply a layer of adhesive.
- After drying the first layer, apply the second.
- Cut a fabric pattern and grease with glue.
- We connect the surface and the fabric.
- When the drawing is completely dry, a layer of acrylic varnish is applied to it.
Master Class
Do-it-yourself decoupage of furniture from chipboard do-it-yourself is now popular. Where is it most often used? That's right, in the kitchen! Consider the example of transforming a simple chair:
- We clean the surface and take measurements. To do this, with the help of a sheet of tracing paper, the shape of the back and seat is fixed.
- Cut the workpiece, for which you need to prepare sharp scissors. Thus, the edges will remain more even.
Important! When the pattern is cut out, you should leave some free space around the edges. Then you can easily get rid of excess using a blade.
- Do not use too thin a material for decoupage, as it wrinkles during wetting. In this case, it is better to scan the picture and print using a laser printer.
- Using a sponge, apply PVA glue.
- Before being placed on the surface, a piece of paper is lowered into cold water. Then it is gently located on the surface and smoothed from the center to the edge. In this way, the formation of air bubbles can be avoided.
Important! Before smoothing, your hands should be moistened with water, otherwise the paper may tear.
- Using a sponge, we get rid of excess glue and water.
- After the paper dries, we cut off the excess edging, and then again we apply glue so that the sections do not begin to bristle.
- After drying of the finished product, several layers of varnish are applied. The interval between application should be at least an hour.
Stock footage
See, there’s nothing complicated. It’s enough to spend a couple of hours to decorate a small piece of furniture. Most importantly, there is nothing complicated in technology, only patience, perseverance and a new outlook on things are needed.
- How to choose a vacuum cleaner taking into account the characteristics of the house and coatings?
- What to look for when choosing a water delivery
- How to quickly create comfort at home - tips for housewives
- How to choose the perfect TV - useful tips
- What to look for when choosing blinds
- What should be running shoes?
- What useful things can you buy in a hardware store
- Iphone 11 pro max review
- Than iPhone is better than Android smartphones
 (No ratings yet)