

DIY decoupage
Decorating furniture is one of the easiest and cheapest ways to update your interior. You can give a new life to old furniture in many ways, the most popular of which is decoupage. This is a simple creative process that allows you to completely transform old and new things. This method does not require large financial costs. So, let's try to make a table decoupage with our own hands. What do we need for this?
to contents ↑Important! Translated from French, the word decoupage means “cut”. In fact, this is a kind of application, gluing the selected image on the surface of the product. This method is easy to master even for beginners, the main thing is patience and accuracy.
Materials and Tools
For decoupage, special cards or napkins are sold, they come with a wide variety of drawings on different topics. But you can use simple three-layer napkins with a beautiful pattern, or print pictures on a printer. Old newspapers, black-and-white photographs, in general, everything at hand are perfect for such a thing.
For work, we need:
- a napkin or thin paper with a pattern;
- acrylic paints;
- acetone for degreasing the surface;
- glue;
- primer;
- clear nail polish;
- putty.
You may also need:
- furniture wax and masking tape;
- brushes for glue and paints;
- stationery knife or scissors;
- sandpaper;
- cotton pads.
Professional Tips
There are several recommendations that you need to familiarize yourself with beginners before work, so as not to be disappointed with the result when decoupage the old table with your own hands:
- For decoupage, it is better to use drawings or photographs on smooth paper.
- A plastic or glass table must be degreased before use with any alcohol-containing agent.
- If the surface is not even, it must be leveled with putty.
- If the glass countertop has a relief surface, it is better to use special napkins for decoupage.
Surface preparation
Before proceeding directly to the decoupage of the table with your own hands, you need to prepare the work surface. For this:
- First, the surface of the table must be thoroughly washed with laundry soap and cleaned with a stiff brush to remove all dirt, grease and dust.
- Then we rinse with water so that there are no soap stains, wipe dry and leave for a while, so that the table is completely dry.
- Now you need to get rid of the old coating. Using sandpaper, we remove the old paint and varnish. If there are holes on the surface, chips or cracks need to be puttied.
Important! In deep cracks before filling, you need to pour furniture wax.
- The turn of the primer has come - you can use acrylic, it dries quickly.
- Finally, you can once again walk the skin, then the surface will be flat and smooth.
Now the surface is prepared for the decoupage of the table with your own hands.
to contents ↑Work with drawing
You need to form the picture the way you want to see it in the end.
Important! You need to pay enough attention to image formation and carefully consider the composition as a whole and the location of each image. Otherwise, the result may disappoint you.
It is best if you circle a place for each drawing with a simple pencil. Farther:
- If you prepared special napkins for decoupage, then they just need to be glued to the surface.
- But if the paper is multilayer, for example, printed on office paper, then it must be delaminated. This is difficult for a beginner, you need to act carefully and accurately.
So, let's begin:
- Pour warm water into the container.
- Immerse it in water with the front side for 30-40 seconds.
- We spread the file on the table and put the image face down on it.
- Carefully roll up the top layers of paper until a thin layer with the image remains.
- We cover the remaining layer with PVA glue and apply it to the table surface with the file.
- Smooth the image with your finger through the file so that there are no wrinkles.
- We remove the file.
In the same way, we glue all the selected images or photographs to the places marked for them.
to contents ↑Corner processing
When the whole composition is glued, it is necessary to process the places around the pictures:
- We take a suitable paint and brush and paint.
- If you are afraid to stain the pictures with paint, it is better to paint the table before gluing the pictures.
- After the paint has dried, you can start decorating the corners. This is an optional procedure, you can do without it.
- For the decor of corners we use a stencil and acrylic paint of a suitable color. We put a stencil on the corner of the table and paint it with a brush.
- Try to hold the brush vertically so that the paint does not flow over the template.
- Also process the rest of the corners.
- After 10 minutes, you can carefully remove the stencils from the corners.
- The last step is to cover the table surface with varnish. Acrylic varnish is suitable for this, it is advisable to apply two layers so that when using furniture the drawing will not be damaged or deformed.
- When the varnish is completely dry, the table can be used.
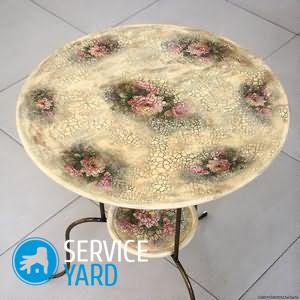
Decoupage coffee table restoration
Make decoupage coffee table under the power of everyone. The main thing is a sequence of actions and accuracy. The choice of material for decoupage largely depends on the size of the table and the material from which it is made.
Important! Furniture from "Ikea" is perfect for this kind of work - it is not expensive, there are a lot of different tables and desks, and kitchen and magazine. The style of decoration can be selected depending on the design of the room where it will be located.
You can restore the old coffee table using decoupage technique using old newspapers. Since the technique is already familiar to us, consider it without going into details:
- Sand the surface of the table, putty, primer.
- Cut newspapers, or even better, tear them into pieces of the right size.
- Spread these pieces with glue and stick to the surface of the table.
- Dry the surface of the table.
- To cover a table with a varnish, it is best of all with two layers.
to contents ↑Important! For convenience, the newspaper should be moistened with water. When distributing pieces of newspaper on the surface of the table, care must be taken not to form large folds.
Kitchen Ideas: DIY Kitchen Decoupage
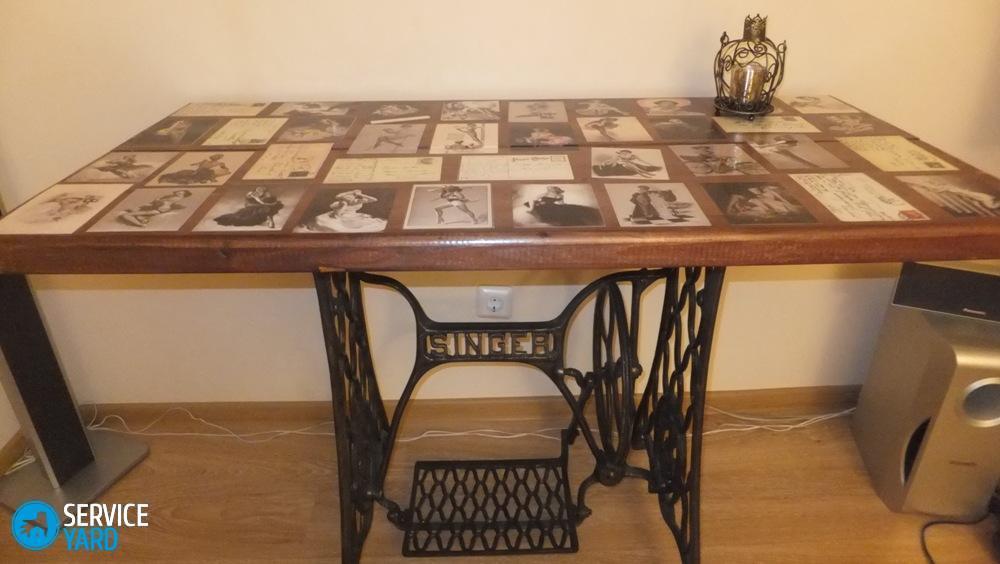
To decoupage the kitchen table with your own hands, you need to pick up pictures that fit into the interior in color and style. And you can use any technique - napkins, newspapers, postcards, photographs are suitable here. A tray decorated in the same technique will look good.
to contents ↑We decorate the office
You can decorate and revitalize your office by making a decoupage of your desk with your own hands. This can be done by pasting it with a cloth or special paper for decoupage. The easiest way to restore a pleasant appearance to your old table is to glue it with napkins.
Important! You should not make very bright images on the desk in your office, they will distract attention.
Before starting work, as usual, the surface of the table is prepared for decoupage. It can, if desired, be artificially aged by applying craquelure varnish.Cut napkins, spread the table with glue, stick and smooth the image. Then coat everything with varnish to fix.
The table will look elegant if you decorate its legs.
Important! The table should fit well into the interior of the room, for example, a small computer table can be decorated with geographical maps.
By the same principle, you can make a decoupage for a children's table with your own hands. Choose pictures from cartoons for him, or you can even revive an old table from a children's room with the help of drawings by its inhabitants.
to contents ↑Stock footage
In this article, we have given you basic ideas for starting do-it-yourself needlework and decorating furniture using decoupage technique. Further develop your endeavors to give your home the same color and coziness that you are striving for.
- How to choose a vacuum cleaner taking into account the characteristics of the house and coatings?
- What to look for when choosing a water delivery
- How to quickly create comfort at home - tips for housewives
- How to choose the perfect TV - useful tips
- What to look for when choosing blinds
- What should be running shoes?
- What useful things can you buy in a hardware store
- Iphone 11 pro max review
- Than iPhone is better than Android smartphones
 (No ratings yet)