

DIY kids table
As the baby develops, it becomes necessary to purchase additional furniture, such as a children's table. This is due to the fact that the baby has grown from a small stool, but an adult simply does not fit in height. To date, a variety of models are presented in children's and furniture stores. But if you want this piece of furniture to fully meet all your requirements and parameters, to be safe for your child, you can make a children's table with your own hands. This is a very simple task and even those who do not have experience in carpentry can do it. Following our advice and recommendations, you will create the perfect writing table for your child.
to contents ↑Making a table for your child
Given the fact that the baby is growing up and he has new needs, you need to carefully consider each piece of furniture that is in the children's room. A children's table is no exception. After all, after him, your child will continue to learn the world around him, draw, sculpt, read and do a variety of crafts.
Materials for work
If you decide to independently manufacture this piece of furniture, then you will need the following tools and materials:
- A sheet of wood from a solid array of 60x40 centimeters;
- Bars for the frame 4 pcs.;
- Legs with a section of 4x4 centimeters 4 pcs.;
- Electric drill;
- Set of end mills;
- Clamp;
- Hammer;
- Wood hacksaw;
- Joiner's knife;
- Sandpaper;
- Furniture lacquer;
- Joiner's glue;
- Ruler;
- Furniture pins.
Important! If you have an old table, then you can use its details for making a children's table with your own hands.
Before starting work, it is very important to determine the height of the future table. The most comfortable is the height at which your child sits with a flat back, while putting his elbow on the countertop and easily touches his temple with his finger.
Important! In order to select the correct table height as correctly as possible, you can use special tables that indicate the recommended standards for the manufacture of tables and chairs for children of different ages.
Work execution algorithm
When creating a children's table with your own hands, drawings and schemes can be taken ready-made. You can find them on construction sites or forums.
We offer you a general scheme of the work:
- Taking into account the height, saw off the legs. If they taper towards the bottom, then you can file them. This must be done in such a way that the future table is strong enough and stable.
- Prepared legs are attached to the elements of the power frame using end mills. During assembly, it is necessary to mark the places for the grooves, and then combine the paired elements.
- Next - in the marked place you need to drill a non-through hole.
Important! The depth of the hole should be one third of the thickness of the workpiece, and the diameter should be the thickness of the future groove.
- Leg blanks must be clamped alternately in the clamp and the wood should be selected with the end mill as much as possible. This must be done carefully until a smooth groove of the correct size is obtained. As a result, you will get 8 grooves on 4 legs.
- Using a ruler, it is necessary to measure the dimensions of the groove and make the corresponding marking on the bars for the power frame.
- Using a carpentry knife and a hacksaw, you need to adjust the ends of the power frame, while creating “spikes” that will easily fit into the grooves of the legs.
- In the end, you should make a control assembly of all elements.
Important! During the control assembly, you have the opportunity to make changes and adjustments so that the table does not turn out unstable.
- The final assembly must be carried out in the same way as the control one, only by pre-coating the fixing points with special furniture glue.
- After everything is dry, you should fix the countertop. To do this, drill a hole for the furniture pin in the center of the legs. And on the back of the countertop are blind holes.
- Lubricate the pins with glue and connect in a single design.
- The finished table must be sanded with fine sandpaper and covered with several layers of varnish.
Lift table
After you have made a simple model of a children's table, it is suitable for use. But if you want to make a more functional option, we suggest you equip it with a lid. Thus, the child will have additional space for storing his office supplies and other small things.
To make such a table:
- Take a wooden countertop. Its dimensions should be 90x45 centimeters.
- Of the bars measuring 5x5 centimeters you need to build a frame.
- Take two pieces of length 8 and 4 centimeters. Fasten them together with nails.
- Insert another line into the middle.
- The table top must be attached to the front of the frame using hinge-type furniture hinges.
Important! You can replace furniture hinges with ordinary door hinges.
- To create a lifting and adjusting mechanism, it is necessary to fasten bars with sizes of 20 and 40 centimeters in a vertical position on the lid. They must be placed on the opposite side.
- In order for the lid to be fixed in different positions, it is necessary to nail 2-4 furniture hooks to the bars. Next - insert one bolt into the base of the frame so that they partially protrude.
- All details are treated with sandpaper and varnished.
We make a folding wooden table for children with our own hands
To create such a table model you will need the following materials:
- 4 pieces, sizes 6x2 centimeters and a length of 72 and 32 centimeters;
- Worktop of 2 parts;
- Joiner's glue;
- Electric drill;
- Furniture pins;
- Sandpaper;
- Dowels.
Important! This model does not take up much space and is suitable for small-sized apartments.
The sequence of manufacturing a folding wooden table is as follows:
- From dostochki do 2 frames. They will “play” the role of legs.
- Using a stencil, drill holes for future fastening in the end sections of the boards.
Important! It is necessary that the lower crossbar of the frames be raised above the floor by 5 centimeters.
- Parts should be connected to the frame with pins.
- Pour wood glue into the hole and connect the parts into frames. Fasten them together with loops.
- Drill a hole in the wall for the dowel.
- Fix the first part of the countertop to the wall. It is necessary to place a vertical folding frame under it.
- The second part of the countertop needs to be attached with loops to the first and laid out over the support frame.
to contents ↑Important! At any time, you can lift the second part of the countertop and fold the frames. Then the movable element of the countertop is lowered, and the table will take up less space.
We make a children's table from a furniture board with our own hands
This model is very simple and consists of countertops and legs.
Important! For the manufacture of legs you can use whetstones measuring 4x4 centimeters.
As a countertop there will be a furniture panel measuring 40x80 centimeters. This is a whole workpiece. In order to attach future table legs to the countertop:
- Mark up future support elements.
- From the end of the countertop you need to indent about 5-6 centimeters.
- From the bar you make blanks of the right size by the sawing method.
- Using carpentry glue and screws, according to the marking, connect the bars.
- Ready legs in the same way are fixed to the countertop.
Important! In order for the self-tapping screw that secures the leg to not “break through” the tree, it is necessary to install a metal corner.
- The finished product is varnished.
Making a cardboard table
If you do not like working with wood, then you can make a table out of cardboard. To do this, you will need:
- Box of furniture or household appliances;
- Cardboard tubes - they remain after the foil or cling film has run out;
- Stationery knife;
- Glue.
Operating procedure:
- Cut the box.
- Measure out 5 parts with rounded edges and a size of 55x35 centimeters.
- On 4 parts, make notes of the circles taking into account the diameter of the tubes. Cut them out.
- Fasten these elements together.
Important! In order for the glue to “grip” well, the workpiece must be pressed down with a press and left to dry completely.
- Try on the workpiece tubes. They should enter fairly tightly, so adjust the hole if necessary.
- Glue the 5th detail to the workpiece. Put again under the press.
- Spread the edges of the tubes with glue, glue to the finished countertop. Leave for a while until completely dry.
to contents ↑Important! Decorate with self-adhesive paper and various applications.
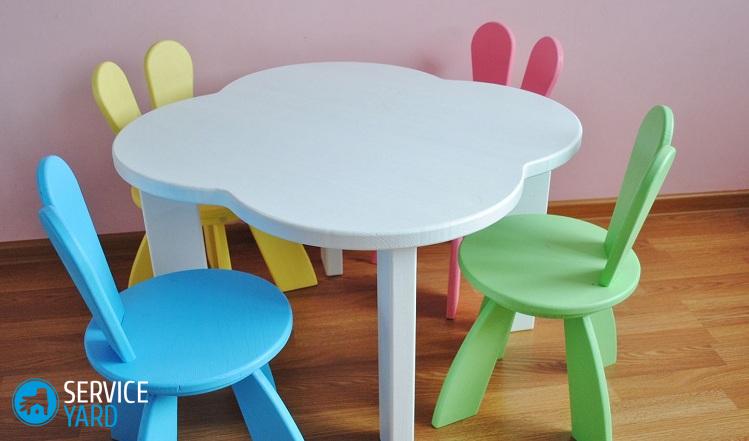
We make a highchair
It is very important to make immediately a set of a table and a chair. Such a headset will not only please your baby, but will also be functional, which is important for a loving parent. How to make a children's table - we already told you, well, for a highchair you will need the following tools and materials:
- Solid wood;
Important! It is best to use beech, birch or pine. They are quite hard, but easy to handle.
- Bars 2x2 or 5x5 centimeters;
- Boards 2.5 cm thick;
- Furniture panel - for this you can use a sheet of plywood or particleboard;
- Dowels;
- Wood hacksaw;
- Screwdriver;
- Sandpaper or grinder;
- Hammer;
- Brushes;
- Varnish or paint.
Important! Before proceeding with the manufacture of the stool, you must make sure that you have taken the measurements correctly. If not, then you need to increase or decrease them proportionally, since the stability of the future product depends entirely on the ratio of height and width.
Make a drawing
In order for the baby to be not only convenient and comfortable, but at the same time the correct posture is formed, it is necessary to make a table that will fully correspond to the physical parameters of the child. You can measure it as follows:
- Measure the distance from the bend of the knee to the heel. This parameter shows you the seat height of the future chair.
- Next - for the test, you should seat the baby on any object that is equal to the height of the chair.
- In this position, measure the distance between the floor surface and the elbow of the child. This will be the height of your table.
Important! Given the fact that children grow very quickly and for the future table to serve for several years, a few centimeters should be added to the current height parameter.
As for the drawings and diagrams, you can find them on the Internet. But it is best to build the drawings yourself, since you will make a chair taking into account the individual parameters of your baby.
Important! If you doubt the correctness of the drawing, it must be tested by making a cardboard model of the chair.
The choice of fasteners
For fastening a highchair, it is best to use dowels. The advantage is that they can also be made of wood.
Parts manufacturing
Before starting work, it is better to leave the tree for a day in a dry room for drying. Farther:
- In order to make the legs of a future product, it is necessary to cut the bars into several parts of the right size, process them with sandpaper.
- The upper and lower rungs are made in the same way from the bars as the legs.
- For the manufacture of cross-beams, it is necessary to saw the bars on a flat surface in a vice. This is necessary so that the cutting angle is 90 degrees.
- Rounding should be cut from the board.
Important! During cutting, it is necessary that the wood fibers are perpendicular to the bend angle.
- Saw the seat out of wood.
We assemble the product:
- We make holes in the details of the future high chair for dowels. They must first be made with a drill with a small diameter (up to 6 mm), and then expanded with a chisel.
- Fasten the parts to the carpentry glue.
- In order for the fastening to be as strong as possible, all elements must be mounted on the dowel, and after that - fixed on the clamp and left for a day.
Chair finish
It can be produced using varnish or water-based acrylic paint. As for the back and seat, it is possible to make a liner made of foam rubber on them with a cover sewn from colored and durable fabric.
to contents ↑Stock footage
In order to make a children's table and high chair with your own hands, you will need to spend a certain amount of time and physical effort. But as a result, you get the furniture that is made with love and is perfect for your child. Using the above tips and tricks, you will do everything right, and the finished product will delight you and your baby!
- How to choose a vacuum cleaner taking into account the characteristics of the house and coatings?
- What to look for when choosing a water delivery
- How to quickly create comfort at home - tips for housewives
- How to choose the perfect TV - useful tips
- What to look for when choosing blinds
- What should be running shoes?
- What useful things can you buy in a hardware store
- Iphone 11 pro max review
- Than iPhone is better than Android smartphones
 (No ratings yet)