

DIY garland
Decorating the holiday with bright attributes is an incredibly interesting and creative occupation. An exciting preparation for the event will guarantee a good mood. And how surprised the guests are! Your efforts will be appreciated and rewarded with the happy emotions of loved ones. Let's find out what a garland can be with your own hands, how easy it is to make it.
to contents ↑Festive garland - a bright guarantee of a cheerful mood
The holiday itself is already a wonderful event that gathers relatives and friends at its table. And if at the same time to emphasize the theme of the celebration, then it will be more fun twice. One of the options for decorating can be a garland with your own hands.
It's easy to create paper masterpieces, and such a pastime will captivate the whole family. And yet this method of decoration is minimal in cost.
If you decide to make a garland, then we advise you to pay attention to the following nuances:
- Before you begin, decide what shape your paper decoration will be.
- Depending on the type and shape of the garland, choose the right paper.
Important! Thin material is better suited for light, weightless decorations that can pleasantly sway from the wind. Thick paper is distinguished by its undoubted reliability, but at the same time it is more demanding in the process.
- The connections of the elements must be strong so that the garland does not crumble. Especially if you use thick material or cardboard, as the final product will be heavier than plain paper.
- Determine the location of the garland and how it is attached. For example, you will hang it from the ceiling or hang it on the wall.
Garland Paper Types:
- Lungs: crepe, tracing paper, foil.
- Dense: all kinds of cardboard variations - corrugated, metallized, mother-of-pearl.
The widest range of colors, effects and patterns will allow you to create the most incredible and beautiful garland for any holiday on the chosen theme.
Mounting Methods
You can connect parts to each other in several ways:
- Glue. Most often, PVA is used, as it is convenient, affordable and ideal for working with paper.
- Stapler. It simply and conveniently fastens layers of paper together with one movement.
- Paper clips. This method of connection is especially relevant if the garland with your own hands is collapsible.
- Scotch. Adhesive tape can also be used as a connecting material.
And for what reason is the holiday?
There can be any celebration, because a do-it-yourself garland can easily decorate a birthday, New Year, a christening of a baby or a wedding. Handmade decoration is especially valuable, as special forces and emotions are invested in it, and besides this, it is distinguished by exclusivity.
Consider a few reasons for celebration and options for suitable garlands.
to contents ↑Favorite birthday
This holiday is always the most beloved of all, and it is for him that surprises and pleasant decorations are characteristic. A garland for your own birthday will emphasize the significance of this event and will certainly please the birthday boy. So, what decor can you offer from a wealth of ideas?
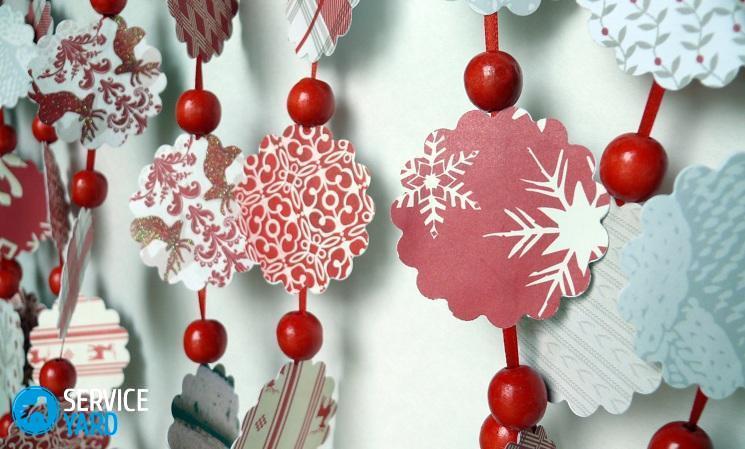
Classic garland of circles and flags
The advantage of these jewelry is their convenient and simple method of creation. At the same time, the atmosphere in the house will become incredibly festive and elegant.
DIY garland of circles requires the following materials:
- Template. A circle of suitable diameter, moreover, it can be several sizes.
- Colored cardboard. Shades can be in a harmonious color palette, but can be contrasted with each other. It all depends on your creative ideas and the theme of the party.
- Scissors, a simple pencil.
- Sewing machine and thread.
We proceed directly to the creation of a garland:
- Cut out a template from thick cardboard.
- We draw circles on colored sheets with a simple pencil.
Important! Calculate the required number of decorative circles for each color.
- Cut out all the elements.
- The final stage is the connection of all parts using a sewing stitch.
Important! Try to keep the same distance between the elements of the garland.
Traditional flags look very nice and festive too. To construct them you will need:
- Colored paper or cardboard. From them you will form flags, think about their size and shape. Flags can be rectangular, triangular, with an internal or external angle, and, in principle, of the most diverse form.
- Scissors, a simple pencil.
- Thick thread or lace.
- Glue or double-sided tape.
We create a garland with our own hands:
- Fold a rectangular sheet of paper in half and give it the desired shape with scissors.
- Then place it on the thread with a fold - you can fix the flags with a drop of glue or double-sided adhesive tape.
Important! On the flags you can place a congratulatory inscription, the name of the birthday person or bright pictures.
- It is desirable that the distance between the elements is the same, so control their location.
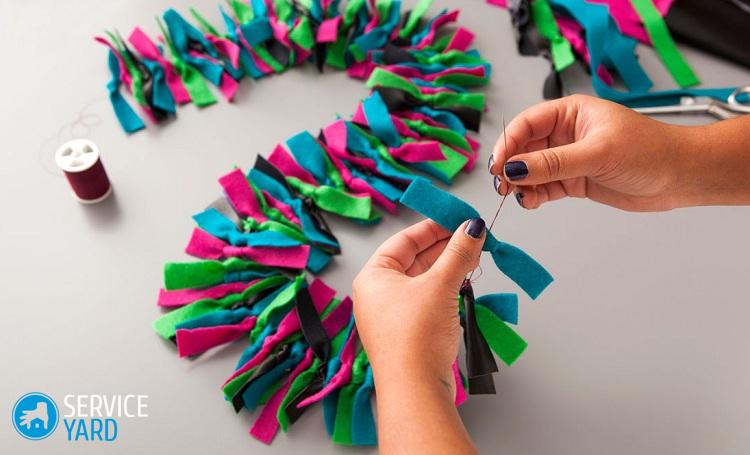
In addition to paper, you can use fabric for a garland, for example, felt is good in work. However, it will be a more expensive decoration option.
Important! And another tip, alternating parts of various sizes and shades will make the garland more interesting and colorful.
These types of garlands are very versatile and suitable for any celebration, and not just for a birthday. And the shape of the circles can be changed to any shape you like: butterflies, flowers, hearts, stars and a host of other options.
Garland of photos
A garland of self-made birthday photos will have an incredible effect on the birthday person and his guests. Such decor will be very pleasant and lovely. Memorable events and funny situations captured in the photo will create an excellent mood from good memories.
Important! In the photo you can reflect a certain chronology of events or changes in the life of the hero of the occasion. Especially if it's an anniversary. Often an idea with such a garland is used on the baby’s first birthday to show how he grew and changed.
There are many variations of garlands with photos:
- Attach the selected images to the cord or thread with bright decorative clothespins.
- Stick photos on a classic garland of flags.
We will consider a more original way of design: a do-it-yourself garland from photos in the polaroid style.
To create it, you need to prepare the following tools:
- The fabric is white. Thin felt will look spectacular.
- Sewing supplies: threads, scissors, needle and machine.
- Lace or color tape.
- Photos are 9 by 11 cm in size. These are the standard parameters for polaroid cards.
- Pencil.
Consider the main stages in the manufacture of our stylish garland:
- We start the process by selecting photos.
Important! Choose clear shots with large faces. If you decide to use a photo in which there is an extensive background, and the person is practically not visible, then the effect will be blurred, since no one will be able to discern what exactly is depicted.
- Then we cut out rectangles of size 9 by 11 cm from the fabric. But we add 0.5 cm to each side for allowances.
- Fold the shapes in half and sew along the edges with each other, with the exception of one. Thus, we get white pockets.
- We turn out our garland details and carefully smooth it.
- In the resulting pockets, cut out the window under the photo 7.5 by 8 cm and insert the pictures into them.
- Sew the last edge.
- It remains only to string the details on a cord or colored tape.
Important! And to make it even brighter, you can apply LED garland.
Decoration for children's party
Do it yourself garland for your birthday will be very welcome at a children's party. The child will be incredibly happy if you design your play area in the style of adored heroes or your favorite theme.
We decided to stay on the famous cartoon hero, the favorite of millions of children - the bright Mickey Mouse. His image is still unusually popular and is perfect for the holiday of lovely girls and courageous boys.
So, to make a paper garland with a muzzle of a cute mouse, we need the following materials: glue, multi-colored cardboard, thick thread, scissors.
Step-by-step instruction:
- Make a Mickey Mouse face pattern. You can print the finished one from the Internet, or you can draw it yourself. A small saucer is perfect for this, circle a circle on it. And ears can be made using a small mug or glass. Cut the resulting figure along the contour.
- According to this template, we make the rest of the garland.
- From cardboard of red color we cut out bows.
- Glue them to the muzzle through one.
- We make holes in all the elements through which we stretch the thread.
Done!
to contents ↑Important! Thus, you can make a garland on any subject or with another hero, whom modern children love so much. The main thing is your desire and a little effort.
Express your tender feelings with a garland
The following types of garlands will be a great addition to create an atmosphere to express your feelings.
Garland of hearts
How to make a garland for March 8 or Valentine's Day? Or maybe your wedding anniversary? There is a huge number of cute garlands, especially decorated in the form of hearts.
Variations of performance are also multifaceted. For example, you can use the technique for a classic circle garland by simply changing the shape to a heart.
Consider a few more types of such decorations. To create a pleasant and stylish decor, you need to prepare:
- Colored paper stripes. Their length should be 15 cm and a width of about 1.5-2 cm.
- Stapler.
And now we proceed to the formation of the decoration:
- We bend the strip in the middle, fix it in this place with a stapler. After that, we bend the edges of the paper in the opposite direction.
- At the junction of the ends we again put the strip bent in the middle, but now we fasten the edges of the previous strip and the middle of the new one with a stapler.
- We bend back the edges of the second strip.
- Actions are repeated until the garland reaches the desired length.
Bright and voluminous garland will be a wonderful decoration of the interior.
Another way to make a garland of hearts:
- Prepare the necessary material: scissors, glue, pencil, colored paper and thread.
- Draw a heart of the desired size on thick cardboard, cut a large number of the same elements according to its template.
- Then we take one heart as a basis and on its flat surface we glue exactly the same part, bent in the middle, and two more elements to it in the same way. It turns out volumetric and bright decor.
- Using glue, we attach the elements to the thread and hang them.
Important! You can use paper of various colors and even ornaments on it, due to which the hearts will turn out to be very colorful and bright.

Flower garland
Again, a universal way to make a garland of flowers is a traditional and simple decor using paper patterns in the form of flowers and a line on a sewing machine.
But how unexpectedly cardboard sleeves can come in handy!
DIY flower garland from paper and a brief instruction on how to create it:
- Prepare some cardboard rolls. Squeeze them in half to make a flat rectangle.
- Cut strips of equal width about 1-2 cm.Thus, we got the petals of future flowers in the form of a pointed oval.
- Glue both outer sides of each petal with glue and connect with the other, the glued areas will be the center of the flower.
Important! To create one flower, you will need five details in the form of petals.
- After all the elements have dried, pass a bright dense thread through the petals.
to contents ↑Important! You can paint the resulting flowers with acrylic paint so that they are brighter and more saturated.
Happy New Year
A wonderful family holiday, which is usually prepared in advance. Here you can not do without a festive decoration at home. How to make a garland of paper with your own hands for the New Year?
Christmas chain
This jewelry has been familiar to many since childhood. Let's remember how to make a garland of links.
To start, prepare the tools and materials:
- PVA glue.
- A simple pencil and a ruler.
- Scissors.
- Colored paper.
To make a garland, draw sheets of paper into strips of equal width of 2-3 cm. Cut them evenly, fold the prepared parts. Now go to the assembly:
- We connect one strip into a ring, we fix it with a small amount of glue along the edges.
- We pass the next strip into the resulting link, we fix it in the same way.
- Repeat the steps until we get the garland of the desired length.
Important! Alternate the colors of the details of the chain to make it rainbow and bright.
You can create an original chain of paper if you use links of an unusual shape.
Important! You can use not just rings, but figures - Santa Claus, Snow Maiden, Snowman, chocolates and other New Year paraphernalia.

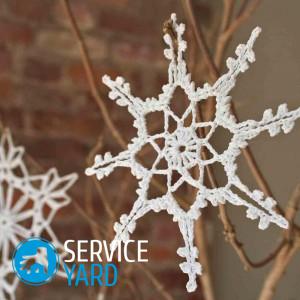
Garland of pine cones
How to make a garland that can surprise everyone? Use the bumps! They will not only decorate your home, but also fill it with a magical coniferous aroma.
If you liked this idea, then:
- First of all, take a walk through the forest with the whole family and collect the most beautiful cones.
- Then use the wire to attach loops to them, through which pass the bright ribbon.
Important! Using white acrylic paint, apply light strokes to the extreme flakes, then you will get a magical effect, as if the cones were powdery with snow.
Do-it-yourself tangerine peel garland
Mandarins are a kind of symbol of the New Year! Their citrus taste and aroma are inextricably linked with this fun holiday. How to make a garland from the peel of this fruit? Everything is extremely simple, but at the same time, it is very unusual and extravagant.
To create such an “appetizing” garland you need:
- Scissors.
- Glue.
- Plain ballpoint pen.
- Peel from tangerines.
- Cardboard.
- Lace or twine.
Sequencing:
- Pre draw various patterns on cardboard. For example, Christmas trees, snowflakes, balls, anything. Cut them out.
- Use the pen to circle the contours of the patterns on the mandarin peel and cut out all the details.
- Prepare the lace to which the elements will be attached. Place them on top of it.
- Use glue to attach the entire decor to the thread.
Important! Hot glue is good for these purposes.
In addition to the decorative effect, your home will be filled with wonderful aroma and freshness of mandarin.
to contents ↑Stock footage
It is very easy to decorate your home on a bright and joyful day, and most importantly - this decor looks very bright, elegant and original. The methods listed above can be used for almost any occasion or occasion, and not just strictly for the events indicated. You can create your own unique holiday atmosphere with the help of such garlands.
- How to choose a vacuum cleaner taking into account the characteristics of the house and coatings?
- What to look for when choosing a water delivery
- How to quickly create comfort at home - tips for housewives
- How to choose the perfect TV - useful tips
- What to look for when choosing blinds
- What should be running shoes?
- What useful things can you buy in a hardware store
- Iphone 11 pro max review
- Than iPhone is better than Android smartphones
 (No ratings yet)