

How to make decoupage?
Many people learned how to make decoupage in our country only at the end of the 20th century. This is an amazing gentle technique for decorating various objects that came to us from old Europe. In this article you will learn how to make decoupage correctly, to make the interior original and restore furniture, what materials to use and what results can be achieved.
to contents ↑What is needed for decoupage?
 For those who are first confronted with the decoupage technique, it may not be completely clear what it is. Decoupage is the decoration of various objects by sticking paper with a pattern on them. The image can be anything: to your taste and preference. The goal is to give exclusivity and surface style.
Important! The technique itself was invented by poor people who could not afford to buy beautiful and expensive things. Therefore, simple, inexpensive materials are needed for work.
What can you do decoupage on:
- On the tree.
- On the bottles to be used as decoration elements in the rooms.
- On polished and varnished surfaces.
- On the plastic.
- On the glass.
Important! The question of what decoupage can be done on is not entirely appropriate, since any object or surface that you plan to embellish is suitable for this purpose. Limitation is just the limit of your imagination.
You will need:
- The surface on which decoupage will be carried out.
- Scissors, knife.
- Brushes and acrylic paints.
- Decoupage material: napkins, postcards, fabric. Any paper with a pattern.
- Varnish for external finishing coat.
Important! Napkins are the most suitable material for this technique. A drawing or image is cut out if it is not necessary to use all the material. The main thing is that the logical line of the picture and the general style of the decoupage picture are respected. To do this, it can be finished with paints. Masters recommend using such napkins:
- Conventional wipes are three-layer. Such material can be purchased at any store. Among the goods there are really interesting and unique drawings, with the help of which wonderful paintings are created. They are cheap, easy to work with.
- Three-layer napkins for decoupage. You will get them in stores for creativity. They are made specifically for this technique. They have a variety of thematic and stylish drawings. Large size is an advantage. Minus is the price. Sold individually.
- Handkerchiefs are paper. They have four layers, but smaller than wipes. There are scarves with a beautiful pattern, but you need to look. The price is low.
to contents ↑When you just master the decoupage technique, use cheap material. When something starts to work out for you, switch to better and more expensive paper. So you can avoid too much spending, and visual video tutorials will help you learn decoupage for beginners.
How is decoupage done?
This technique is performed on different surfaces, so the approach to each is different. In some cases, you will need additional tools for processing. Below we will present you all the possible materials with which you can make decoupage, and tell you how to work with them correctly.
How to make decoupage on a bottle?
If you decide to decorate the interior in the easiest way, but reserve the opportunity to change it, how to make decoupage on a bottle is the most relevant question.
In this case, you will not need additional materials.Perform the work by following this step-by-step instruction:
- Clean the selected bottle of stickers and other interfering materials.
- Wash and dry it.
- Glue the picture to the base with glue.
- Remove any remaining adhesive with a cloth from the center to the edges.
- Acrylic paint the remaining surface.
- When the paint dries, cover the entire bottle with varnish.
- Set to dry.
How to decorate a tree with high quality?
 Making decoupage on a tree is a unique opportunity to surprise your household and guests. This technique looks great on wooden surfaces and can satisfy the aesthetic taste of any person. And since most of the furniture is made of wood, the choice of the appropriate item is up to you.
Important! If you are only in search of techniques for how to make decoupage for beginners, choose the product that definitely can not spoil the design of your room.
To make a beautiful decoupage on a tree, focus on the following instruction:
- Prepare the surface for decoration: putty, sand and primer.
- Prepare the material for the decor, cut out the picture you like.
- Lubricate with glue and press to a tree.
- Smooth out any bumps and remove any glue.
- Wait for it to dry. Varnish
Important! When working with postcards and photographs, soak the material in water. Remove the bottom layer of paper, use only the top layer with the image.
How to work with plastic?
The application instruction itself is no different from the previous ones. Pay special attention to the preparatory work:
- Degrease the plastic with alcohol.
- Slippery plastic sand with fine-grained sandpaper.
- Apply a coat of gypsum primer.
- Start applying pictures.
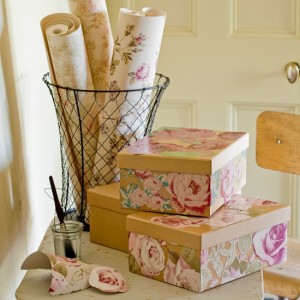
How to make decoupage furniture?
You can use this technique to visually age the furniture and give it solidity and value. You can easily cope with this task if you read the instructions on how to make paper decoupage, which are described above.
To give the effect of antiquity, proceed as follows:
- On the places where you will “age” the furniture, apply varnish. Do not touch the picture.
- Mix the varnish and liquid soap in a bowl.
- Apply the mixture over dried varnish. The thicker the layer, the more pronounced the cracks.
- When the varnish dries, paint with oil paint.
- Remove the excess.
How is decoupage performed on glass?
The decoupage technique itself is classic. The only difference is working with a glass surface. Pay attention to such material handling features:
- Degrease the surface.
- Apply a clear primer.
- Try to take only drawings from napkins. Any glass paper is too thick.
- When decoupling the glass, cover the surface with light paint or varnish.
- For direct applications, carry out additional drawings and inscriptions before applying varnish.
An important role in this process is played by glue. It must be easy to use, high-quality and suitable for the materials used. Depending on the features of your decoupage material, you will need these types of glue:
- Normal PVA. The glue is applied to the surface and smoothed with a cloth.
- Glue stick and iron. It is applied to paper and smoothed over the surface with an iron.
- Plastic file. The picture is poured with water and applied to the file smeared with glue.
- Spray gun. The napkin is poured and leans against the surface treated with glue. Processed by a hot iron.
to contents ↑Important! Choose your preferred gluing method and experiment with pictures. Then you yourself can give interesting tips on how to make decoupage with your own hands.
Helpful hints:
- The drawing should be only on one side of the paper, otherwise it will appear and ruin the whole picture.
- A damp cloth should always be at your fingertips to remove excess glue and crush the edges.
- Make sure that there are no bumps or wrinkles in the glued pictures.
- To create a three-dimensional picture, stick the picture in several layers, applying on each layer of varnish.
Stock footage
Now you know the basics of how to make decoupage on a bottle, wood, glass, furniture. Do not be afraid to show your imagination, but be very careful and careful while working. In this case, you will be able to create high-quality and unique decor and impress your guests with your finds!
- How to choose a vacuum cleaner taking into account the characteristics of the house and coatings?
- What to look for when choosing a water delivery
- How to quickly create comfort at home - tips for housewives
- How to choose the perfect TV - useful tips
- What to look for when choosing blinds
- What should be running shoes?
- What useful things can you buy in a hardware store
- Iphone 11 pro max review
- Than iPhone is better than Android smartphones
 (No ratings yet)