Wall moldings in the interior 🥝 how to glue wall, decorative
Internet pages are full of modern and stylish interiors that you want to repeat in your apartment. Many designers began to use moldings to visually divide the space, which make the interior more expressive and vibrant. Borders and trim levels (moldings, europlast) add a certain relief to the appearance of the walls, thereby forming a creative interior. So, if you want to decorate your home and give it a special unique style, then check out the information in this article to learn how to glue moldings on a wall with wallpapers and give the decor lightness and completeness. Decor of wall surfaces using borders is the most popular technique, in addition, working with the material is quite simple and inexpensive, which simplifies the repair process. In our article, you will learn how wallpaper looks framed by moldings, how to paste wallpapers, layout of moldings on the walls, bending from the wiped and how to install, separate them.
to contents ↑What is the advantage of using moldings?
Molding is a fairly broad concept, it includes stucco molding, plinths, borders, trim strips, mirror and picture frames, pilasters, columns, sockets and complex decorative elements.
Moldings are used for various purposes in interior decoration. With the help of modern molding you can:
- Hide the gaps.
- Framing doors and mirrors.
- Decorate the walls and ceiling.
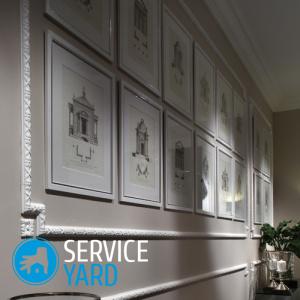
- Break wall surfaces into separate sections of various shapes for zoning the space.
- Protect walls and wall cover from damage, for example, from blows by the door handle.
- Disguise unaesthetic details and poor-quality finishes.
- Change the shape of the space. The low ceiling and other architecture flaws can be corrected by creating a visual illusion with half columns tending upwards or outlets that decrease in size when approaching the center.
- Create any architectural style indoors. For example, snow-white columns and pilasters, gilded borders with ornaments will turn the room into a Greek temple or a European palace.
to contents ↑Important! Molding is an overlay decor with which you can add volume and relief to a standard interior.
What are moldings made of?
In the modern market, decorations are made for every taste and color. Products differ in form and material of manufacture. The most common decorative elements are made from the following materials.
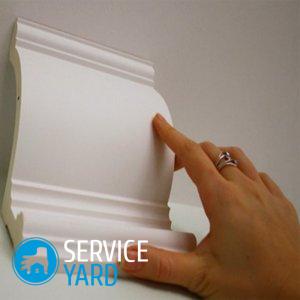
Polyurethane
Plastic products are especially popular due to the best value for money. Polyurethane molding has practically no drawbacks, but there are plenty of advantages:
- Strength and durability. Products with additional processing by special composition can last more than 30 years.
- Elasticity. Thanks to flexibility, they easily take any form.
- Moisture resistance and resistance to temperature extremes. Due to this quality, plastic products are often used to decorate bathrooms.
- Easy installation and maintenance. A smooth surface does not cause problems when washing the bar.
- Low cost.
- Wide range of colors.
Important! Surely you will not leave the walls of your room empty, but you will want to decorate them upon completion of the repair. And the remnants of moldings, which can be used in practical applications, will certainly be. Use our workshops to get your own hands doneceiling baseboard picture frame.
Polystyrene (Styrofoam)
Foam moldings are able to hide unaesthetic parts and decorate an empty wall. Polyfoam is not as durable as other materials, but has its own advantages:
- A light weight.
- Low price.
- Moisture resistance.
Important! This material is for those who want to create a beautiful interior, but do not want to spend money.
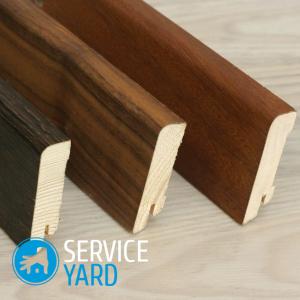
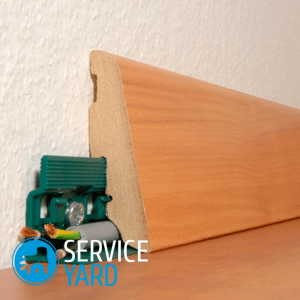
Wood
Wood molding is much more expensive than artificial “brothers”, but it easily pays off with an attractive and aesthetic appearance of wood. Wooden products are strong enough, but are afraid of moisture, so they are not used for rooms with high humidity. In addition, a lot of weight requires mounting to strengthen the slats with screws.
Important! If the wood molding is treated with an antiseptic and a water-repellent, then it will last quite a long time.
Gypsum
Plaster products are easy to install, durable, do not turn yellow over time, lend themselves perfectly to restoration and are safe to use. And the beautiful appearance and richness of relief forms makes them popular since the Renaissance.
Disadvantages: gypsum products are not flexible, are expensive, have a lot of weight and are hygroscopic.
Important! If you are just thinking about the final design of the room, take note of the helpful information from these articles:
Metal
Basically, metal products are used to decorate the corner of a step or threshold. A metal molding is installed with an additional fastener connecting the corners with the cladding.
to contents ↑Important! Self-adhesive moldings made of various materials appeared in stores. Especially popular is the rubber band border tape, which is used to junction the bathtub with the walls. Groove molding is no less popular, which serves as an element of decor, and installing it does not require much effort.
What else are moldings?
The shape of moldings is divided into the following types:
- Cornices The products are designed to mask a window frame or cornice. The models are simple and have a simple shape.
- Skirting board. Products have a round or semicircular section and are suitable for masking the joints between the wall and ceiling.
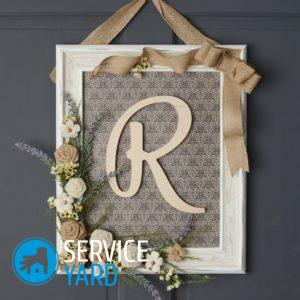
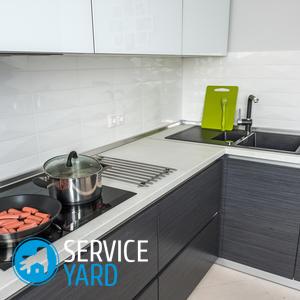
- Baguettes. Decorative, textured planks, designed for decorating panels, paintings, mirrors, shelves and other elements. You can also use baseboard in the kitchen for countertops.
- Compositions. These are ready-made decorative solutions in the form of arches, sockets.
Features of mounting moldings
Moldings are glued to any surface, in particular:
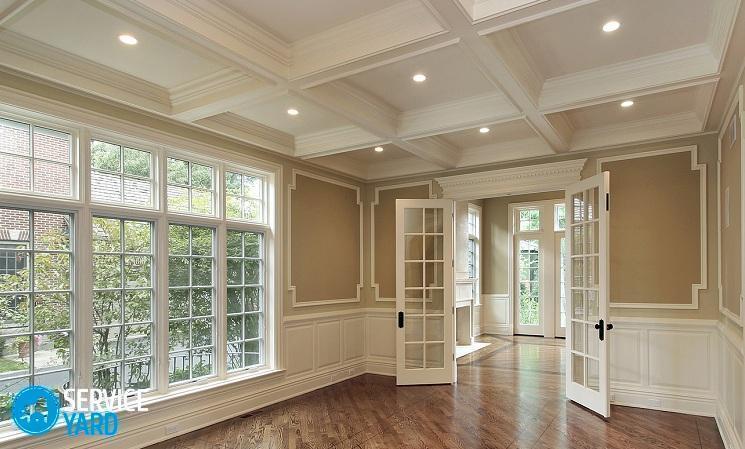
- On door and window openings. This decor option will create a complete composition and comfort in the room.
- To the surface of the wall. In this case, the decorative strip can perform several functions: zoning the space, decorating the interior, protecting corners from deformation and rubbing.
- On the ceiling surface. This method will visually raise the height of the room and make it more spacious.
With the right choice of material and adhesive for installation, you can achieve excellent results and molding will become not only a finishing material, but a great addition to the interior.
to contents ↑How to glue molding?
The choice of glue depends on the weight of the strap and the material of manufacture. Here are just a few recommendations:
- For the installation of lightweight polyurethane and foam elements, PVA glue or wallpaper glue is suitable. You can also purchase special glue for products made of polyurethane.
- Fix gypsum products on gypsum mortar or polyurethane adhesive.
- Fasten wooden products with self-tapping screws.
Adhesive Tips
In order to glue moldings on the wall, in construction stores a wide selection of adhesive compositions is presented. Pay attention to the following glue options:
- Loctite PL 355. Professional German-made mounting glue suitable for interior decoration, gluing skirting boards, decorative elements, as well as materials from MDF, PVC, chipboard, foam, cork, drywall. The glue is resistant to moisture, does not contain solvents, does not have an unpleasant odor, can withstand temperatures up to - 20 degrees.
- Decomaster 250. The composition is designed specifically for interior molding and is a milky white liquid. Glue has a lot of advantages: it is resistant to moisture, durable, can withstand cold up to -25 degrees, sets in 10 minutes, and dries in 24 hours. The composition withstands 5 cycles of freezing and thawing.
- Stayer Professional. German-made mounting glue for construction and repair is reliable in fixation, resistant to moisture, temperature extremes and frost. Suitable for fixing panels, borders, moldings, glass, PVC to any type of base.
- Kraft Nails Premium KN-604. Special mounting adhesive for mounting light parts: panels, moldings, ceramics. The adhesive composition is solvent-free, safe, non-toxic, dries quickly and withstands temperature extremes from - 18 to + 50 degrees.
- Bison EXPERT. Domestic adhesive is intended for the installation of building materials and decoration. Used for gluing decorative corners, stucco moldings and moldings. The adhesive is suitable for both absorbent and non-absorbent substrates, as well as uneven surfaces. The composition of the adhesive does not contain solvents, frost-resistant, elastic.
How to glue molding on the wall?
Installation of decoration is carried out very carefully, without leaving marks on the surface.
Training
So that the work does not disappoint, adhere to the following rules:
- Before installation, let the molding “get used” to the room. Leave the product for a day so that the material adapts to room temperature.
- Walls must be carefully leveled and cleaned. Carry out pasting of the surface cleaned from wallpaper only after putty, primer and grout.
- Markings on the wall must be done. For this purpose, you can use the cornice itself.
- To prevent the slats from sliding before the glue dries, drill holes for self-tapping screws in them, and mark the places for the dowels on the wall. After the glue has dried, the self-tapping screws can be removed, and the places of their fastening can be puttied.
- Apply mounting adhesive to the back of the molding.
Important! Paint on a decorative element one day after installation. Use only non-acetone formulations for painting.
Mounting Methods
You can mount the molding directly on a bare wall or on a wallpaper. Each option has its advantages:
- Decorative strips glued to a bare peeled wall have a longer service life, since they do not need to be changed when changing wallpapers. However, it is much more difficult for them to adjust the joints of the wallpaper and not the fact that with the next decoration of the apartment you will not damage the glued molding and you can easily choose the wallpaper of the necessary color.
- Gluing moldings on the wallpaper is much easier. The operation will take less time, and the result will be more accurate. However, when replacing the wallpaper, reuse of the scenery is not possible.
Important! Which option to choose - decide for yourself, but remember that it is better to choose lightweight moldings made of polystyrene or polyurethane on the glued walls, and the surface of the base should be smooth and without cavities.
Next, we will talk about the technology of the process and how to correctly make moldings on the wallpaper.
Necessary tools
To glue decorative elements you will need:
- Hacksaw with small teeth.
- Miter box for cutting butt angles (35, 45, 60, 90 degrees).
- Glue gun.
- Adhesive composition.
- Putty knife.
- Sandpaper.
Step-by-step instruction:
- Start by marking the wall. It is most convenient to make markings using the decorative trims themselves.
- With a miter box, cut the workpieces of parts with a margin of 2 mm. Carefully cut the allowance during gluing, but cracks may form if there is no allowance. Separately, learn about some of the nuances of working with PVC models - read the link,how to cut a plastic baseboard.
- Glue the corner elements first. If you are sticking elements to a bare wall, first wet it with water or a primer. Apply glue evenly on the supporting surface, distribute the composition with a spatula. Apply glue to the back of the plank, press it against the wall. Wait for the glue to set. Fix the molding to the surface with screws.
- Glue straight to the corner elements. Align joints, clean from dust. Apply a layer of putty to the joints. When gluing, press the parts firmly against each other.
- After drying, cut off excess bonding adhesive with a knife. Grind the joints.
- The gaps remaining after installation between the wall and the stucco element, fill with mounting glue. Remove excess glue with a damp cloth.
- If any bumps remain on the surface of the parts, sand them with sandpaper.
- After a day, proceed to painting the molding.
Advice:
- Fix wooden elements on self-tapping screws with glue. Drill holes for self-tapping screws in advance, after gluing the straps, wrap them until the head is deepened. Coat the resulting recess with putty.
- Use a stapler to prevent the stacked elements from spilling out. After the glue has dried, remove the staples, the tightening elements, and cover the traces of them with putty.
Important! Installation of gypsum moldings requires special care and a certain skill, since the gypsum mortar hardens very quickly and it will not be possible to fix the already mounted part. Put gypsum mortar on the plank, press it against the wall exactly according to the marking. Hold the element until the solution is completely “set”.
Painting
The last step is painting. First of all, carefully check the appearance of the glued elements, if necessary - remove all exposed adhesive residues with a knife, treat with sandpaper, cover with putty. After the preparatory work, paint the moldings in the desired color. The choice of paint depends on the material of the molding and the interior of the room.
Here are just a few recommendations for painting decorative elements:
- Joints should be painted over before gluing to the wall.
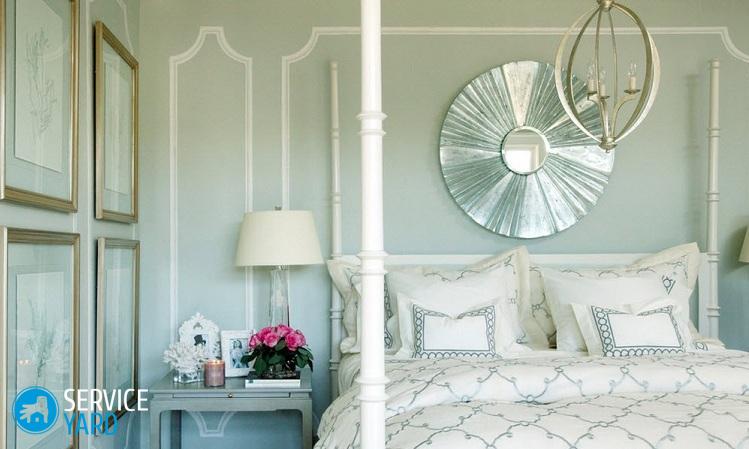
- To decorate a room with walls in dark colors, use a white molding to make the interior more airy, cozy.
- Colored moldings for decorating walls have gained particular popularity recently. Color the decorative elements a tone or two above or below the color of the wall.
Important! You can use the main tone of the walls for painting, then the molding will create an additional decorating effect.
- Pastel color moldings are great for the living room. They help form an emphasis on paintings, family photographs. You can use decorative elements in pastel colors for zoning the space.
Stock footage
A high-quality installation of the molding will make your room attractive and original, and beautifully and precisely mounted sets of decoration will transform the walls and ceilings beyond recognition. Create, fantasize and use our tips and tricks to implement your ideas!
 (No ratings yet)