

How to drag a chair with your own hands step by step?

No matter how high-quality upholstered furniture is, sooner or later there comes a moment when you need to think what to do next: buy a new one or restore an old one. It is not always possible to painlessly allocate from the budget the amount for the purchase of new furniture, but restoration will cost you not so much. And if you are a creative person, then you will get, in addition to updated furniture, the pleasure of the work done. Who knows, maybe your hobby will also bring you income. Let's look at how to drag a chair with your own hands step by step.
to contents ↑We select material
First of all, you have to choose what kind of fabric we will upholster our chair. Upholstery material should have the following properties:
- to be strong and dense;
- keep fit;
- easy to clean and easy to clean.
Important! Well, if he also possessed water-repellent properties.
The most common upholstery materials are leather, nubuck, chenille, jacquard, etc.
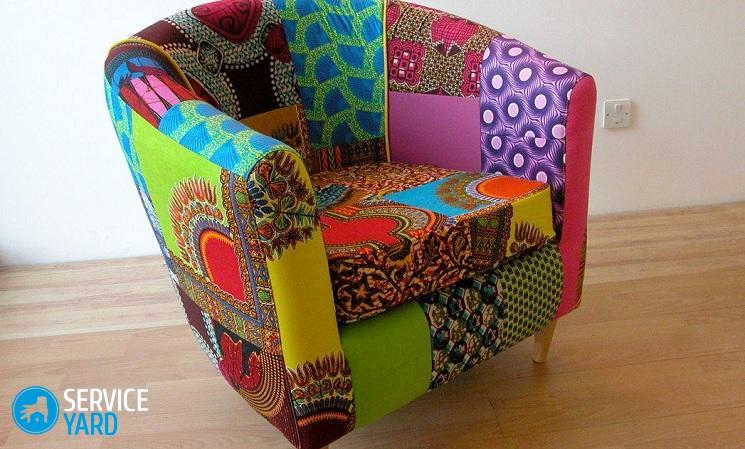
When the fabric is selected, go to the choice of pattern, color and texture. For a chair with armrests, you can use several different materials at once.
Important! The presence on the fabric of the pattern increases its consumption.
Together with the fabric, it is necessary to purchase durable threads for working with furniture of the corresponding color.
to contents ↑Step 1. Dismantle the chair
The first thing you have to do is disassemble the chair into its component parts. You will need the following tools:
- hammer;
- screwdriver;
- roulette;
- furniture stapler;
- pliers.
Dismantling the bottom
Disassembly of the chair usually starts from the bottom. To do this, you must:
- Turn the chair over and remove the legs.
- Loosen screws or remove brackets.
- If the chair has armrests, they must be removed - this can be done with a screwdriver and a hammer.
Important! It is better to work with gloves, since nails or staples can be rusty.
Disassembly of the bottom
To remove the fabric, you need to disassemble the bottom completely. The staples must be gently bent, the fabric removed and the plywood bottom removed.
Important! Remove the fabric carefully, it is useful for making patterns for new parts.
Upholstery is attached to the wooden frame with furniture staples, which are very difficult to remove. You can use a knife.
Important! If the brackets are not damaged, they can be reused to reduce the cost of upholstery.
When all fasteners have been removed, all upholstery fabric can be removed.
Filler
If the filler is worn out, you can add a new layer. Usually batting or foam rubber is used as filler. If it is completely spoiled, then you will have to replace it completely.
Important! If you do not think about the mounting system, then over time the edges of the filler break off. To avoid this, use clamps. This will extend the life of the chair.
Removing old parts
All unnecessary fasteners are removed. Metal fasteners, which will be useful to us in the future, need to be treated with an anti-corrosion compound. In the same way, the entire upholstery and filler are removed from the rest of the chair. In the end, we still have a wooden frame.
It must be processed before hauling:
- remove the old coat of paint or varnish;
- glue loose parts;
- paint with a new layer of varnish or paint all wooden structures.
to contents ↑Important! The armrests, legs and other wooden parts must also be treated with stain and varnished.
Step 2Cut fabric
Now you can start making new upholstery. For this:
- We lay out the old fragments on the new fabric. If there is a picture, you need to consider how the details will fit together.
- After all the parts are cut, you need to process the cut points so that they do not crumble. Either hem them using the hemming method, or singe them on fire.
Important! Cutting should be done with a margin. Before you sew them together, you need to do a fitting.
When all the parts are ready, you can begin assembling the chair.
to contents ↑Step 3. Hauling and assembling the chair
Consider the process of hauling a chair with your own hands step by step. You need to drag the chair in stages in an unassembled form, for example, first drag the seat, then the back, then the small parts.
So let's get started:
- Put the frame of the part and place foam rubber on it. If the foam rubber is thick and dense, then the corners can be cut, making the transitions rounded.
Important! To protect the foam from displacement and simplify installation, you can put a layer of synthetic winterizer on top and fix it with a stapler.
- Go to the upholstery. We straighten the fabric part and put it on the base. We fasten the fabric with staples, trying to proportionally stretch the fabric.
Important! The material should not sag or tighten strongly - constantly monitor this process if you want the stretch to be of high quality.
- In the same way we pull all the details.
- The back can be covered with lining fabric, securing it with brackets.
- When all the parts are tightened, you can start assembling.
- Remember how to dismantle the chair, and repeat all the steps in reverse order.
- All screws and fasteners must be tightened.
Stock footage
Of course, each piece of furniture has its own nuances, and you yourself have to figure out how to drag your own chair with or without armrests. By the same principle, you can do not only upholstery of a chair with your own hands, but also a sofa, chair or any other upholstered furniture.
- How to choose a vacuum cleaner taking into account the characteristics of the house and coatings?
- What to look for when choosing a water delivery
- How to quickly create comfort at home - tips for housewives
- How to choose the perfect TV - useful tips
- What to look for when choosing blinds
- What should be running shoes?
- What useful things can you buy in a hardware store
- Iphone 11 pro max review
- Than iPhone is better than Android smartphones
 (No ratings yet)